
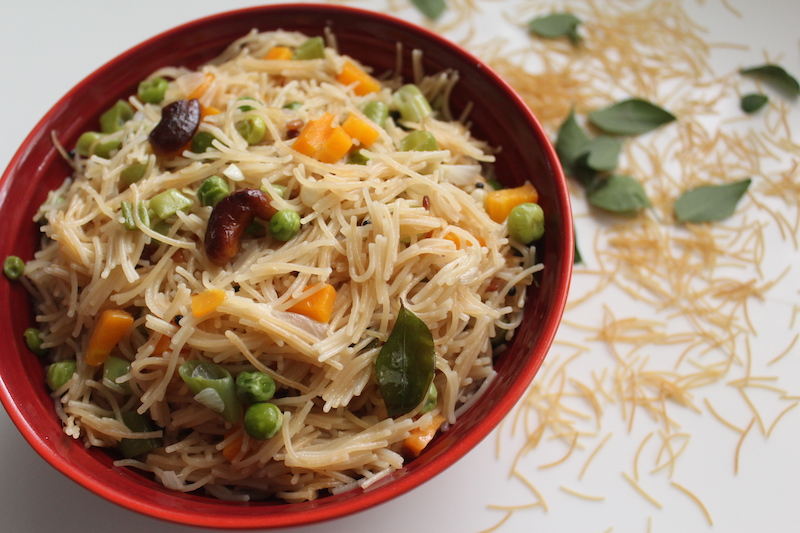
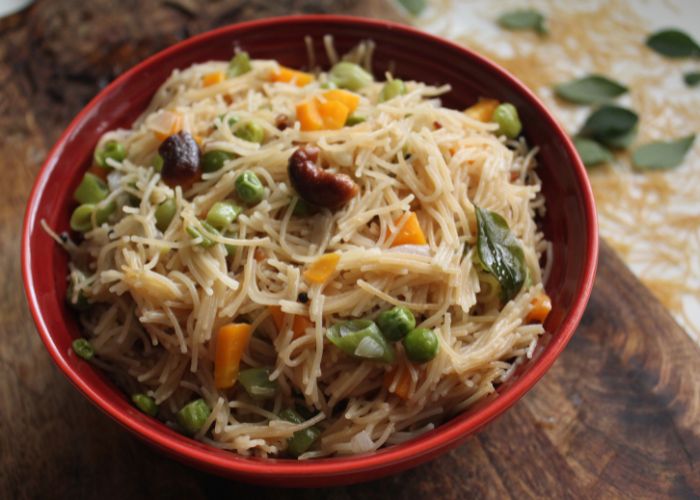
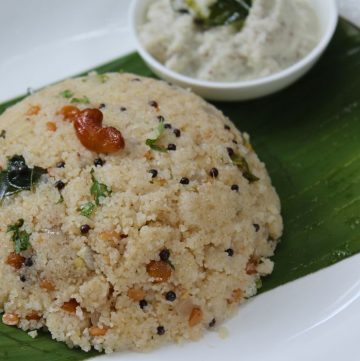
Semiya Upma is a popular south Indian Breakfast Recipe made with vermicelli, vegetables, lentils, cashews and spices. Also known as vermicelli upma, healthy, vegan and savoury breakfast dish that can be made in 25 minutes. Serve semiya upma with coconut chutney, tomato chutney, sugar or yogurt. Learn how to make authentic, non-sticky semiya upma made two ways with or without vegetables with proper step-wise pictures & video.
Semiya Upma
Semiya / Sevia / Vermicelli Upma is our staple. I make it atleast once in a week for breakfast. This is our go to recipe, which uses few spices and ingredients. This is one particular light-breakfast dish which can be enjoyed without any side dish.
Amma makes it simple, she just tempers basic spices like mustard, urad dal, curry leaves in oil and saute onion, chilli and ginger. Add in semiya and water and Cook.
About Semiya Upma
Delicious vermicelli, aromatics, spices, cashews, and herbs are used to make the semiya upma. Vermicelli upma is another name for this dish, which has distinctive flavours and textures. It is very similar to the well-known upma - breakfast dish from South India.
Wheat, which is produced by grinding very hard wheat, is used to make vermicelli. It only contains wheat, water, and a dash of salt.
This South Indian breakfast vermicelli upma can be enjoyed with Tomato Chutney, Idli podi, Curd, & Mango pickle.
Watch Semiya Upma Video

Similar Recipes,
Ingredients for Making Semiya Upma
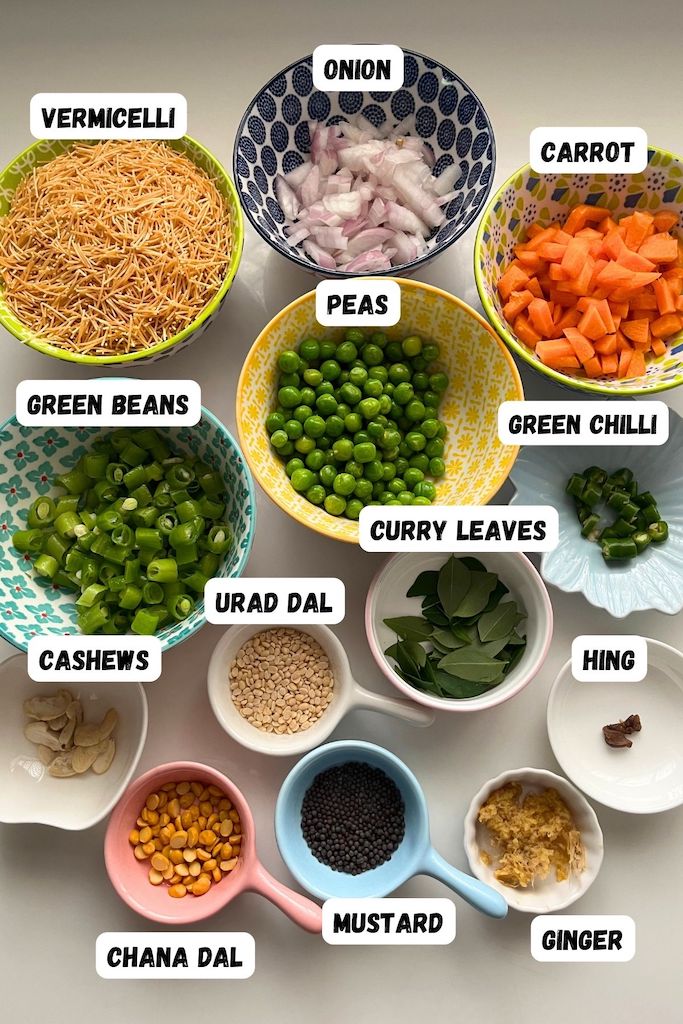
Vermicelli | Semiya
Semiya or vermicelli is a good source of carbohydrates and energy that has a relatively low cholesterol content. I use roasted semiya for fluffy non-sticky end product even when it is completely cold which makes a perfect lunch box dish.
Whole Spices
Spices like mustard seeds, chana dal, urad dal, cashews or peanuts made base for this upma. Another important spice to add aroma to the upma is asafoetida (hing) gives earthy pungent flavour which is unique to every upma dish.
Onions
Onions are considered a basic ingredient or the foundation of Indian cooking and are used to make any gravy, curry, or bhuna dish. The flavour and aroma of onion transforms any ordinary dish into a mouthwatering and delectable one. Specially it gives unique aroma which cannot be substituted.
Vegetables
Even though vegetables are optional, add it into the upma for health benefits and taste. Mixed veggies like carrots, green beans, green peas adds colour and more nutrition to your dish.
Which Semiya | Vermicelli to Use for Upma?
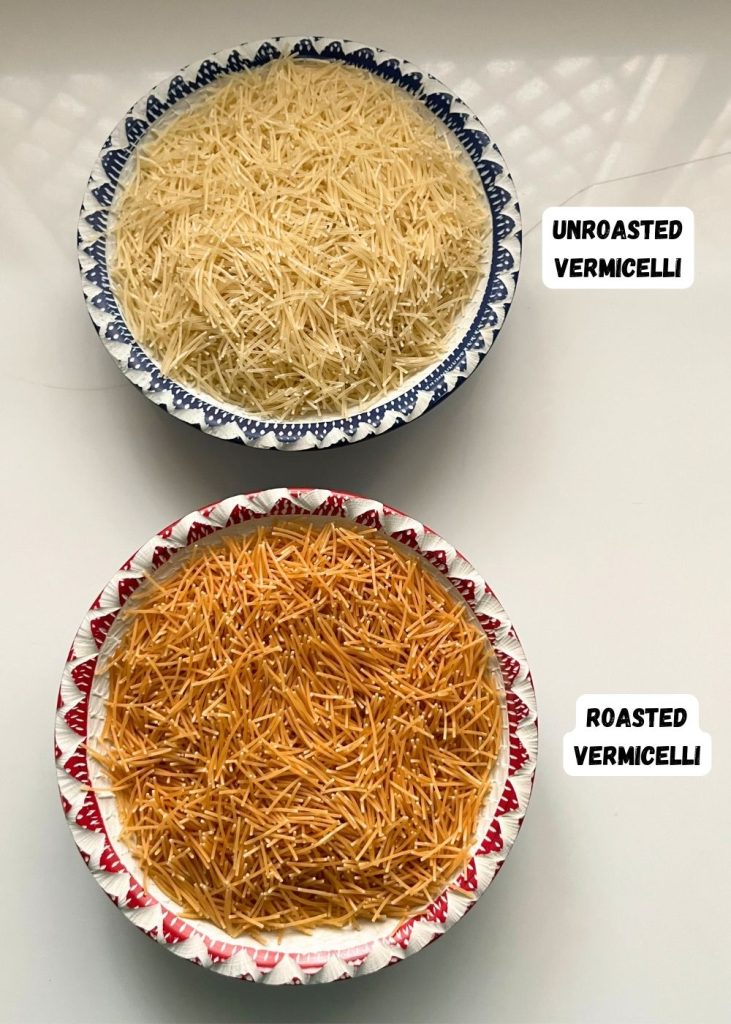
One of the main ingredient used in making upma is vermicelli.Semiya upma is made with two variety of semiya which are available in the market. There are many variety of vermicelli pasta available in the Indian market. Ragi vermicelli, rice vermicelli, millet vermicelli and many more which is used in making semiya upma.
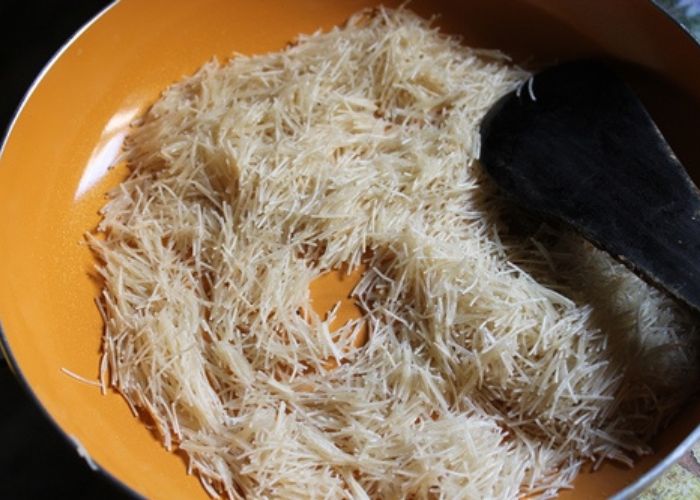
Roasted vermicelli - These are fine vermicelli which is already roasted and comes in golden colour. I prefer this variety because it makes my job easier. Since the semiya is roasted, you don't have to roast it again for making upma. You can directly add it to hot water and cook. Roasted vermicelli gives fluffier upma than unroasted
Unroasted vermicelli - if you are using this variety, you have to take your time roast it before hand in a separate pan for 2 to 3 minutes in ghee or oil before making upma. You can make upma without roasting the semiya as well, in that case the upma tends to be soggy.
Expert Tips for Perfect Semiya Upma
Semiya | vermicelli can be quite tricky to cook, because it is quite starchy and can be over cooked within seconds and gets mushy or sticky. The key to get perfect semiya upma depends on few factors. lets see what are those.
Roasted Semiya
I strongly recommend you to buy roasted semiya which is readily available in markets. It looks deep golden in colour just like the image shown above. Using roasted vermicelli makes your upma less sticky and fluffy.
Water Ratio for Semiya Upma
- For Store bought roasted vermicelli, you can add upto 21/2 cup water for every 1 cup of semiya.
- If your vermicelli is much fine and thinner, add 2 cups of water for every 1 cup of semiya.
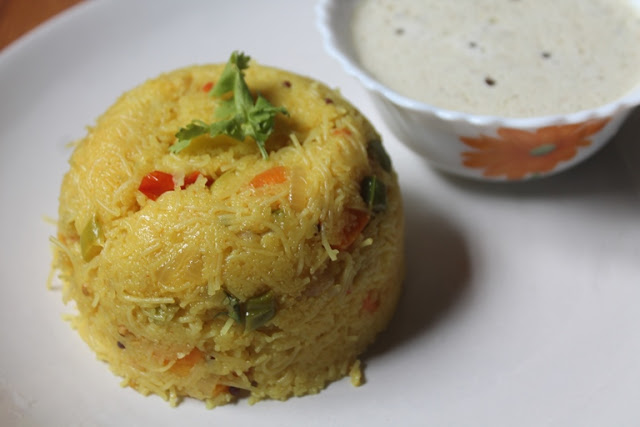
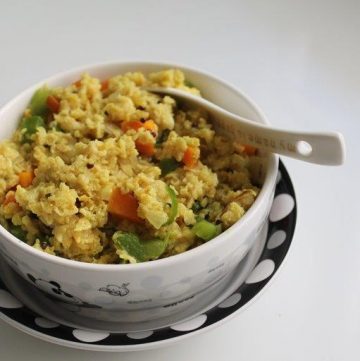
How to Make Vermicelli Upma with Vegetables
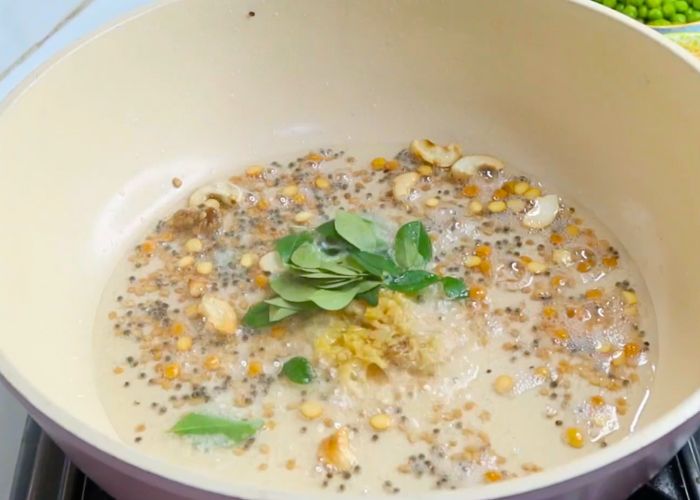
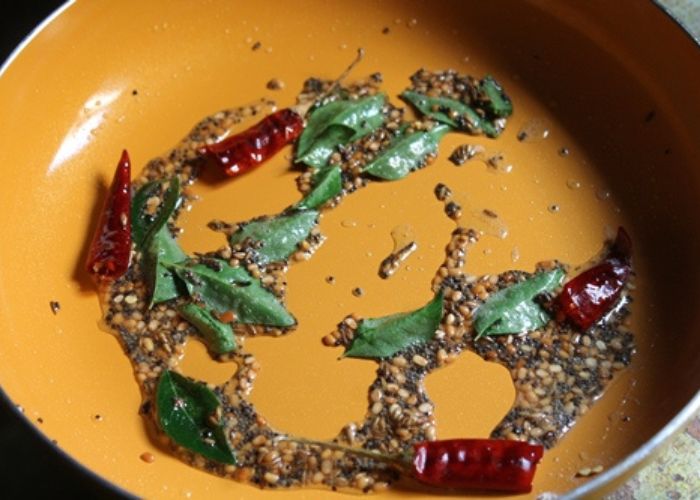
1)Heat oil or ghee in a pan. Add in mustard seeds, chana dal, urad dal, cashews and asafoetida. Let them sizzle.
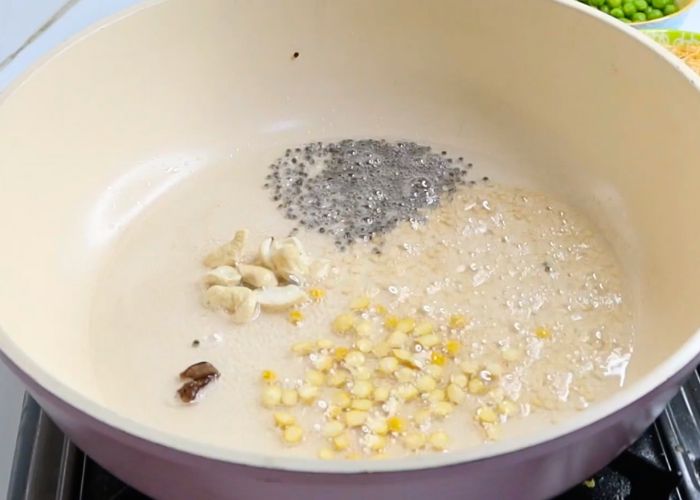
2)Add in curry leaves and grated ginger.
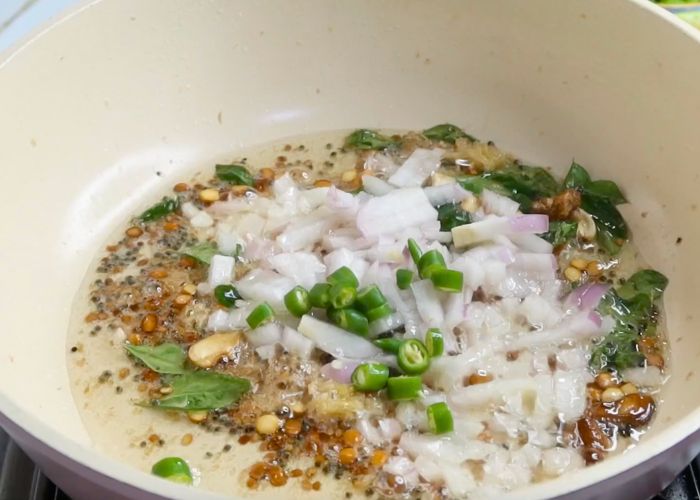
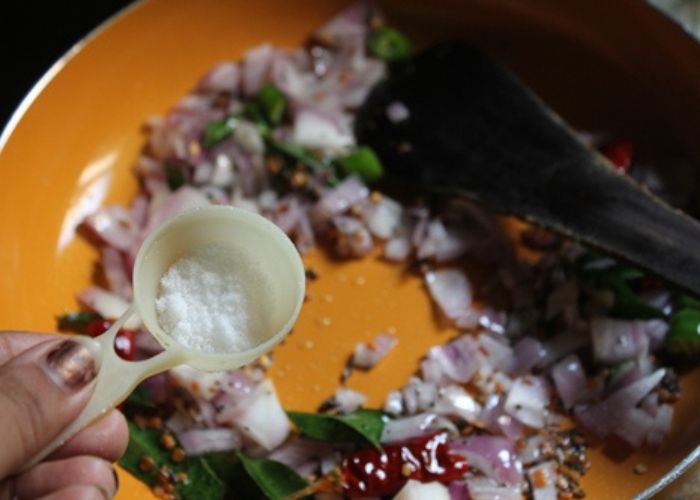
3)Add in onions, green chillies. Saute for 30 seconds.
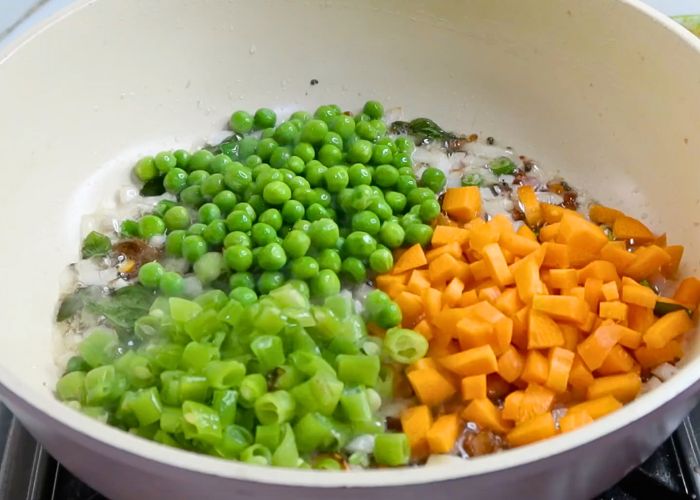
4)Add in vegetables. I used chopped carrots, green beans and green peas.
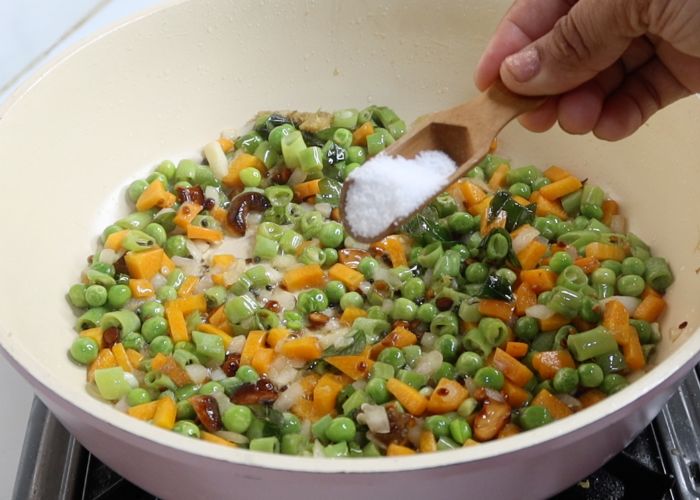
5)Season with salt. Saute for 1 mins.
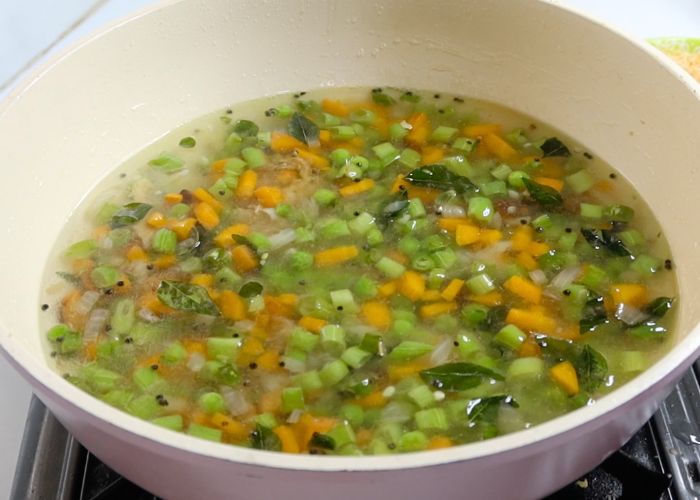
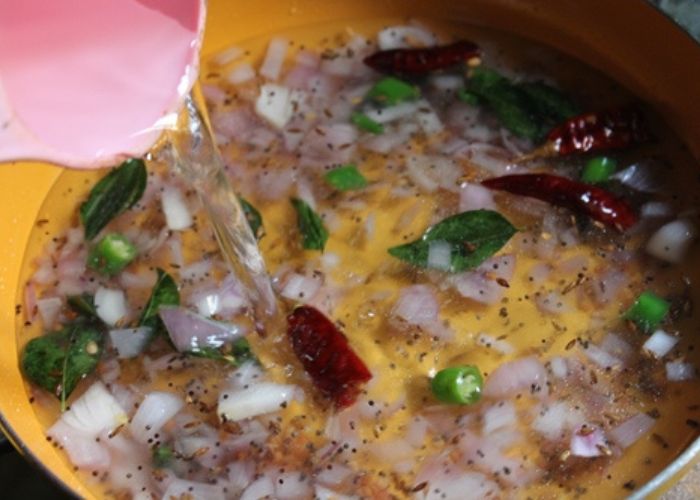
6)Add in water and bring it to a boil.
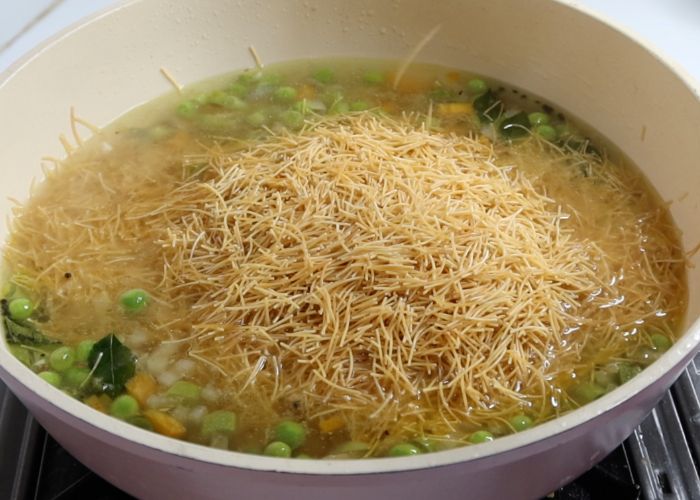
7)In goes roasted vermicelli and mix well.
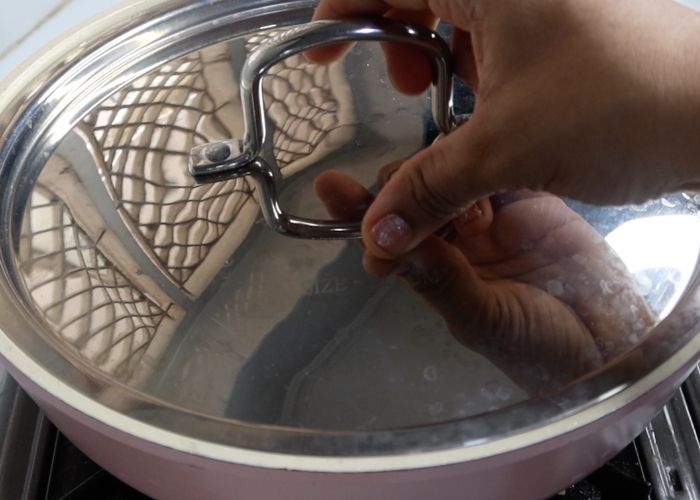
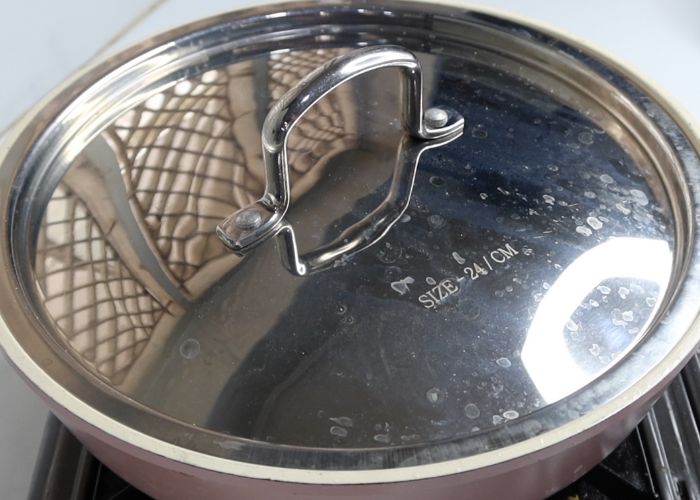
8)Cover and cook on a lowest heat for 10 minutes.
9)Remove the lid half way through and mix it gently.
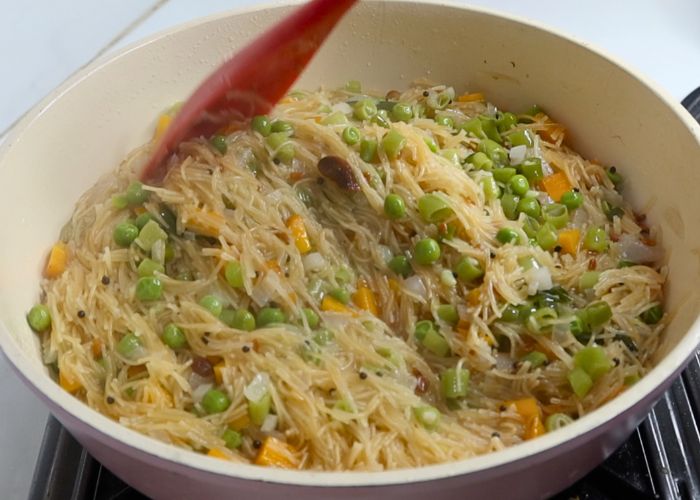
10)Cover it and cook on low heat.
11)Vermicelli Upma done.
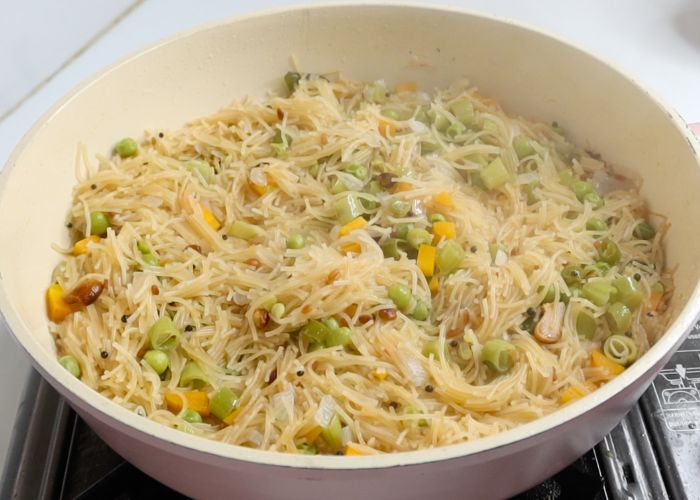
12)Mix the upma gently.
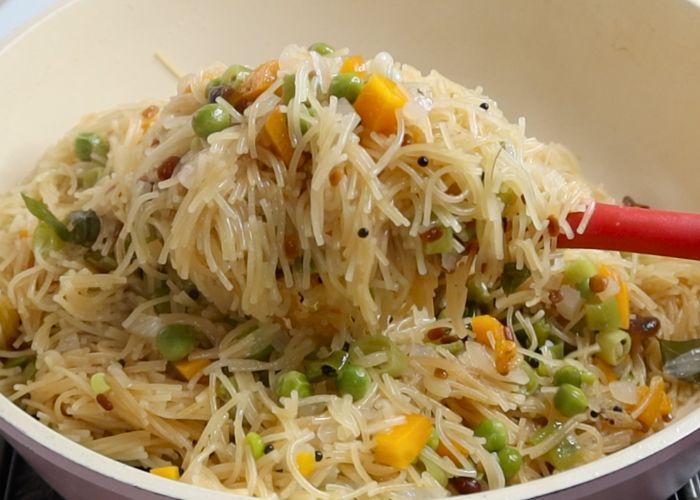
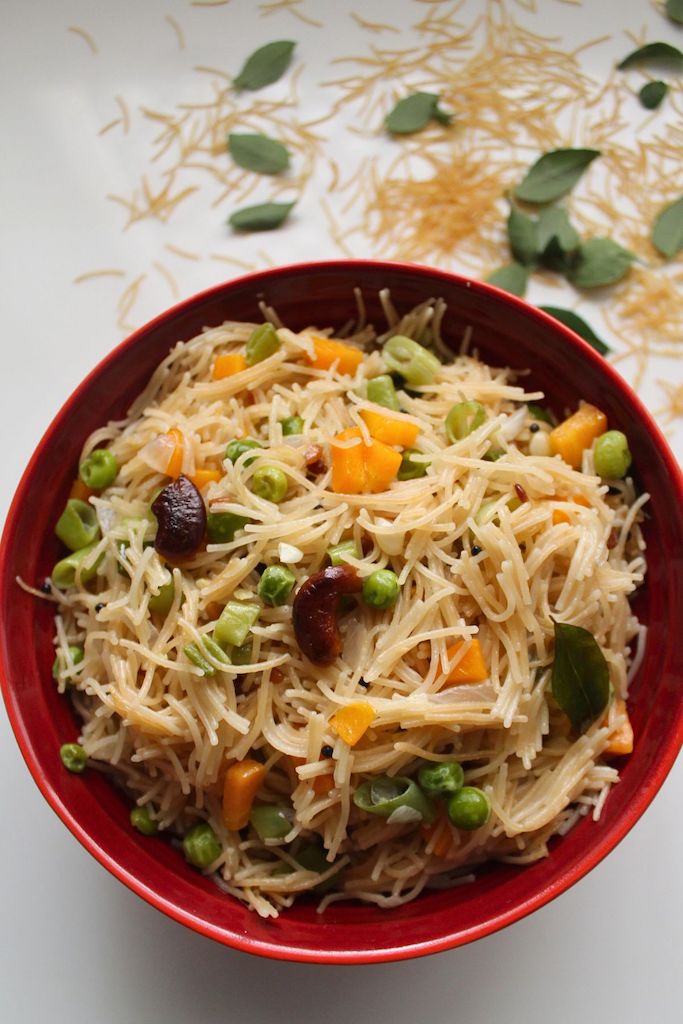
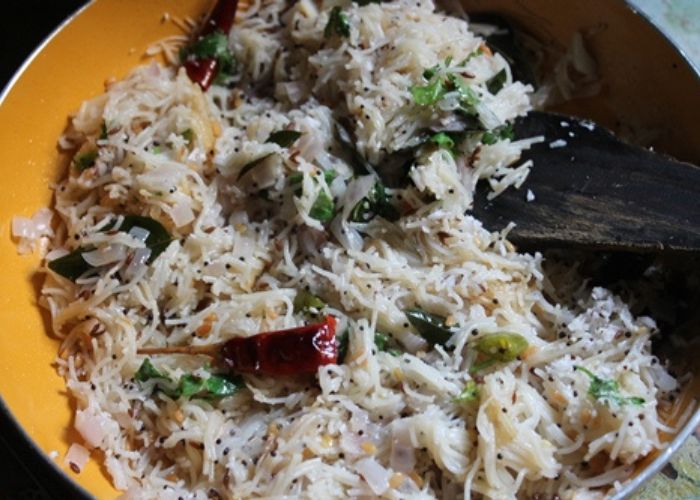
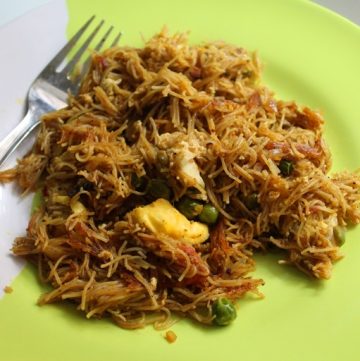
13)Semiya upma with vegetables is ready to serve.
How to Make Semiya Upma (Stepwise Pictures)
Roasting vermicelli
1)Heat 2 tablespoon oil in a pan. Add 1 cup vermicelli and roast for 3 to 5 mins until golden brown. Remove it to a bowl and set aside.
Tempering spices
2)In the same pan, pour 1 tablespoon of oil and add -
- 1 tsp Mustard Seeds
- ½ tsp Cumin Seeds
- 1 tsp Urad dal
- 1 sprig Curry leaves
- 2 Dry Red Chillies broken
- ¼ tsp Asafoetida
3)Add in one finely chopped onions, 2 finely chopped green chillies and saute for 1 minute.

4)Season with salt and saute for few more seconds.
Semiya Upma Water Ratio
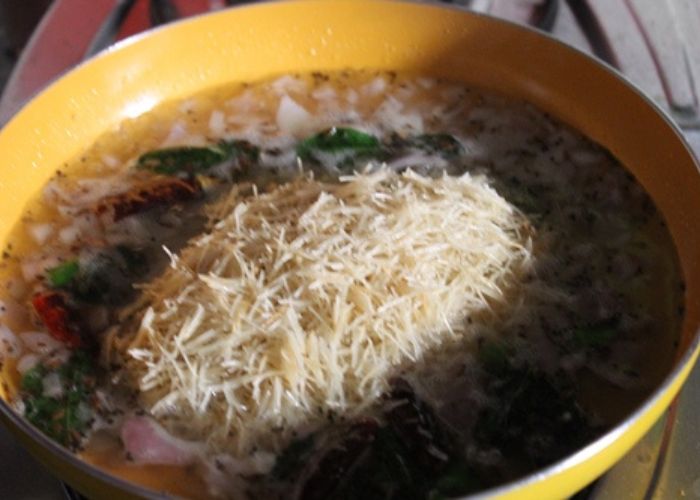
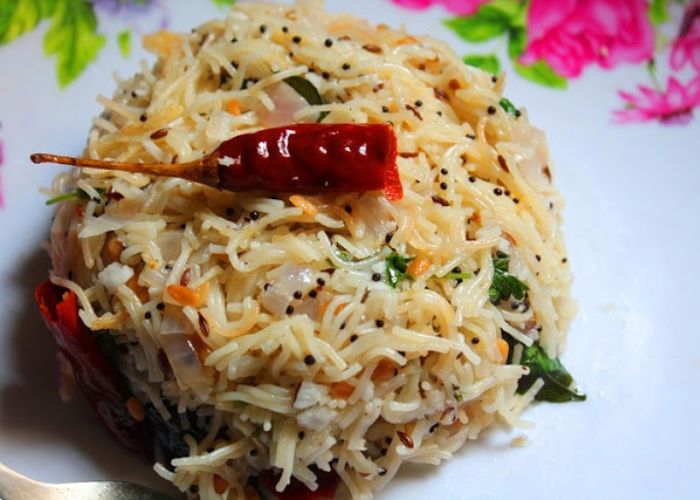
5)For 1 cup of roasted semiya, pour in 2 cups of water. Bring water to a full boil.
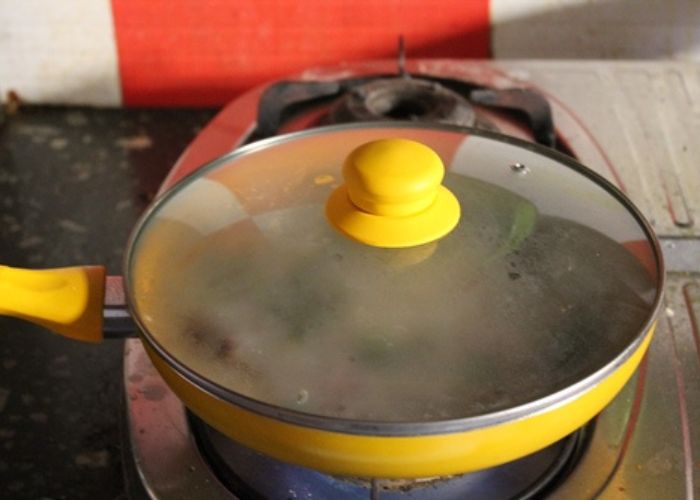
6)Add in 1 cup of roasted semiya and mix well. Cover and cook on low heat for 5 to 10 mins until semiya is done.
7)Once you add in the semiya, cover the lid and cook on a very low heat.
8)One the semiya absorbs all the water, finish the upma by adding ½ cup freshly grated coconut (optional) and 3 tbsp chopped coriander leaves. This add so much flavour to the dish. You can add in 1 tsp of ghee and squeeze in some lemon juice.
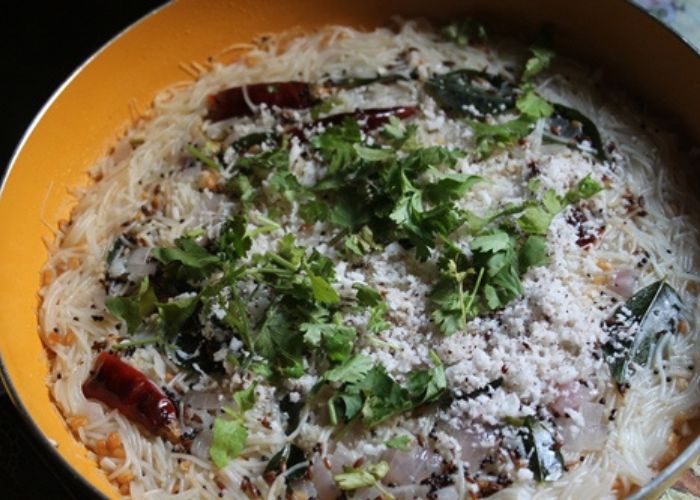
9)Mix the coconut and coriander leaves into the upma while it is still hot and take it off the heat.
10)Simple basic semiya upma done.
Variations
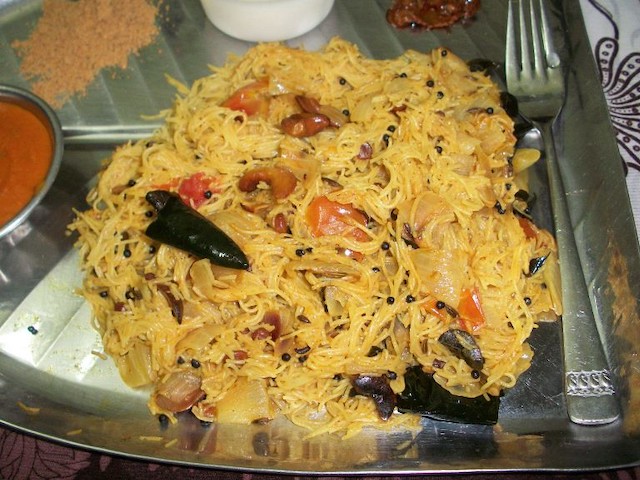
Vermicelli Tomato Upma
I made the semiya upma as mentioned in the recipe card. Add 1 chopped tomatoes to onions for tangy tomato taste.
Vermicelli Rava Upma
Add in ½ cup of rava and ½ cup of semiya instead of 1 cup of semiya.
Frequently Asked Questions (FAQ)
What is Vermicelli?
Vermicelli is a typical noodle similar to spaghetti in shape. Vermicelli is a refined wheat product that offers energy, a little amount of protein, and is easily digestible.
What is Semiya made up of?
It only contains wheat, water, and a dash of salt. Popular instant food item is vermicelli. It is a wheat-based extruded product and belongs in that category. Sometimes ingredients like groundnut, soy, or tapioca flour is used.
Is Semiya Upma good for health?
Semiya upma is a healthy dish and has relatively low calorie compared to other breakfast dish. It keeps you full longer and feels light on tummy. Also you can pack it with vegetables and makes it much healthy. If you are looking for healthy alternatives, try my ragi vermicelli upma recipe.
📖 Recipe Card

Semiya Upma Recipe (Vermicelli Upma)
Equipment
- Any Cookware with lid
Ingredients
- 1 cup Semiya | Vermicelli (Roasted)
- 1 large Onion chopped finely
- 2 Green Chillies chopped finely
- 1 Carrot chopped finely
- 5 Green beans chopped finely
- ¼ cup Green peas (frozen)
- Salt to taste
- 2 cups Water
Tempering Ingredients for Semiya Upma
- 2 tbsp Oil or Ghee
- 1 tbsp Chana Dal
- 10 Cashews
- 1 tsp Urad dal
- 1 tsp Mustard Seeds
- ¼ tsp Asafoetida | Hing
- 1 sprig Curry leaves
- 1 tsp Ginger grated
Instructions
- I used roasted vermicelli in this dish. So I skipped the roasting step. if you are using unroasted you have to roast it in some oil till it turns golden brown.
- Heat 2 tbsp oil or ghee in a pan. Add in tempering ingredients one by one and cook them on a low heat till it turns light golden.
- Add in onions, green chilli and saute them for a min. Add in vegetables and saute for 2 mins till the raw smell leaves from it. Add in salt to taste and mix well.
- Pour in water and bring it to boil. Once it starts to boil, Add in roasted semiya and mix well. Simmer the flame and cook covered on low heat for 8 to 10 mins.
- Half way through the cooking process, open the lid and mix the semiya gently. Cover again and cook for few more minutes.
- Once the semiya is cooked completely. Open the lid and gently fluff the semiya using a spoon. Serve with chutney of choice, podi, yogurt and pickle.
Video
Notes
- Roasted semiya is easily available in super markets. You can use roasted semiya ready bought. if you don't have roasted semiya, roast raw semiya in ghee or oil till golden brown for better flavor.
- For Store bought roasted vermicelli, you can add upto 21/2 cup water for every 1 cup of semiya.
- If your vermicelli is much fine and thinner, add 2 cups of water for every 1 cup of semiya.
- I recommend you to have boiling water ready in a kettle or sauce pan. If you feel your upma is undercooked, pour little hot water, cover and cook until done.
Nutrition
If you have any questions not covered in this post and if you need help, leave me a comment or mail me @[email protected] and I’ll help as soon as I can.
Follow me on Instagram, Facebook,Pinterest ,Youtube and Twitter for more Yummy Tummy inspiration.
Ms.Chitchat
Tasty vermicelli upma, love it any time, yours look very tempting. Btw, the non stick is too good, can I know the brand please?
Aarthi
@Ms.ChitchatIt is wonderchef brand
Kavita
My all time favourite.. I can eat this given at any time of the day.
Love your blog Aarti and awesome recipes. Have tried some, yet to try some. Would be more frequent and impromptu with comments henceforth when i try..:)
Keep up the great work
Anonymous
Hi Aarthi,
I am looking for a masala rava upma recipe. If you could post that it would be helpful for me.
Thanks in advance
Anonymous
Hi aarthi.. Every time I made this its gets sticky.. Did i made any mistake in procedure?
Aarthi
@Anonymousu must have added too much water or you didn't roast the semiya properly
aarthi dhanraj
Whats this vermicelli made with initialy?
Aarthi
@aarthi dhanraji think it is made with wheat
Anonymous
Hi aarthi,
Pls post masala upma recipe. I m waiting 4 it
Nandhitha
Wt brand of vermecilli u used
Aarthi
savourit