
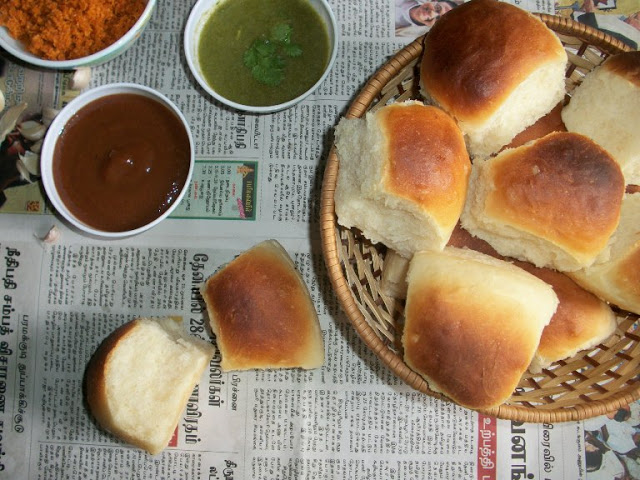
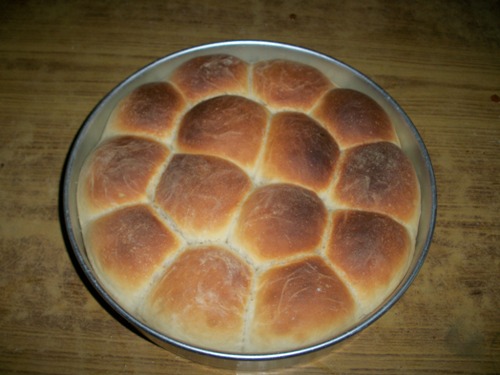
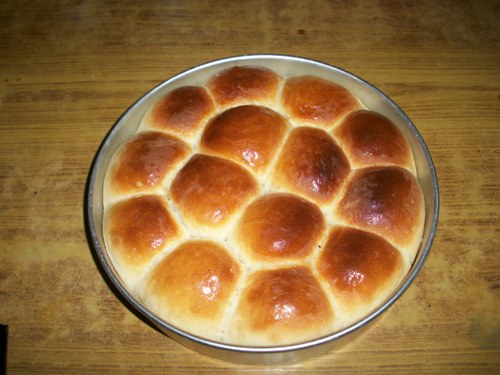
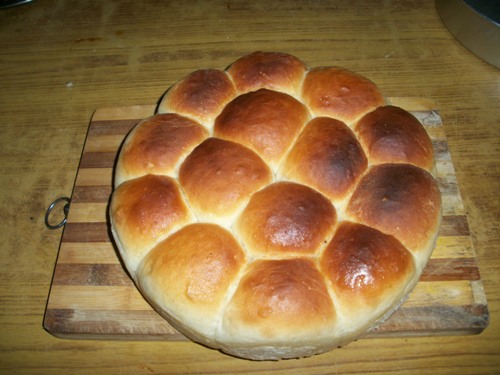
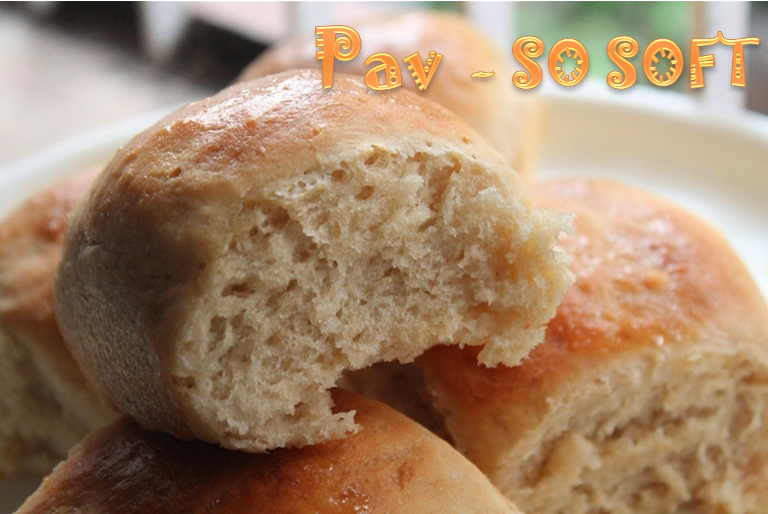
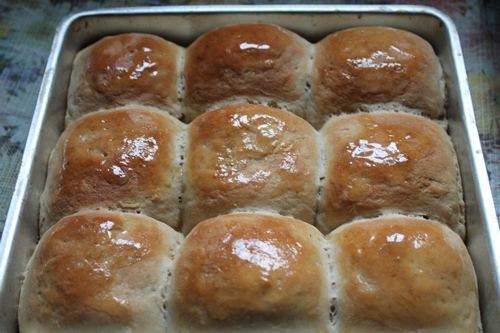
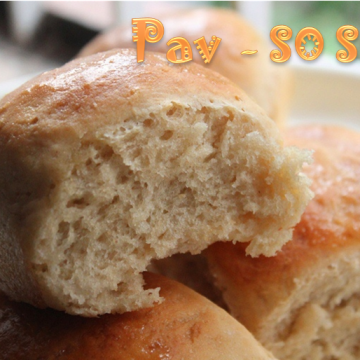
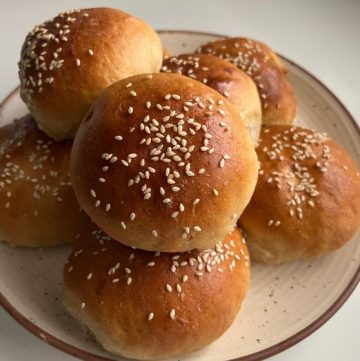
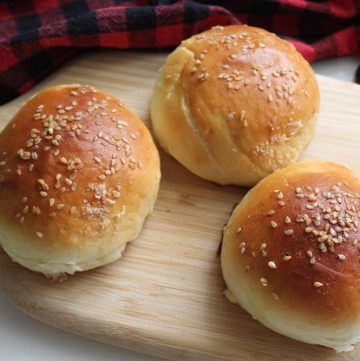
Pav Buns with Step by Step pictures and video. These fluffy indian rolls are tasty and easy to make.
Pav Buns
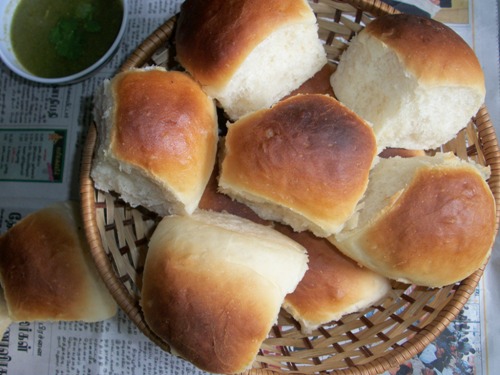
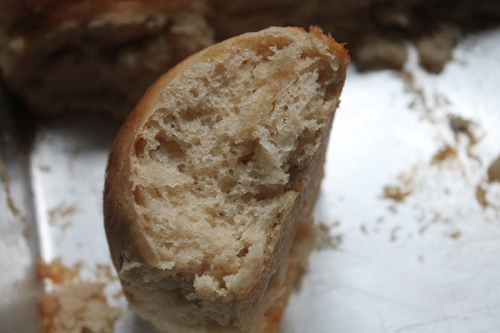
This is the first time I am making it, the result was quite amazing. These buns turned out so soft and spongy. I totally loved it. The smell of freshly baked buns fills your house as you baked them. There is nothing better than baking your own bread or buns.
About Pav Buns
Pav Buns are one of the main thing which you need as a side for vada pav or pav bhajji. These fluffy and soft buns are so tasty with anything. You can have it on its own too. They are readily available in supermarkets , but they are quite expensive here..So I thought to make it on my own.
Eggless Indian Pav
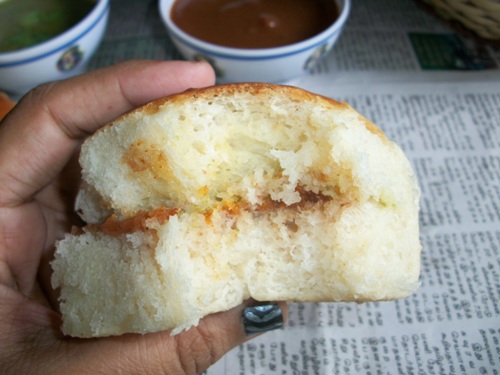
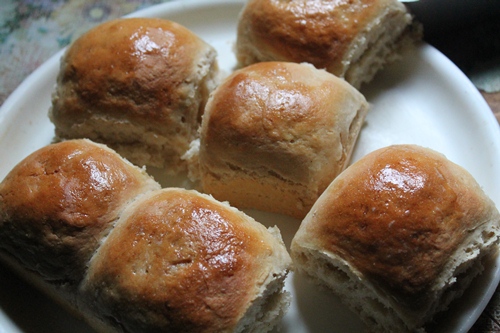
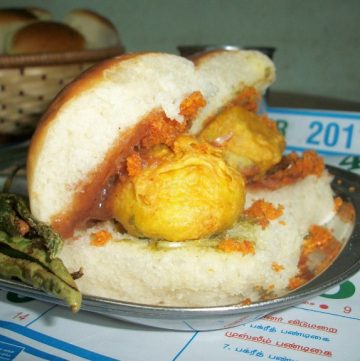
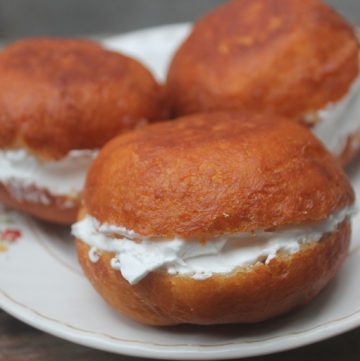
I actually made vada pav, potato pav, onion pav using this and served it with green chutney and tamarind chutney. They are totally delicious…Will post recipes soon...You could probably stuff anything in this from chicken filling to vegetable filling and enjoy this soft buns.
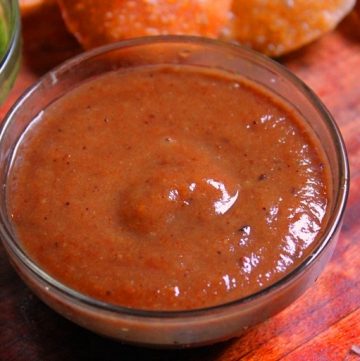
I actually had one by just spreading some green chutney and tamarind chutney and sprinkled some garlic chutney over it and took my first bite, wow it was so good.. Would recommend you to try it once…So without any delay off you go to the recipe.
Similar Recipes,
Real Dominos Cheese Burst Pizza


Whole Wheat Pav Buns Recipe
Eggless Whole Wheat Pav

Pav Buns Ingredients
- All Purpose Flour / Maida - 1 cup + more for kneading
- Wheat Flour / Atta - 1.5 cup
- Milk - ½ cup
- Water - 11/4 cup
- Dry Yeast - 2 tsp
- Sugar - 2 tblspn
- Salt - 1.5 tsp or to taste
- Oil - 2 tblspn
- Milk for brushing on top
- Butter for applying over baked pav
Pav Buns Preparation
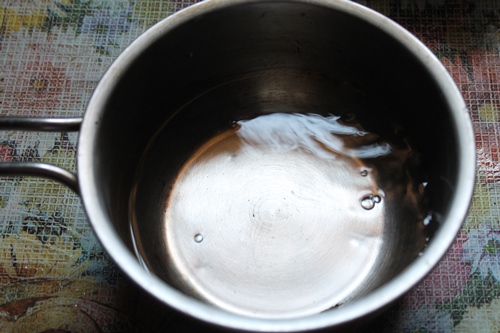
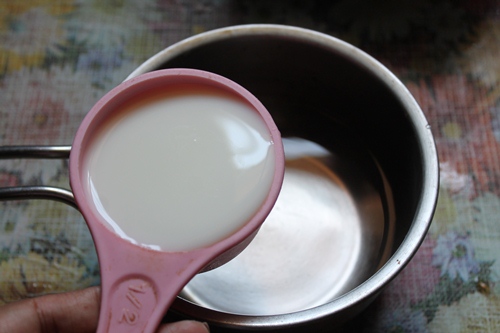
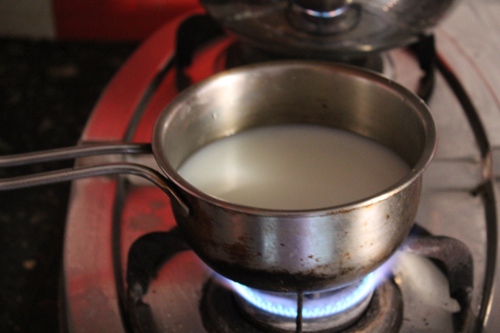
- Take milk and water in a saucepan, heat till it turns warm. Set aside.
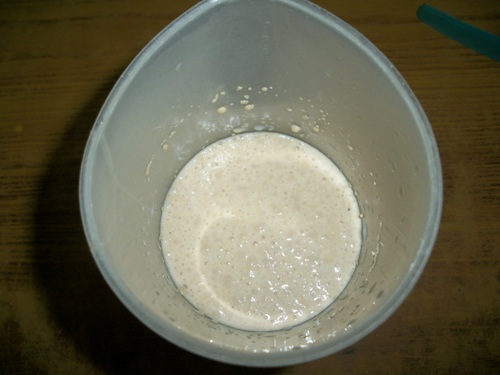
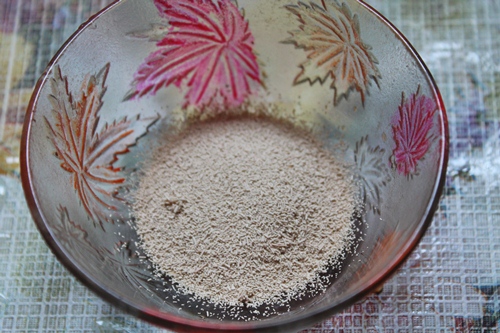
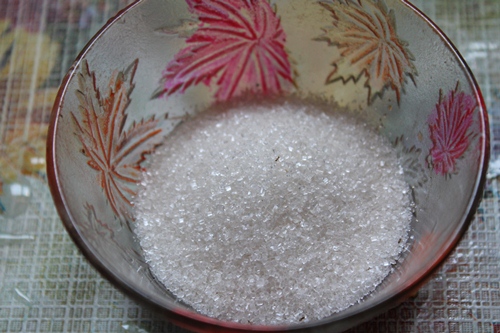
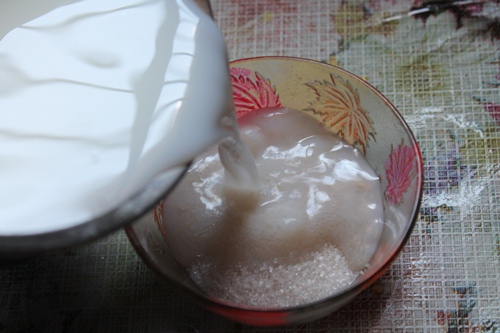
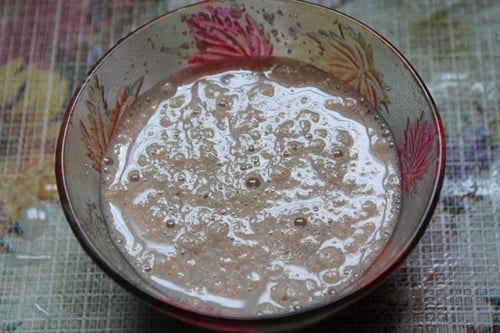
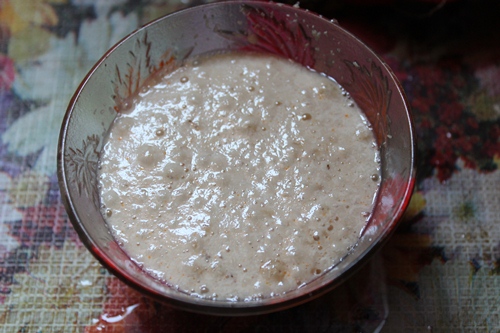
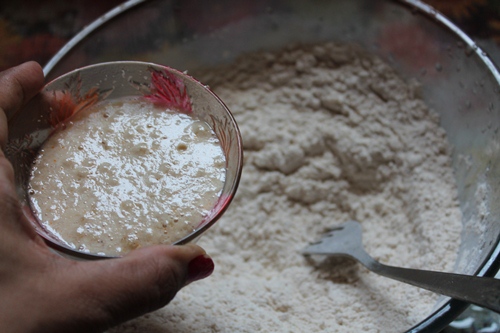
- Take yeast and sugar in a bowl, pour little of the warm liquid over it. Mix well. Set aside for 5 mins till it is foamy and activated.
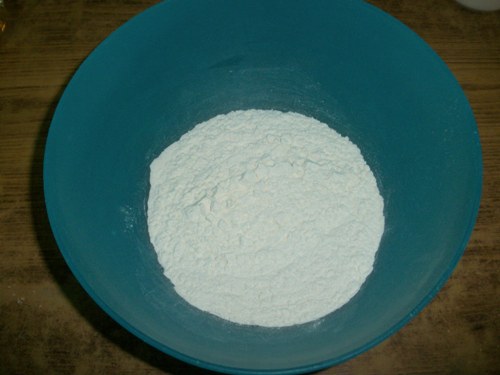
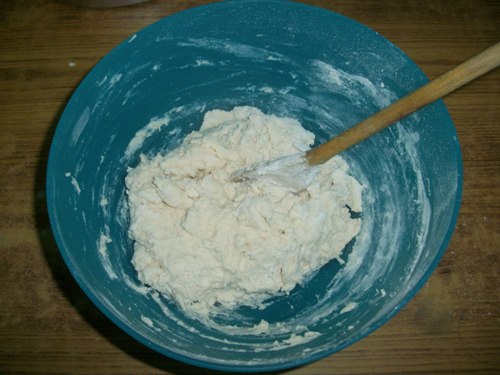
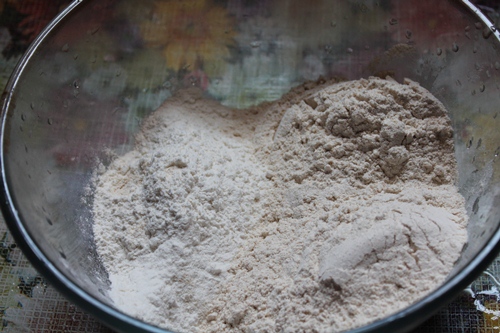
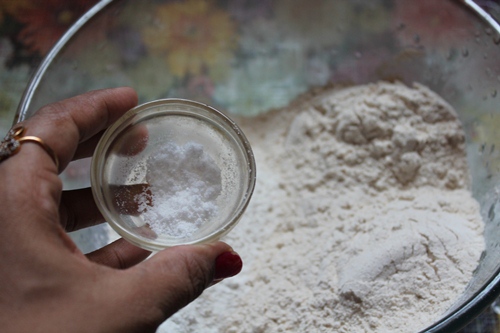
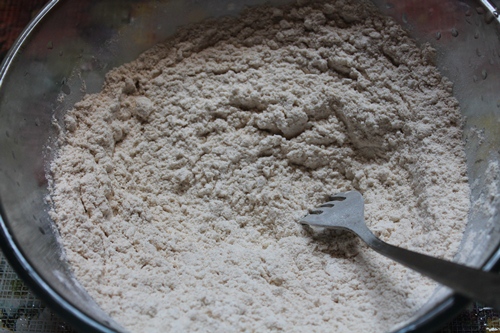
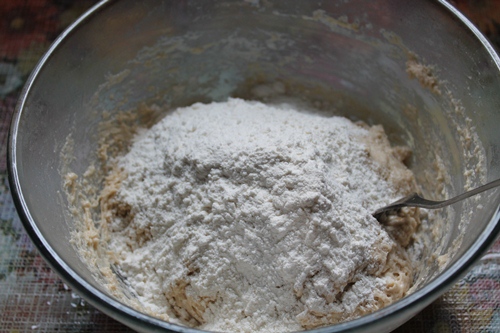
- Now take both the flour in a bowl, add in salt and mix well.
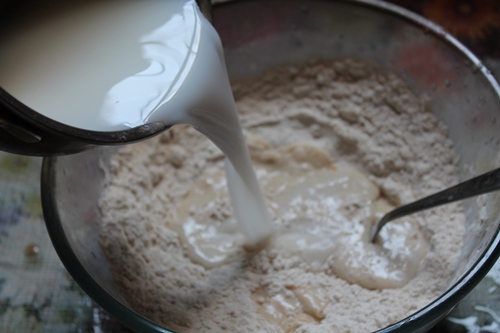
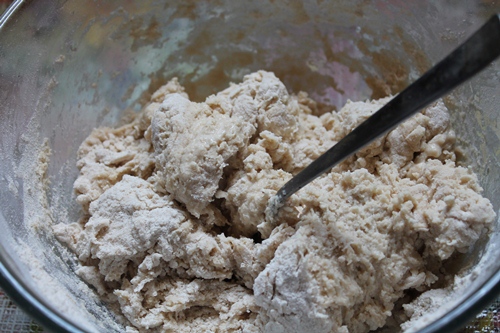
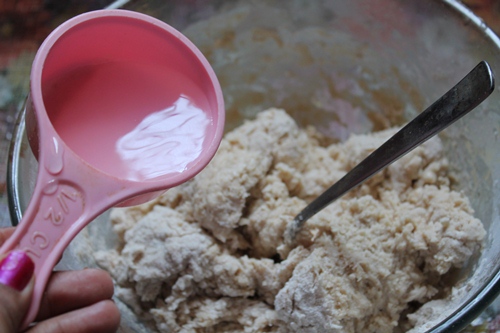
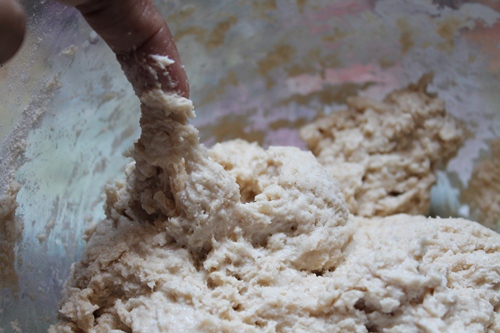
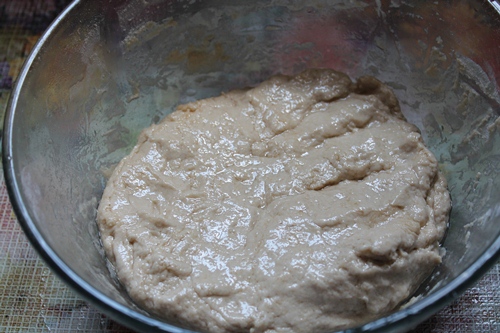
- Pour in the yeast mix and milk mix. Mix well. The dough will be very sticky.
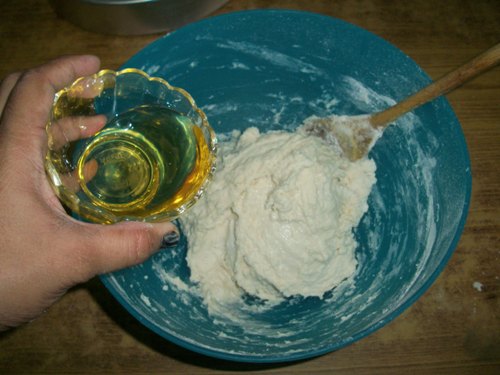
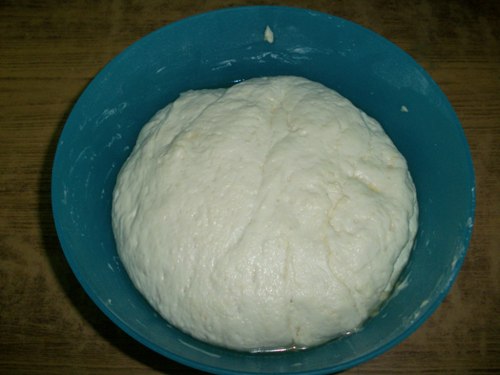
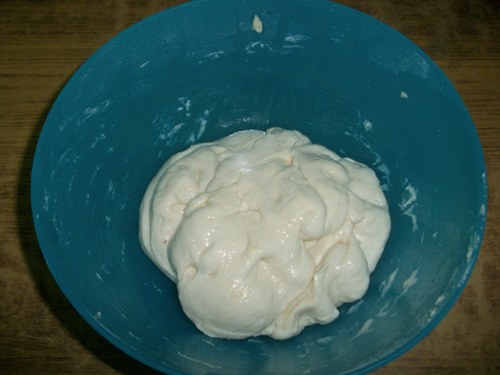
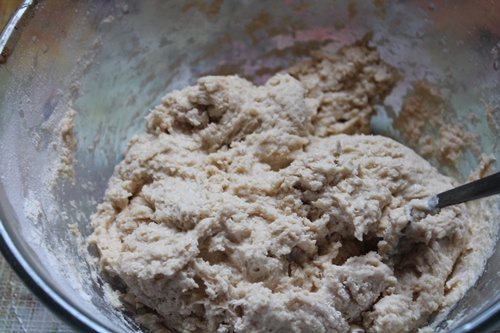
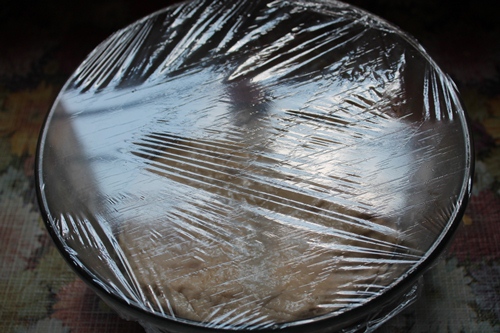
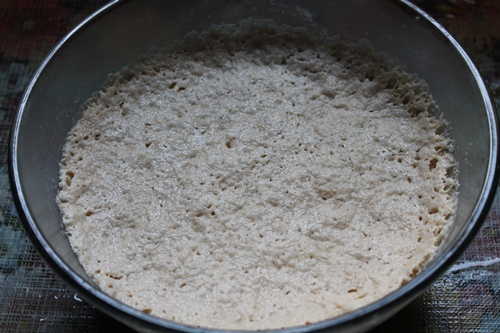
- Now add in oil and mix well. Cover the bowl with a plastic wrap and put the bowl in a warm place to rise for a hour or till it is doubled in size.
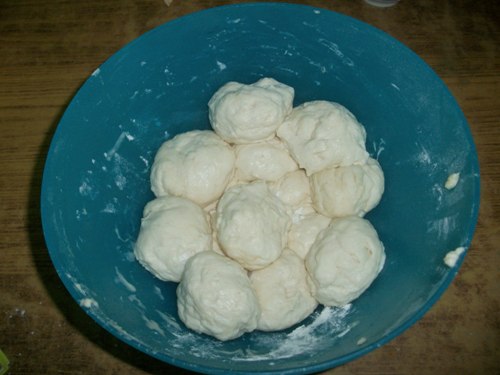
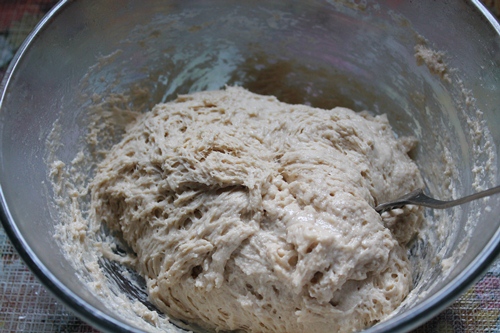
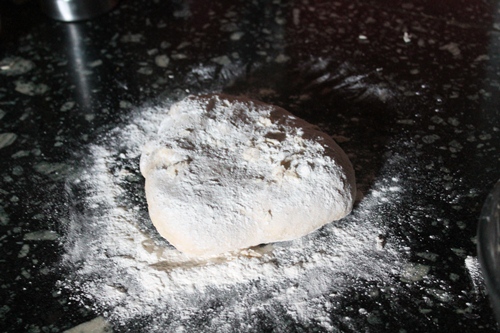
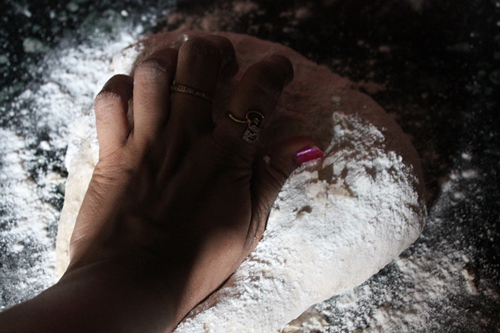
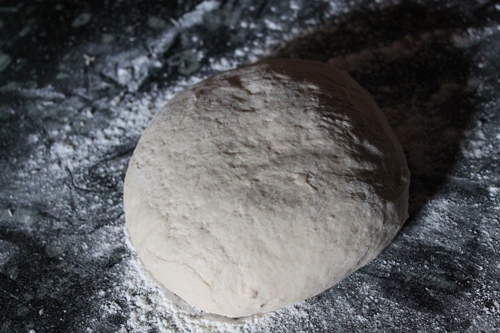
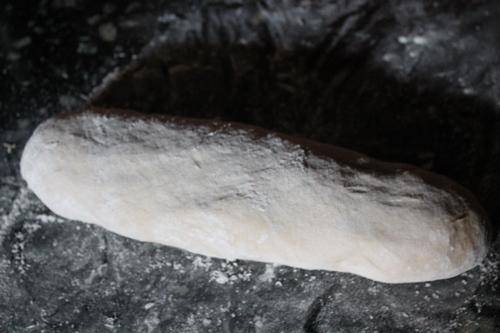
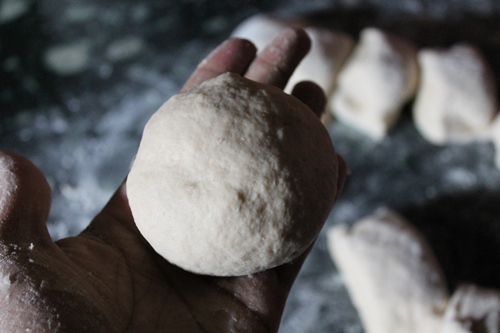
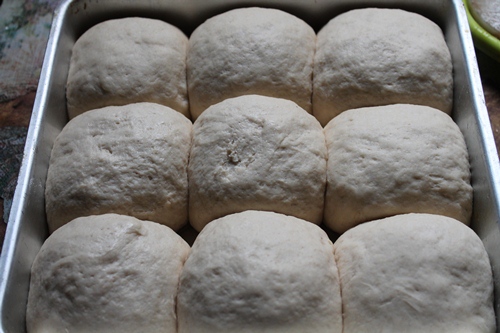
- knock back the dough down and add more flour to it. Transfer the dough to a work surface, sprinkle more flour and knead for 5 mins or so till the dough is soft. Add more flour as needed.
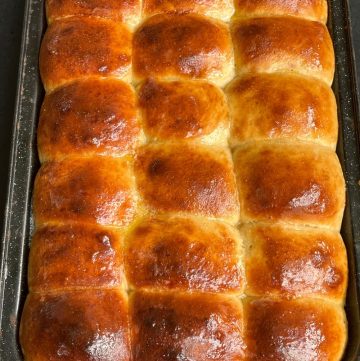
- roll into balls and leave to rise. Bake.
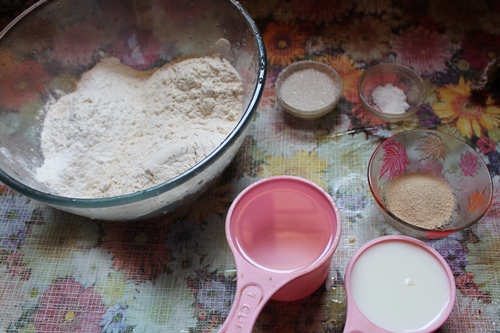 |
| Take all your ingredients |


Recipe Card
📖 Recipe Card
Ladi Pav Recipe | Homemade Pav Buns Recipe | Pav Recipe
Ingredients
Pav Buns Recipe
- All purpose Flour - 500 gms / ½ kg
- Yeast - 1 tblspn
- Butter - 4 tblspn melted + for brushing on top
- Sugar -1 tblspn
- Salt - 2 tsp
- Warm Milk - as needed to make the dough
Whole Wheat Pav Recipe
- All Purpose Flour / Maida - 1 cup + more for kneading
- Wheat Flour / Atta - 1.5 cup
- Milk - ½ cup
- Water - 1 ¼ cup
- Dry Yeast - 2 tsp
- Sugar - 2 tblspn
- Salt - 1.5 tsp or to taste
- Oil - 2 tblspn
- Milk for brushing on top
- Butter for applying over baked pav
Instructions
Pav Buns Recipe
- Add yeast and sugar to warm milk and mix well. Let it stand for 5-10 mins untill it becomes foamy.
- Take flour in a mixing bowl and add salt in that. Mix this together so that the salt gets uniformly distributed.
- Now pour the milk in this and mix well so that it forms a very soft dough.
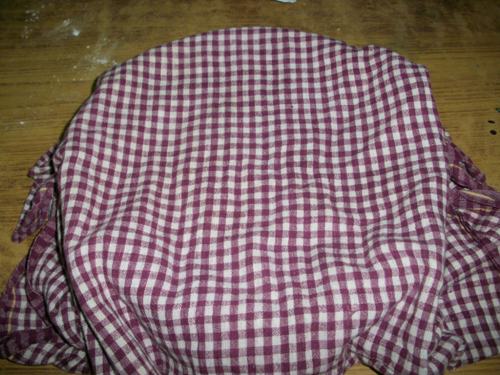
- Pour melted butter over this and mix well.Cover it with a damp cloth and let it rest for 1-½ hour till it doubles in size..
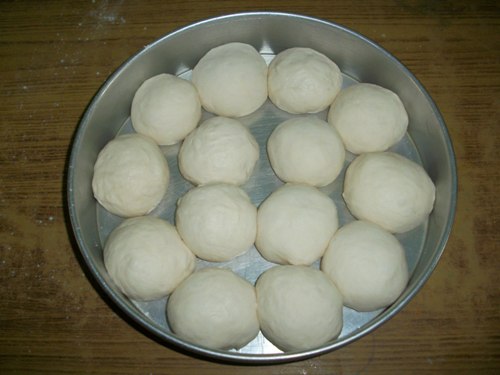
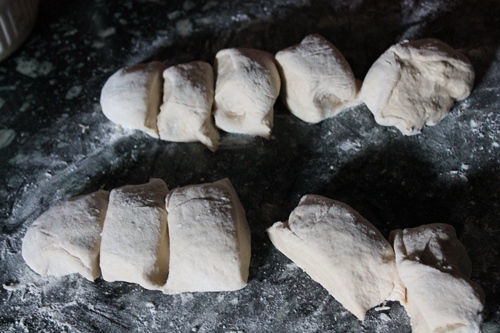
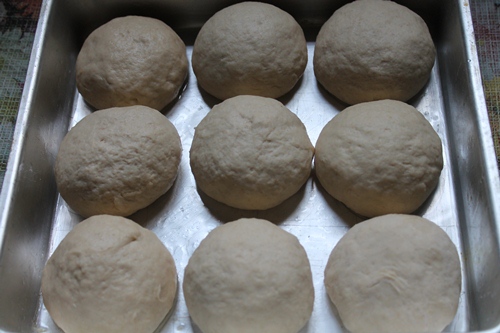
- Now punch the air out and divide into equal portions..
- Take a tray or any baking pan and arrange this balls equally spaced.
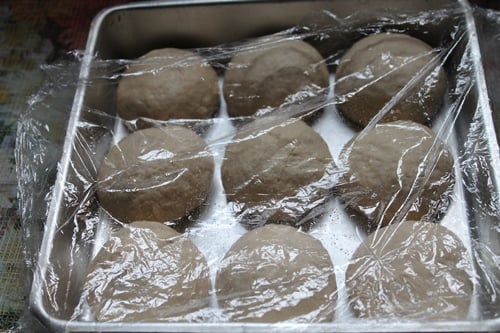
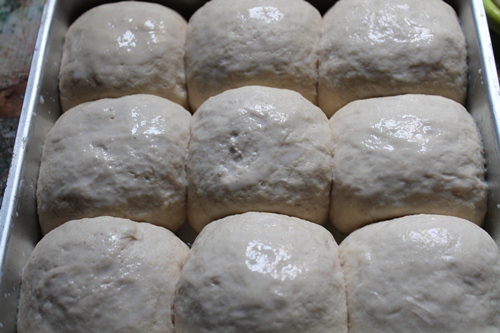
- Now cover with a damp cloth and let it rest for 30 mins till it doubles in size.
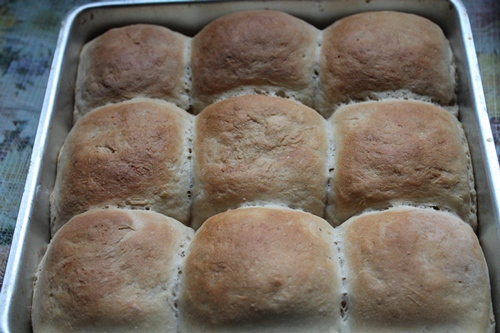
- Now put this in a preheated oven( 200 Degree C / 400 Degree F) for 15-20 mins untill the top turns golden and cooked.
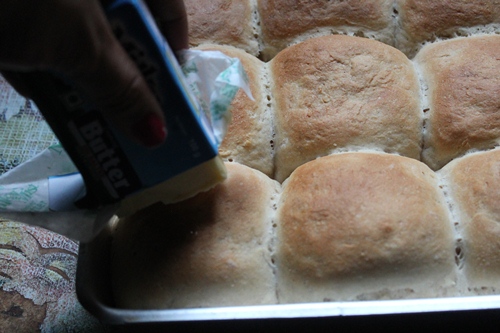
- Remove it from the oven and brush it with butter.
- Remove the pav buns individually and serve it with pavbhajji or use it for vada pav or anything.
Whole Wheat Pav Buns Recipe
- Take milk and water in a saucepan, heat till it turns warm. Set aside.
- Take yeast and sugar in a bowl, pour little of the warm liquid over it. Mix well. Set aside for 5 mins till it is foamy and activated.
- Now take both the flour in a bowl, add in salt and mix well.
- Pour in the yeast mix and milk mix. Mix well. The dough will be very sticky.
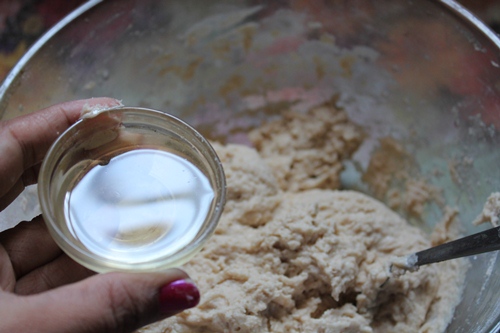
- Now add in oil and mix well.
- Cover the bowl with a plastic wrap and put the bowl in a warm place to rise for a hour or till it is doubled in size.
- Now knock back the dough down and add more flour to it. Transfer the dough to a work surface, sprinkle more flour and knead for 5 mins or so till the dough is soft. Add more flour as needed.
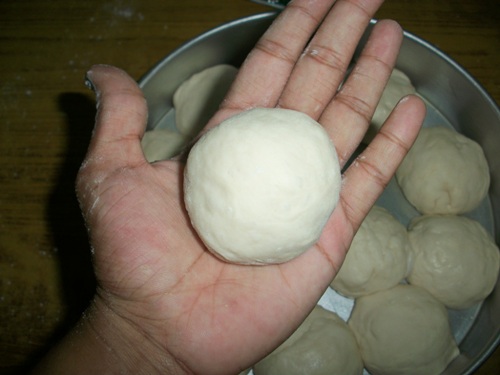
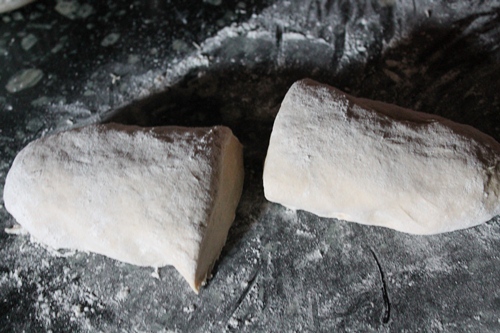
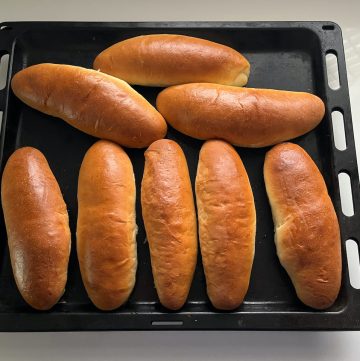
- Now roll the dough into a log, cut into equal portions.
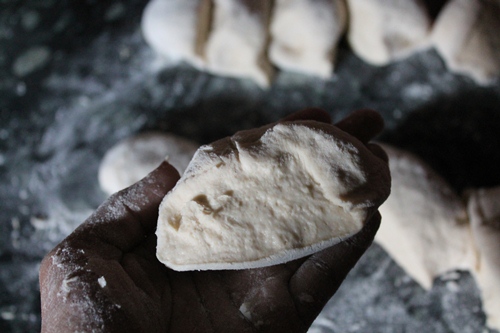
- Take a portion and roll it into a smooth ball.
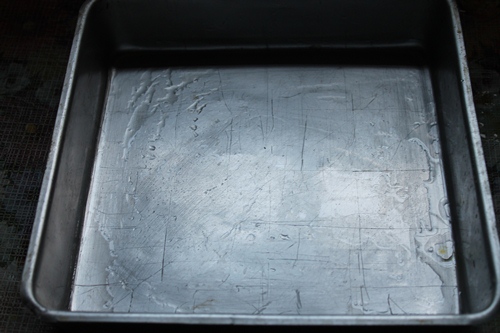
- Arrange the ball in a well oiled baking tray.
- Once it is all done, cover with plastic wrap and let it rise for 1 more hour.
- In the last 10 mins of rising, Preheat oven to 190 Degree C.
- Now the dough will be well risen and stick to each other. Brush the top with some milk and bake for 35 to 40 mins.
- Remove and brush some butter over the top.
- Serve warm.
Video

Pro Tips
1)Activating yeast till it is foamy is very important before you proceed with the dough. If your yeast is not foamy them please don't continue, the dough wont rise and it will give you a rock hard bun.
2)The dough which you make before the first rise has to be sticky. This what gives your tender and soft buns.
Common Questions about yeast:
1)Why my yeast is not getting foamy and activated?
There may be three reason for your yeast not activating.
a)If you add too hot water to yeast, it will kill the yeast.
b)If you add too cold water, then the yeast won't activate.
c)Your yeast may be expired or out of date. Get a fresh packet.
2)How to store yeast?
Always store yeast in an airtight container in freezer.
Kalpana Sareesh
Awesome dear.. fab work bookmarked this is always in my first do list as my hubby is a big fan of vada paav shd def treat him
Siri
Can we make this in airfryer
Archana
I love your pics but these are the best.
Teena Mary
wow...home made paav..never tried it...i'm gonna make it today...my hubby loves paav bhaji. We usually buy paav so he'll be happy to eat home made paav today!! thx 4 sharng 🙂
LoLy
WOW, Loooooooooooooove the home baked bread, but I am always too lasy to BAKE, i prefer cooking than baking :p
Treat and Trick
Beautifully baked and so fluffy!
Suja
Perfectly baked,soft and delicious
faseela
lovely paav........bookmarked
Kala
Hey Aarthi this bun are very delicious baking home made pav bread and mixing well with masala huhhhh Heaven 🙂
Enjoyed ur visit to my place when u find time keep checking by my blog
lola
se ve un pan superesponjoso y rico y ademas queda muy bonito
¡¡besos¡¡
Esha
Nice and simple receive. Can we make the pav in the pressure cooker?
Aarthi
yes you can bake.
@lekshmi
this is really awesome. you did a great work aarathi.......
Claudia
Those have to be the softest buns in cybersphere. I can think of so many uses for them and they don't seem difficult. The baking aroma is a huge bonus!
Hema
No more buying pav buns, only home-made, very fluffy buns, the way you have given in steps makes it look easier..
Poonam Borkar
OMG..your buns look so perfect and soft..loved it very much!!
Tina
These bread rolls look so feathery light and tasty. Love that last picture, but wish that was me eating instead of you! Great bread recipe-yum!
Christy Gerald
Oh real yumm and Superbly baked Dinner Rolls Dear.Luv it.
grace
fluffy doesn't even begin to describe these pillows from heaven!
Renu
pav looks tempting, need to try this out
Prabhamani
Book marked Aarthi...!!Thank for sharing dear 🙂 It's luks Amazing..
Prabhamani
Aarthi one doubt u didn't use any water to make dough right?
Carolina
It looks so soft, i like it so much.
Kisses
The Café Sucré Farine
I'm almost smelling through my computer the delicious aroma these must produce! This is a wonderful post with such a great tutorial! I would love a chicken salad sandwich on one of these right now! thanks
Nalini's Kitchen
Wow!!!bun looks so soft and fluffy...
perfectly done.
Sobha Shyam
perfect pav buns...awesome job Aarthi..
Veronica's Kitchen
These dinner rolls look deliciously warm, nothing is better than fresh bread! Yummy!
Trini Altea
Mmmmmmmmmmm que rico!!!!
Que tengas un buen fin de semana.
Neha
Perfectly baked pavs...Looks very soft..
Priya
Super soft and stunning pav buns..
Catherine
Dear Aarthi, These dinner rolls look just perfect. They would be perfect warm with butter! Blessings, Catherine xo
Swathi
Delicious buns, I love homemade ones.
DV
Lovely buns, Aarthi! 🙂
Kristen
Congratulations on your success with the buns. They look perfect!!
Meena
wow home made buns.. i dont have oven but this looks delicious. and if they r home made then its even better.. one of our relatives had made this and it tasted good. i havent tried and most probably may not get chance soon unless i get an oven.. well done
Ann
These are prefect! I love soft, warm, yeasty rolls - and yours are stunning!
Aarthi
Prabhamani ..yes you don't need to add any water..the dough is made with warm milk..
Chung-Ah @ Damn Delicious
These rolls look amazing - light, fluffy, and buttery. That's my kind of bread!
The Pumpkin Farm
wow, this is great, i tried a couple of times in vain, they turned out too yeasty. will try in march when the climatic conditions will support
Yuvana's Favourites
Bun Looks absolutely spongy and wonderful. just looks like store bought bun. bookmarked.
Sumi
Love the texture of your bread.Awesome. Iam yet to try on the yeasted dough. Probably I will start with this recipe.
Deeps @ Naughty Curry
wow! u made pav on ur own... they look superb, all soft & fluffy. even im gonna try 🙂
Anjali Shukla
I'm on the verge to bake them anytime now coz I had been waiting for a pushing recipe like this...thanks a lot n a lot for sharing. 🙂
The buns/ pav look perfect perfect perfect!!! 🙂
Amar Recipe
Hi, got to try this one day. but does it work on microwave or otg?? I got microwave? Big Thanks to you.
Aarthi
Amar..If you have microwave convection oven you can make this perfectly..If your microwave has only grill mode i don't think it will work..You can make it in OTG too..Hope this help
Amar Recipe
wow! got a quick response from you. Thanx a ton. Yes I got microwave with convection and also able to bake cakes in my microwave. Thanks a ton once again for your kind advice. Just love your blog sites with pics along with instruction and recipes. Big thanx to u.
The Yogi Vegetarian
Wow! Those buns look so professional Aarthi! Amazing pictures too. One of the best blogs I have seen.
Amina Khaleel
wow... pav looks fabulous... so soft and delicious... bookmarking your recipe... thank you so much for sharing...
anthony stemke
Based on the photographs I can almost smell the aroma.
Thanks.
ushaprashanth
Hi!
Lovely Pics!!! looks great!!!!!
Chic & Gorgeous Treats
Wow! The dinner buns look so moist and fluffy. It goes well with anything from curry to slathering some good butter, and dunking it in a good soup. Thanks for sharing this Aarthi. I have been bookmarking so many recipes, but just don't have the chance to cook/ bake everything for now. Will just need my own home ;). Cheers~
Agnes
Hi, Thanks a ton!I follow your receipes really makes my life easy. Was longing for bread finally its here.Will try
Mamatkamal
I will try for sure your wonderful Indian buns and let you know. They look perfect.
Cheers
Binitha
lovely pavs...can we directly substitute wheat flour instead of maida?
Lakshmi
Hi Aarthi,
Cant wait to make these buns. I have tried making buns at home several times but the buns never turn out as spongy as they come in bakeries. Can you tell me how long you kneaded the dough?
Regards
Lakshmi
Lakshmi
Hi Aarthi,
Cant wait to try out the recipe for the buns. I have tried to bake buns several times but they just dont turn out really spongy as we get them in the bakery. I had a few doubts would be great if you could clarify them.
Did you use maida or bread flour?
How long did you knead the dough for?
Waiting for your reply.
Regards
Lakshmi
Aarthi
@Lakshmi
I used maida in this and i didn't knead the dough so long..Just 5 mins is good...
Aarthi
@Lakshmi and one more tip for soft buns is the dough should be very soft and not stiff...that makes the buns so soft
Anonymous
hi aarthi....
I loved your site so much...iam planning to make pav buns ....san u tell me 500gms is equal to how many cups...your buns so perfect n superb...thanks for sharing....
Aarthi
@AnonymousThanks dear...500 gms is around 4 cups..
Anonymous
ur buns are so soft and fluffy...can u tell what brand of yeast u uesd?
journaloframbles
Hi Aarthi, came across your lovely blog today. It was very nice reading all the recipes and also about you, infact I'm still going through the blog.
I recently started baking, will definitely try this. Looks amazing.
Jazz
Aarti, can we use warm water instead of milk ?
Aarthi
@Jazzyes you can use. But milk makes it even more softer
Anu
Hi Aarthi I kept dough for longer time like 4 hrs and my Pav didn’t rise so should we not keep it for long time.
Ranga123
can i bake pavs in convection oven?
Ranga123
can i bake pavs in convection?
Anonymous
Hi aarthi.. can you tell me what kind and brand of yeast you are using in your recipes?
Anonymous
Hi aarthi.. can you tell me what kind and brand of yeast you are using in your recipes? PLZ replay to this
Aarthi
@AnonymousI buy yeast from my supermarket and it is their own branded yeast. I have used bakers yeast also, it works great, you could use that too.
Anonymous
Hey aarthi this is sangita I was going through your blog and I was impressed I came across your pav buns reciepe and It would be very kind of you if you tell me the exact quantity of milk to make a soft dough for soft buns2
Aarthi
@AnonymousYou will need around 250 ml. increase or decrease as needed
Anonymous
Hi Aarthi,
Which yeast do you use in this recipe - active dry yeast or instant yeast?
Aarthi
@AnonymousIt is active dry yeast.
vaish
Hi arthi, i tried making pav buns, but the dough did not rise as expected after I set it for 1.5 hrs 🙁 i used eagle active dry yeast.
Aarthi
@vaishyour yeast is dead. Try with a fresh packet of yeast
Priety Maheshwari
hey aarthi I tried this one..all set till baking but after they were baked they were hard and chewy. .why...nd I din hv tgis round baking tray..I baked in rectangular one..nd they were nt sticked to each other..is this the reason...ot what...m nt getting..plz help asap
Priety Maheshwari
hey hi..I tried these one..everything was fine till baking also..but they were hard and chewy on eating..y so. .nd I dn hv this round tray I hv rectangular tray nd my byns were nt sticked to each other. .is this d reason of hardness or what..plz tell me...ty
Priety Maheshwari
hey hi..I tried these one..everything was fine till baking also..but they were hard and chewy on eating..y so. .nd I dn hv this round tray I hv rectangular tray nd my byns were nt sticked to each other. .is this d reason of hardness or what..plz tell me...ty
Aarthi
@Priety MaheshwariThen your yeast is the problem. Your buns didn't rise much because of yeast so it is hard
Vidhya
Hi Arthi,
i tried pav buns from your space. The outer crust turned out to be hard and buns were dense.. i used fast acting yeast.so didnt proof. added directly to flour. where have i gone wrong? Any suggestions
Thank you
Aarthi
@Vidhya
Did your dough rise well. If it didn't rise, then it is the mistake of yeast. Try with different yeast. I find activating yeast before adding it in flour helps a lot.
Vidhya
Thanks arthi for your response. Dough has risen. Don't know where I have gone wrong.
Aarthi
@VidhyaAfter making the balls did you allow it to rise. And also, the dough which you made should be very soft, then only you will get soft buns..
Anonymous
May ,I use baking powder/baking soda instead of yeast..?
Aarthi
@AnonymousNo you cannot skip yeast, it is must for this recipe.
ilearner
Hi,
I am a silent follower of your blog..
My yeast doesn't work all the time. Can you pls tel me how to proof the yeast ( ml of water, yeast measurement etc).
Aarthi
@ilearnerWill share it as a separate post
Anonymous
Do you put on/light both heating elements of your oven while baking bread?
Aarthi
@Anonymousyes u have to bake with both elements on
Chandana Lakshmi
Hi aarthi . This is chandana . I am big fan of your blog. Thanks for sharing such easy and yummy recipes. Here in pav buns can I half the measurements and try the recipe? Please let me know . Thank you
Chandana Lakshmi
Hi aarthi . Can I half the measurement including milk and proceed the process
Aarthi
@Chandana Lakshmiyes u can half the recipe and make
Kavita Lala
Hi! This is Kavita. Ur recipes are great... Have tried few of them. Want to know tem. For baking buns in convection n for how long.. Thanks
Aarthi
@Kavita LalaBake for the Same time mentioned.
Anonymous
Hi, can you tell me how you knead the dough.. My breads are becoming dense everytime I bake... Also do you heat both the rods in otg and bake in the same mode?
Aarthi
@Anonymousu have to knead the dough till it is smooth. The dough which you make should be very soft and not stiff.
Meenaloshini
Can v use wheat flour instead of maida? If so, in wat proportion.?
Aarthi
@MeenaloshiniYou can use half maida and half wheat flour.
renu akre
Helo Aarthi can I make knead the dough overnight and keep in fridge it..and make the pav in morning???..pls do reply
renu akre
Aarthi can I knead the dough overnight and keep in fridge and make the pav in morning..please reply?
Aarthi
@renu akreno you cannot. it will give you denser buns
umamahi
hi sis..actually what yeast are you using either dried or instant?since dried yeast will be bigger than the size of mustard,bt yurs s look alike instant yeast..bt you are proofing it..y so?? im in a state of confusion!! pls clarify akka 🙁
Aarthi
@umamahii am using dried yeast. there are two types of yeast in dried form, bigger ones and smaller ones. Smaller ones are best.
Adele
Can u name the yeast u r using
Aarthi
i use a brand which my super market sells. you can buy yeast from amazon.
renu akre
Thanku so much Aarthi for your reply.Ur such a kind hearted
renu akre
Thanku so much Aarthi for your reply.Ur such a kind hearted
vidya nair
Hey Aarti can we do Ladi Pav in Pressure Cooker.. Let me know
Aarthi
@vidya nairyes u can make this in cooker..follow this link
https://www.yummytummyaarthi.com/search/label/Pressure%20Cooker%20Baking
Priyanka Patil
Please help..I'm unable to find right temperature of milk/water for activating yeast..I tried 2-3 times but it is not activated..I changed my yeast also..
Aarthi
@Priyanka Patilit is very warm, say put a cup of water in a sauce pan and heat it on high heat for just 5 to 8 sec till it get light warm
anju varma
Hi arti, fan of this as always.. Just one doubt how much will this yield and how to lessen the ingredients for less quantity? Planning to make this week so waiting eagerly! Keep posting!
Anonymous
Hi arthi,i love ur recipes i tried ur pav buns it didnt rise while baking.i used bakers dried yeast the big ones 1tblsp and soaked it in 1/4cup of warm water and1/4 cup of milk ratio as u have mentioned but didnt get the bubbles.should i reduce the yeast since it is big ones?please help me im new to using yeast.
Swetha
Hi arthi i love ur recipes.i tried ur pav buns but it didnt rise well guess there was a mistake in soaking the yeast.i used bakers dries yeast big ones and soaked it in equal proportion of warm water and milk(1/4),but didnt get the bubbles.im new to using yeast please help me arthi.
Aarthi
@Swethayour yeast should activate first. add it to very warm water or milk along wth some sugar it helps in activating the yeast
Aarthi
@anju varmathis will yield the amount which i have showed in the pic..you can half it if you need less
Swetha
Thankyou for replying arthi.can u tell me how much should i measure yeast incase of big ones?and how long does it take to activate?
Aarthi
@Swethasame measurement i think..I have never used big ones..
abi abinaya
Hi aarthi,
I have one doubt in this...
How to know that it is baked well...
Because when i took it out after 20 mins the center part not was not cooked well
So how to know the correct time to stop baking?
Thanks in advance...
Aarthi
@abi abinayathe top and bottom will be cooked and when u press it it will just bounce back
Sapna Deore
Did u use wet cloth to cover the dough?
Sapna Deore
Hi arathi. I m confused about how much milk should I use to mix sugar and yeast. Can I take little milk and add yeast and sugar in it and after mixing this with flour I was thinking of adding plain warm milk? Will this work?
Aarthi
@Sapna Deoreyes u can add yeast to just 1/4 cup of milk and use more when kneading
Aarthi
@Sapna Deoreno it is normal cloth
kavithhaa vjayakumar
Ur blog is awesome. I have a question please replay. Which brand of yeast ur using. Can u tell me pl
Aarthi
@kavithhaa vjayakumari get it from my super market, it is their own brand
Bushra
Hi Aarthi,
I am a regular follower of your blog.Thanks for all recipes which are simply great. Today I tried Pav buns using the same measurements as mentioned. It tasted awesome but need few corrections which i couldn't find out.
1. After keeping in baking tray, buns didn't rise much (second rise) even after keeping for 1 hr.
2. Colour became slight golden allover the buns after baking and the outer crust remains hard even after cooling.
Hope you can guide me. Thank you.
Aarthi
@Bushrait may be because of the yeast. dont over bake it.
Bushra Shabnam
@Aarthi
Hi, thanks. i changed the yeast brand and today I got so fluffy Pav buns..I am so happy. Thanks a lot
Shaista
Thank you for the great recipe I made it today and it was great success. thanks again.
Unknown
Hi Aarti, I try most of your veg recipes and it always turns out well. I wanted know about this pave, should we knead the dough for 15 mins for gluten to be formed. As many other pav recipes calls for it. Can u please guide me on this. Thanks in advance. Regards Rashmi
AkhilaBaskar
Yeast mentioned as 1 tbsp seems to be more whereas the picture shows only 1 tsp. Is it tablespoon of yeast or teaspoon and salt also looks less than 2 tsp in the picture can you please reconfirm if the measurements are accurate.
Narmadha
I tried this today. It turned out good. But I didn't get golden brown color on top. What may be the reason for that?
Divya
My buns turned out to be soft; however, it didn't turn brown on top..I baked in cooker. What might be the reasons?
Ela
I followed ur recipe , but it dint double after 1 hr ; also I used dry yeast ; how much milk to be used
Aarthi
If the dough didnt rise. Then you must have added it to too hot milk or water. That must have killed it.
Serena
Greeting sister,
I know you have used active dry yeast but i only have instant yeast. Can you tell me how to substitute both.
Thank you for the amazing blog. I Am a huge fan.
Aarthi
use same amount of that
Serena
Thank you for getting back ♥️
Kate
Hiii aarthi,
I know you have used active dry yeast.
I only have instant yeast. In order to substitute What are the changes i have to make to the quantity and method?
Im a huge fan of yours. Keep up the great work
Sangeeta
cant we make buns without maida?completely with wheat flour.