
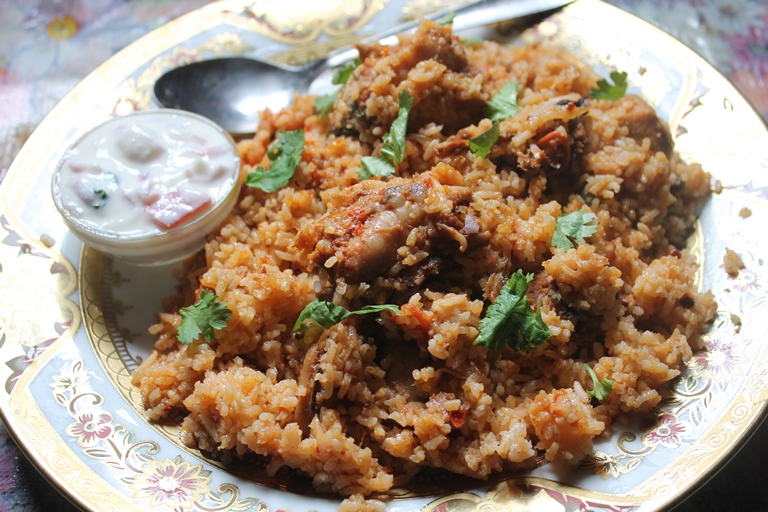
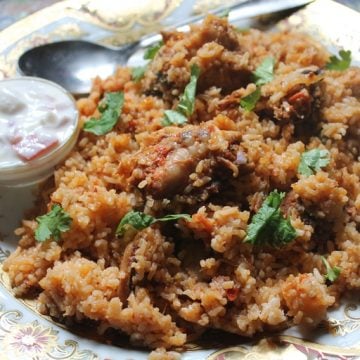
Ambur Star Biryani Recipe, Tamilnadu iconic biryani always has a special place in my heart. Unlike other biryani recipe, this one is made differently. It is cooked with seera samba rice, chicken, yogurt, herbs, red chilli paste, masala blend makes it so delicious.
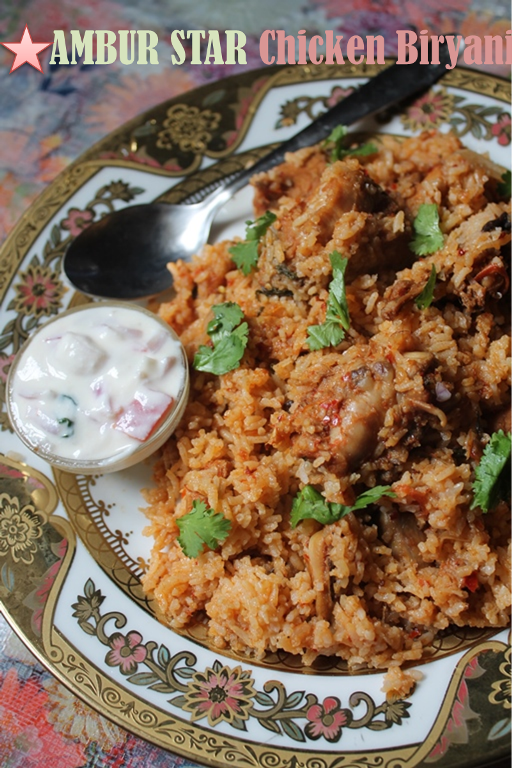
Ambur Star Chicken Biryani
If you have followed me on Facebook, you must have noted that I made Ambur star biryani for lunch yesterday. I am sharing it the next day itself because I cannot wait so long. Because it turned out so good.
About Ambur Chicken Biryani Recipe
Ambur Star Biryani, Tamilnadu's most loved biryani. will always have a special place in my heart. This iconic biryani was started in 1890, byHaji M. Syed Khader in the small town of Ambur.
What began as a small food stall grew into one of the most famous biryani brands in South India.
Ambur biryani uses seeraga samba rice instead of basmati rice which is the speciality. Also the biryani doesn't have too much spice powders, it uses few simple whole spices. The colour and taste comes from the freshly ground red chilli paste and yogurt.
Chicken and mutton biryani are the most popular ones. It is usually served with biryani brinjal curry also known as brinjal dalcha (eggplant gravy) and onion raita.
More Recipes
The main thing I love in this recipe is the simplicity, it don't have lots of spice powders like my other biryani recipe.
The main flavour is dried chilli paste and few whole spices. But the main thing is the addition of ingredients at the proper interval and proper timing.
Seera samba rice tends to get sticky that other rice, soaking them and cooking them to the right texture prevents that. Also use Nonstick casserole so nothing sticks when mixing.
Always make sure the chicken gravy taste is perfect. It should have extra spice and salt, because when you mix with rice, everything will get perfect.
So follow the exact method as I have given, you will taste the real Ambur flavours. I served this with Raita and Chettinad chicken fry. You can serve it with biryani brinjal masala which is the proper side dish for it.
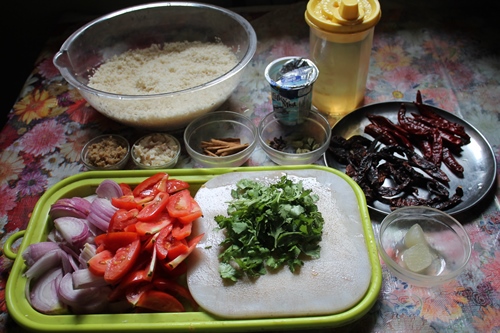
Ingredients
- Rice - use seera samba rice for making Ambur biryani, make sure to wash them well and soak before cooking.
- Onions & Tomatoes - used to make the main chicken gravy.
- Ginger & Garlic - since this doesn't uses spice powders, ginger garlic gives aroma.
- Whole Spices - cinnamon, cardamom, cloves are used for the aroma.
- Herbs - make sure to use lots of coriander leaves, mint leaves for taste.
- Chicken - bone in chicken should be used for taste of the biryani.
- Red Chillies - the colour for this Ambur biryani comes from the red chillies. I used a mix of regular chillies and Kashmiri chillies.
- Curd - gives tangy taste and form the gravy base.
Step by Step Pictures
Chilli Paste
1)Wash rice really well in multiple changes of water. Soak them in water for 30 minutes. Set aside.
Start by soaking dry red chillies in hot water for 15 minutes. I used kashmiri red chillies and regular red chillies.
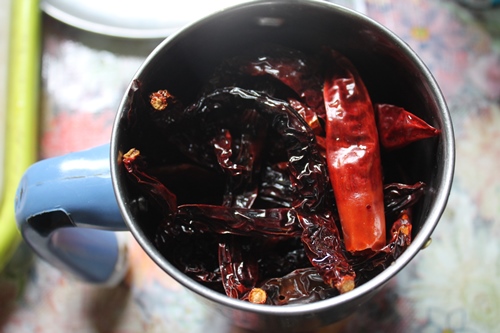
2)Take them in a blender and add very little water to make a smooth paste.

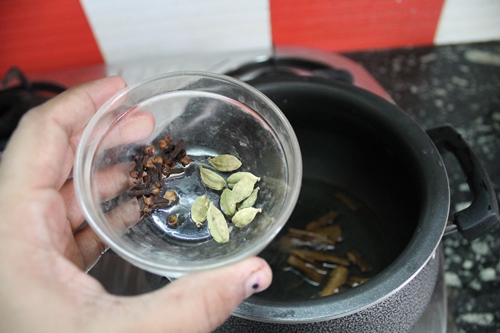
Tempering Spices
2)Heat oil in a pot. Add in whole spices. I am using cinnamon, cardamom, cloves in the oil. Let them sizzle in the oil.
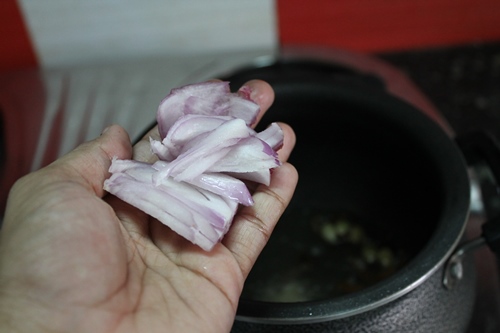
3)Add a spoonful of yogurt into the oil and saute for 1 minute until it sizzles in the oil.

4)Add in sliced onions and cook the onions until golden brown.
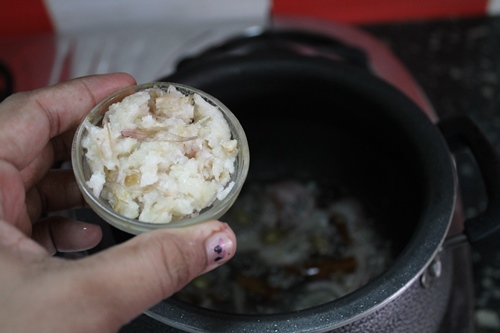
5)Add in crushed garlic into the oil and fry them well. Cook for 1 minute before adding in herbs.
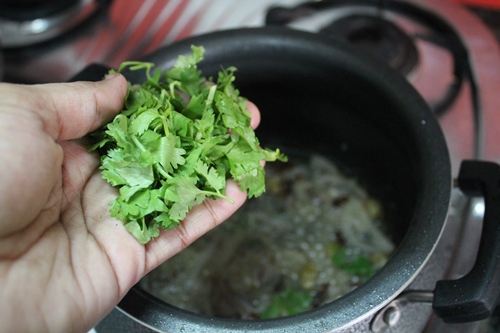
6)Now add in coriander leaves. Make sure to chop them fine.
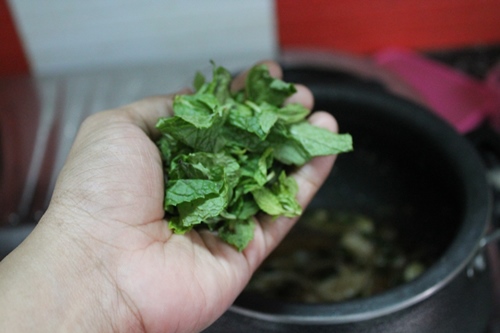
7)Add in mint leaves. and saute well with the spices.
8)Add in ginger paste and mix well in the oil.
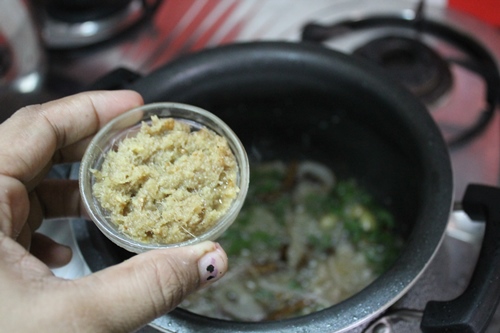
9)Cook all this in oil, so it flavours the oil.

Making Chicken Curry
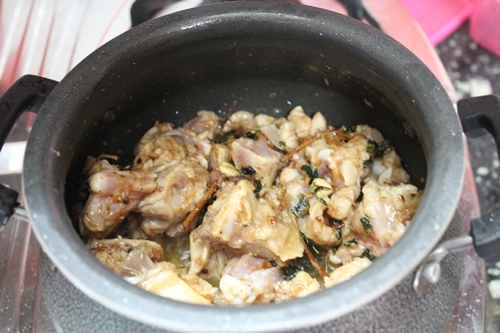
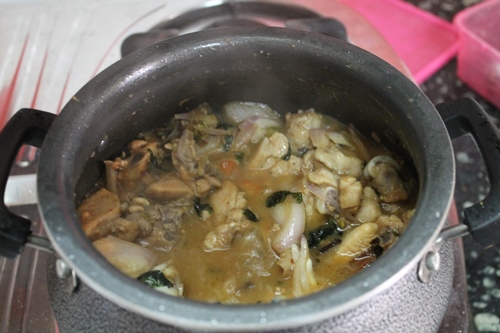
10)Now add in chicken pieces, salt and mix well.

11)Let the chicken get some colour. Saute for 4 to 5 minutes.
12)Add in sliced onions, tomatoes into the chicken.
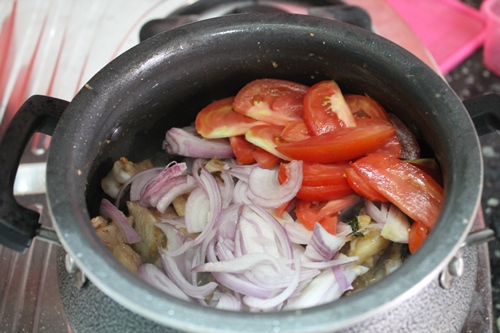
13)Mix that well into the chicken. Let it cook for 5 to 6 minutes so it disintegrates into the curry.
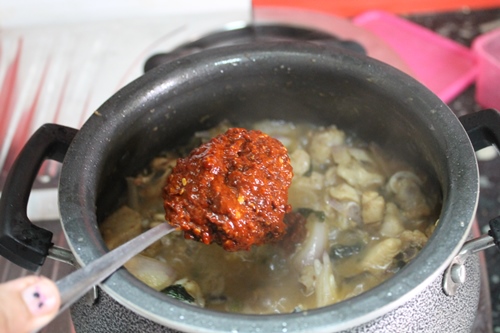
14)Now add in the remaining ingredients. Add in chilli paste. This is what gives the colour and flavour to the biryani.
15)Add in yogurt and mix everything really well.

16)Mix well. If this mix looks too dry for you, add some water.
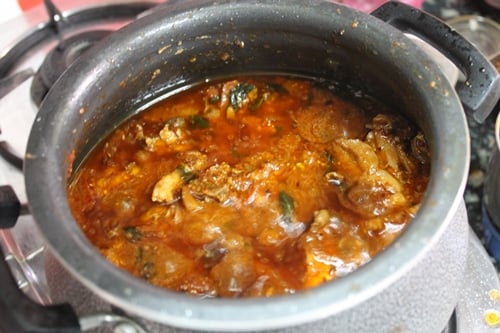
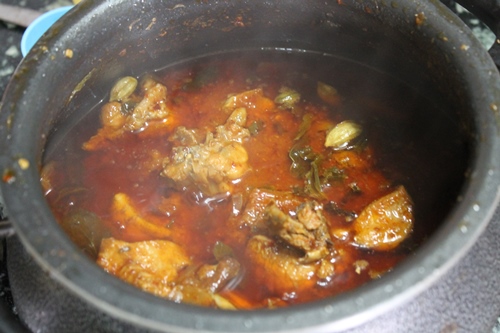
17)Cover and cook until the chicken is cooked. it will take around 10 to 12 minutes.
18)Now the chicken curry is done. You have to remember, we are going to mix this with rice. So taste and adjust the salt, the curry should be little salty.
Cooking Rice
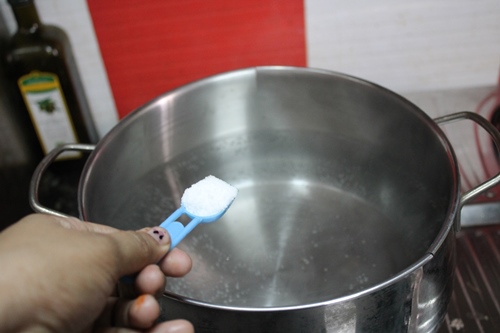
19)Bring lots of water to a full boil, season the water generously with salt.
20)Add in the soaked and strained rice.
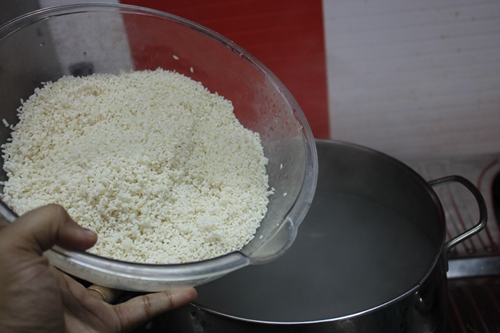
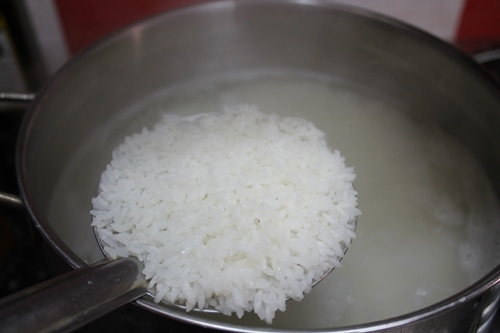
21)Cook until the rice is 80 percent cooked. This step removes the starch from the rice and also half cooks the rice. Strain the rice and add directly into the chicken curry.
Putting Dum
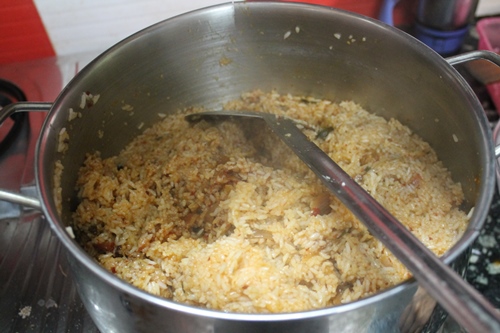
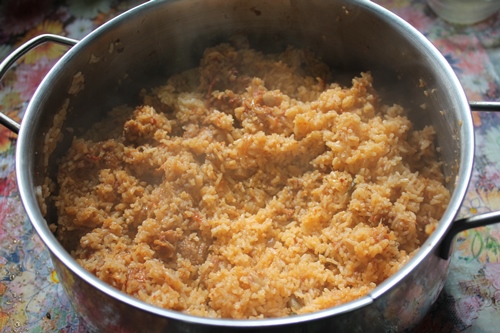
22)Add rice to the chicken curry and toss immediately really well.
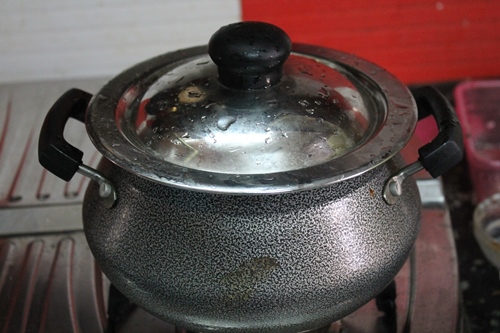
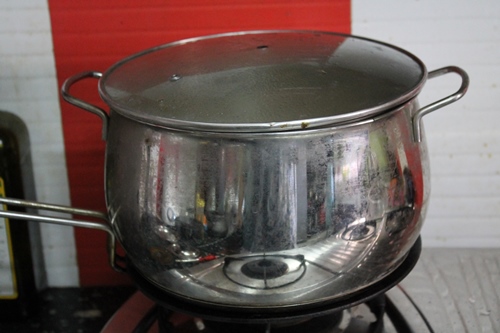
23)Cover the pot with a tight fitting lid. Place the whole pot on a tawa. Put the tawa on heat and cook for 10 to 12 minutes on low heat. This is called as "DUM".
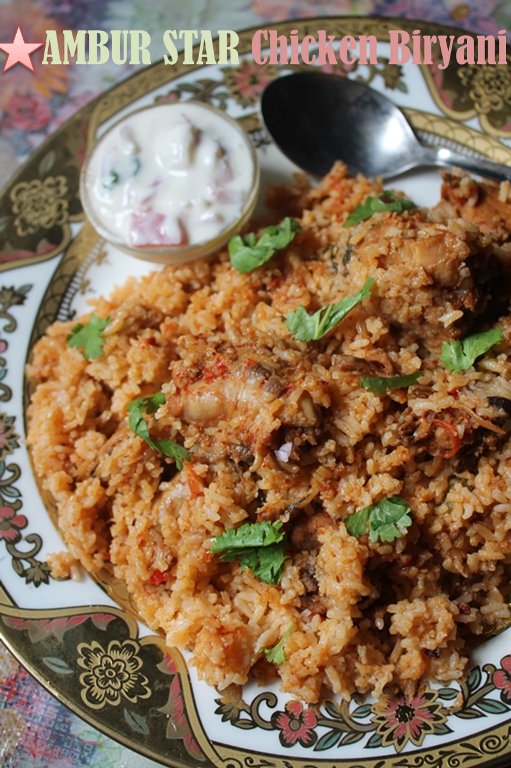
24)Ambur biryani is ready.
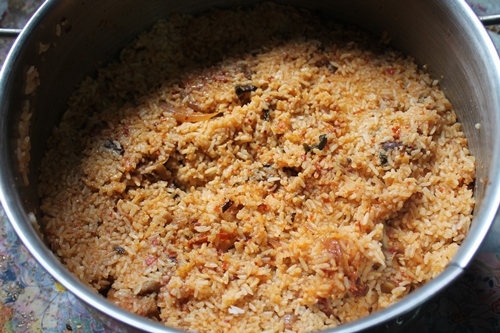
25)Fluff the rice gently, cover and set aside for 10 minutes. Then serve.
📖 Get Recipe
Ambur Star Chicken Biryani Recipe (Ambur Biryani Recipe)
Equipment
Ingredients
- 750 grams Chicken (bone in)
For Tempering
- ½ cup Coconut Oil
- 1 stick Cinnamon
- 10 no Cardamom
- 6 no Cloves
- 1 medium Onion peeled & sliced thinly
- 1 tablespoon Yogurt (Curd)
For Chicken Masala
- ½ cup Yogurt (Curd)
- 3 large Onions Peeled & Sliced thinly
- 3 tablespoon Garlic Paste
- 1 cup Coriander Leaves chopped finely
- 1 cup Mint Leaves chopped finely
- 2 tablespoon Ginger Paste
- 2 large Tomatoes sliced thinly
For Chilli Paste
- 10 no Dry Red Chillies (Regular)
- 10 no Kashmiri Dry Red Chilli
For Cooking Rice
- 2 cups Seeraga Samba Rice
- 1 tablespoon Salt to taste
- 3 litre Water to cook rice
Instructions
- Soak Rice - Wash seeraga samba rice very well in multiple changes of water. Soak rice in fresh water for 30 minutes.
- Chilli Paste - In a separate bowl, Soak both the dry red chillies in hot water for 15 mins. Strain and make it into a smooth puree, use the soaking water to grind the chillies into a puree. Set this aside till use.
- Tempering Spices - Now heat oil in a kadai. Add in cinnamon, cloves, cardamom and fry for a minute. Add in 1 tblspn of curd and saute for 30 seconds. Add in the sliced onion given in tempering and saute till onions turn golden brown.
- Make Chicken masala - Now in the same oil, add in ginger paste, garlic paste, coriander leaves, mint leaves and saute for 2 minutes until the leaves are wilted.
- Now add in the chicken, salt and toss well on high heat for 5 to 7 mins till the chicken is seared. Add in the sliced onions and tomatoes. Saute for 3 to 4 mins. They will cook down and leave out some water. At this point add in the dry red chilli paste, ½ cup of curd, salt to taste and mix well. Cover the pot and cook on low heat for 15 minutes. The chicken must be cooked and looks like a curry,.
- Cooking Rice - In the mean time, bring lots of water to boil. Add in salt to it and when it boils add in soaked strained rice. Mix well. Cook it for 7 to 8 mins. When you taste it the rice should have a bite in it. Once it is 80 percent cooked.
- Assembling - Take a nonstick pot, add the chicken curry, strain the rice and and add over the rice and toss to combine. Cover with a tight lid and place the whole thing over a tawa and cook on low heat for 10 to 12 mins. Turn off the heat and leave it for 15 mins.
- Serving - Now open the lid and fluff the rice. Once it is mixed, set aside for 10 minutes. Serve with raita.


Sharanya Skarp
Can we cook the same procedure with basmathi rice ?
Aarthi
@Sharanya SkarpYes u can do
Chamu
My mom's place is ambur & i am great fan of this Briyani from childhood.your recipe is just the Same la..haven't thought of trying this Briyani but now after seeing urs will try for sure..pls post for mutton also coz I am not sure about the mutton since it takes longer time to cook..
Anonymous
Wow it's my favorite ...I am from ambur .. Never tried to cook at home but now I will try yours... Super Aarthi..
Anonymous
I tried ...but it was like rice mixed with chicken curry kulambu......why the rice didn't absorb the flavour n the essence....what went wrong?
Aarthi
@AnonymousAfter mixing gravy with rice you have to put on dum till al water is evaporated and rice is done and fluffy..
Anonymous
Hi I ve been looking for biriyani recipes around for last twelve years . Congrats good try with ambur star biriyani . The dish presented looks like the rice is sticky and come out like a pongal or kulambu satham . Any tips to how to reduce this stickiness when making star or for that matter any other biriyani
Nal
Aarthi
@AnonymousIt do look sticky, but it is not that sticky...I took the pics immediately after opening the lid so it looks like that..After it has cooled down, it turned fluffy. follow the entire procedure, you will get perfect rice.
calicut hotels
biriyani is one of my favourite food..,Wish I get that plate right now from my computer screen, irresistible chicken biriyany.Thanks for sharing it with us
Unknown
Thanks Aarthi for ur wonderful step by step instructions on how to prepare ambur biriyani. I tried today and it was a great success.
Unknown
Thanks
Unknown
Thanks
Unknown
Hi Aarthi,
Thanks for the wonderful recipe of ambur biriyani. I tried today and it was excellent. Thanks for sharing as it helps everyone.
Regards,
Martine A
Anonymous
Hi Aarthi,
I tried you Ambour Biryani recipe last Sunday. It came out well.
Is it the same recipe for mutton Biryani too?
Aarthi
@AnonymousYou can make it like the same. But cook mutton before adding rice.
chad
This was one of the best biryanis I have had in ages..It beats the hyderabad biryani. My aunt from Bangalore reccommended this biryani and had no words to say...Jeeraka Samba is a must for this recipe. The aroma filled my house yesterday...I cooked this and put it on the dum (in the oven) and went for swimming with my baby..When we came back...oh my god..too gud...Had for breakfast as well..Well done!!!
Chad
Sydney
raja
Being an amateur in cooking, i followed ur procedure and the recipie and it turned out yo be an awesome biryani...thank you soo much for sharing...even my friends loved my biryani n shared ur link to them 🙂 keep cooking n sharing
Merlin Senthil
Superb Briyani. Thanks for posting it
Sonu
Hi please help me as soon as possible....should I follow the same procedure for mutton instead of adding chicken I put mutton and can I pressure cook it till mutton fone...and then add rice and dum rite na...
Aarthi
@Sonuyes first cook mutton then add rice and dum
Malavika
Hi Aarthi,
I searched for Ambur biriyani recipes and found yours. I knew it was genuine since I had seen Star biriyani being made on a travel show. I followed your recipe and it turned out perfectly!! So thanks a lot.Good luck! 🙂
Amber
I have 2 boneless chicken breast cut into cubes and I need the biryani for 2 people who are good eaters...how much rice shud I use? I don't want to disrupt the balance of flavours and I haven't cooked non veg ever so wanna make sure it's perfect. ..pls help 🙂
Aarthi
@AmberAdd 2 cups of rice
Anonymous
Hi! This is the first recipe I am adapting from your website. The instructions and pictures were so well explained! Was so easy to follow...Came out really well. Made my friends very happy!!! Thank you so much:) Keep up the great work!
Lily
I don't hv the Indian rice, can I use jasmine rice, . I try not to buy more rice as 2 of us eating. Thanks.
Aarthi
@Lilyyes u can use any rice u have on hand
Anonymous
First time trying to make briyani and it turned out delicious!!! Thanks for the well-organized recipe.
Dinesh
Shouldnt we put biriyani masala in this...?
Aarthi
@Dineshno need
Praveen Nair
Hello Artiji.. I tried your recipe today.. the taste was very good, I did a small modification added some chicken Marsala powder and saunf..
The only issue was that the biryani was a bit dry.. Can you please suggest some modification..
Regards
Praveen
Aarthi
@Praveen Nairadd a little more water then
Anonymous
I am a bachelor living with friends and have always had a interest for cooking. Your website is virtually a treasure trove. Whenever i hear a new dish, I check it out on your website and ta-da its always there detailed, pictured and ready to follow. Thanks a lot for such detailed and delicious looking recipes. I have tried chutneys, curries and rice recipes. Now its turn for Biryani's 🙂 . Thank you
sherin
Hello
Can u pls giv me the measurements to make with 2 kg chicken. Plsss
Aarthi
@sherinjust increase the recipe 4 times
Anonymous
Hi I tried this I was getting raw smell of the chillies while eating....and totdl of 28 chillies is not more right because I want to try again...please help
Aarthi
@Anonymousu have to saute the chillies well in oil. so you wont get the raw taste
Urvashi
Just tried this yesterday here in Singapore and it was superb! Used basmati rice though and put some lime juice at the end. But i couldnt get enough of this, the taste was so authentic. Fantastic recipe. Thank you!
VIshal
Hey there I'm quite bad when it comes to adding the right amt of salt can you tell me approx how much you added at each stage?
Also i noticed that there wasn't any lemon juice in this recipe..i hope that's right
arun
Hi ,
Its an ausum receipe and you are doing a great job. i would definitely try it out.
Anonymous
hi aarthi...
I am a big biryani fan... but have never had the courage to make one thinking its too tedious...
my little sister shared this recipe with me... and it was my first attempt at making biriyani... thanks to your recipe it turned out to be quite tasty...
🙂
Sivanesh Rulz
1/2 Cup oil means how much of table spoon ?
Aarthi
1/2 cup is 120 ml
maweeya!
Can I substitute the kashmiri red chillies with kashmiri powder or red chillies? If so, can you please tell me the proportions of either? Thanks in advance! 🙂
This is my favourite biryani in the whole world. Really excited to try this.
Aarthi
yes u can use that
sai nirosha
Hi Aarthi, I have a measuring cup of 250ml= 1cup. So can u pls tell me how many cups of rice does 500gms jeera samba rice I should add.
Alagu
Vanakam aarthi indha procedures appadi pressure cooker la whistle podu normal biriyani maathiri seiya mudiyuma
Divi
Thanks for the recipe Aarthi.. tried today and it came out well except the spice level.. before mixing rice the spice level was moderate .. but when I tasted briyani finally, spice level is very high..
Could you suggest any idea to make up the dish if the spice level is high ?
Violet Thomas
Hi Arti,tried this biryani today and it turned out awesome n my husband loved it.Thanks a ton.
Aneeta
I tried out.. And "It turned out so perfect" says my husband.. Hearty thanks for the recipe..❤
Akshaya Naresh
Best briyani recipe ever!!I couldn't believe it was so easy yet totally delicious!!Thank you for the wonderful recipe Aarthi!!
zayan
the recipe is almost correct, but the preparation method is not, that why even in the pics the finished biriyani doent look like the actual biriyani. I'm from Ambur BTW.