
Soft and Healthy Whole Wheat Bread Recipe with Step by Step Pictures and video. This 100% wholemeal bread is perfect recipe for beginner bread bakers and it is made with wheat flour, milk powder, honey, milk, yeast and water. Easy to make wheat bread which turns out soft and is perfect for making sandwiches or toast. Check this perfect brown bread & white bread which can be made in less than 2 hours.
Wheat Bread
We have been trying to eat healthy and low fat dishes. During busy mornings, my life saver is wheat bread. We enjoy it during morning as a toast with some eggs and coffee. Brown bread available in super markets and bakery has all purpose flour added in them. So we are kind of staying away from it and baking our own bread.
Jump to:
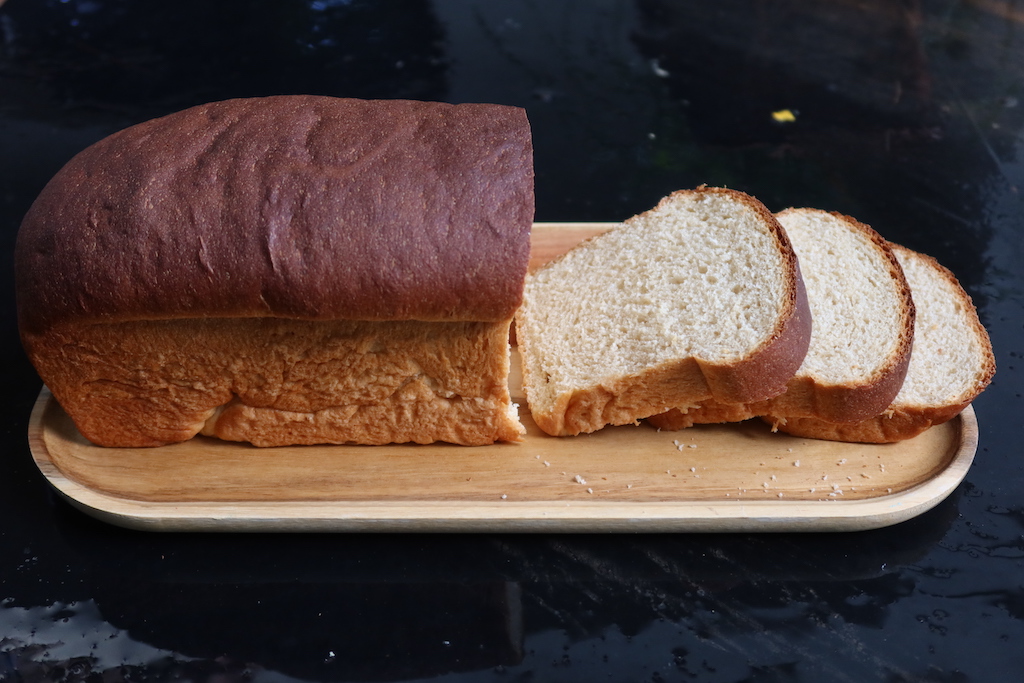
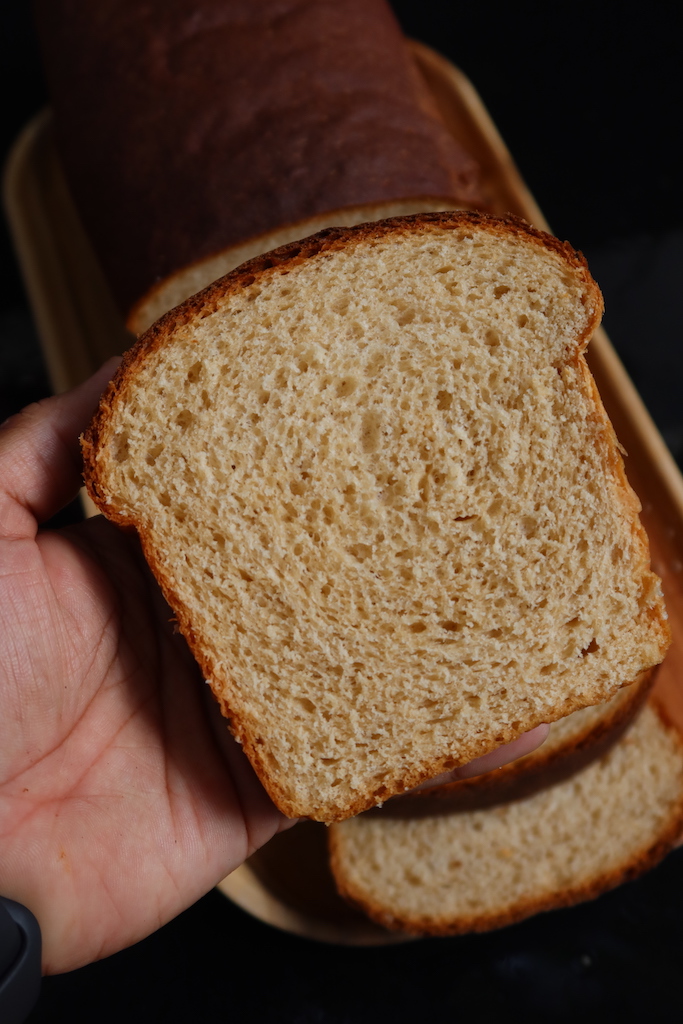
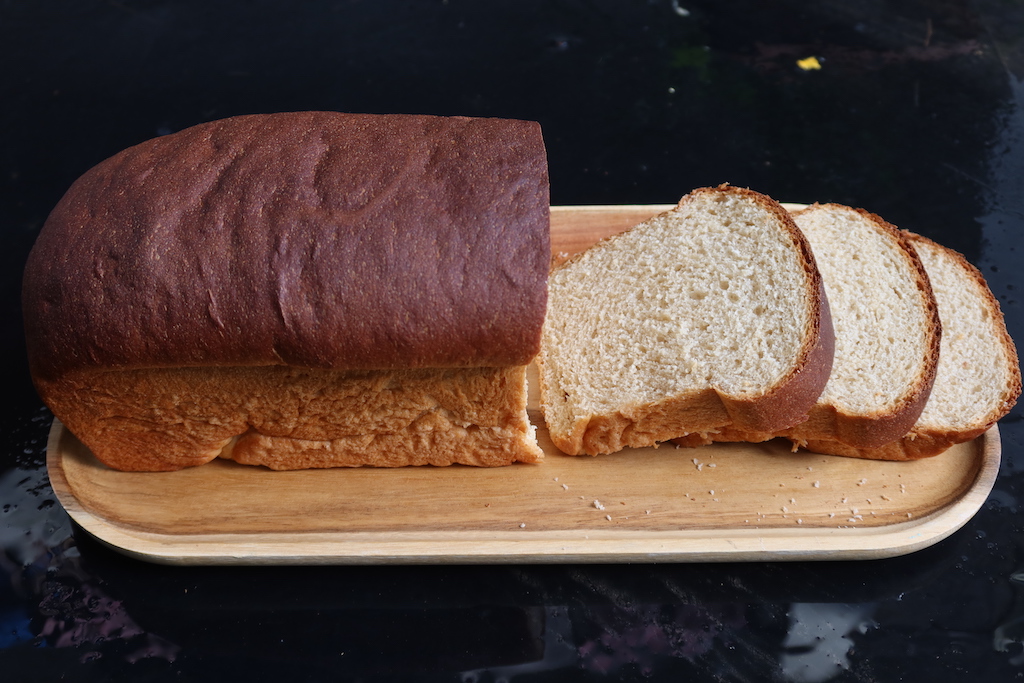
This bread was my experiment, i just measured my own ingredients and baked this. Just look at those texture, very porous and spongy like. It turned out to be perfection. This is so easy to make as well and it makes the perfect toast or taste just delicious when spread with some jam or preserves over it when sliced fresh from the loaf.
Sometimes when making wheat bread at home, it tends to have a dry texture. In this blog post, I have shared all the tips and tricks to make a perfect whole wheat bread with step by step pictures and video.
About Whole Wheat Bread
Whole wheat bread is also known as wheat bread, brown bread is made using wholemeal flour, yeast, honey, milk powder, butter, milk and water. Even though it is easy to make, there are few tips and tricks that I follow to get the perfect texture.
You might think that now we can find so many wheat breads out in the markets, why would spend time making it at home. But let me tell you a secret. The bread which you find in store have some maida added to it. So it is best to make it yourselves.
You all know my love for baking bread at home from my array of bread post in my blog. So far I have tried 100% Whole Wheat Bread, White Bread, Multi Grain Bread. And i went a little fancy and made a fruit bread & Focaccia Bread. So far everything turned out so beautiful and they all been my favorite ones.
Similar Recipes
White Bread
Multi Grain Bread
Oats Honey Bread
Milk Honey Bread
100% Whole Wheat Bread without Maida
I have tried so many bread recipes so far. This is the best recipe for wheat bread which I am making for decades now. The texture of the bread was so perfect. It was soft inside and has a perfect crust. You can use this bread for making sandwiches or toast.
I have made so many version of bread in my blog, so far this is the best whole wheat bread i have ever made. It is sturdy enough, slices perfectly and has a great texture and flavour to it. I specially love this bread when it is toasted, used this in my avocado toast recipe.
Freshly baked bread is a family favorite. As soon as the bread comes from the oven, we slice it and spread some jams or any toppings and have it. I would suggest eating this for breakfast along with some fruits and a glass of milk. Sure that it is a healthy option than having regular white bread.
Wheat Bread Ingredients
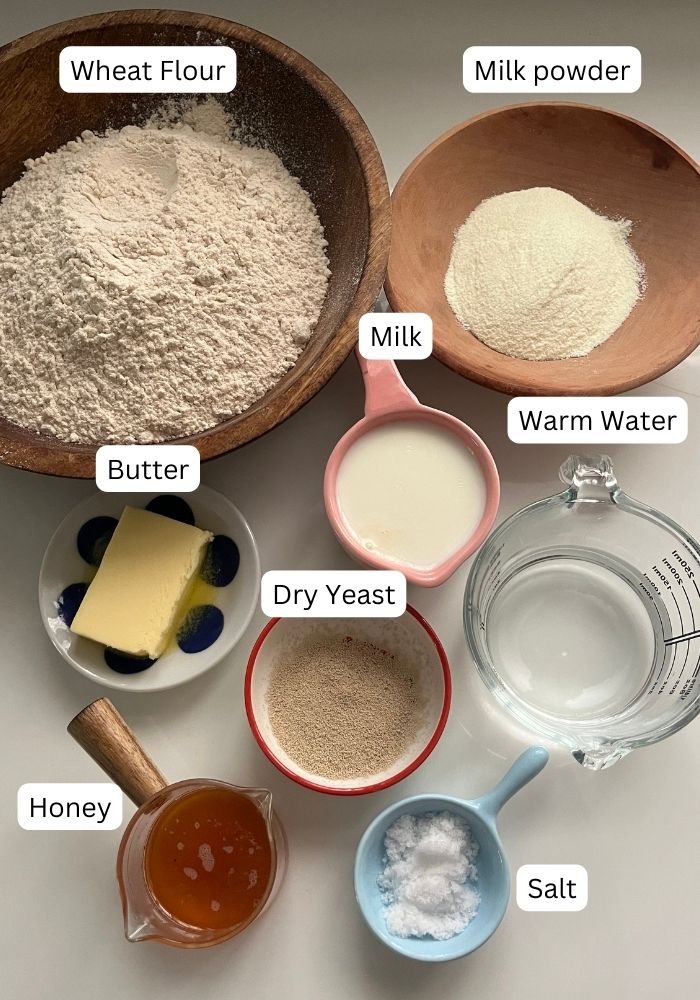
Whole Wheat Flour - use the finest quality wheat flour you can find. I used store bought wheat flour and it worked just fine. Always prefer using 100% whole wheat flour.
Milk Powder - I added some milk powder in this bread. In my personal opinion, it is very important to use milk powder. This provides the texture to the bread and also prevents it from going dry.
Milk - Along with milk powder, I added some milk to lock in the moisture. This helps soft texture in the bread.
Butter - soft unsalted butter is added into the bread dough during the final stages of kneading. It helps incorporate some fat into the bread dough which inturn makes it soft.
Honey or Sugar - I prefer to use honey, you can use sugar as well. You need some kind of sweetener to activate yeast.
Yeast - one of the most important ingredient in making bread. I use dry yeast, if you struggle activating yeast, read my FAQ section where I have talked about yeast.
Water - make sure your water is Luke warm to touch. If you use too hot water, then yeast might not activate.
Wheat Bread Made Multiple Ways
I have been baking bread for over a decade. I have tried so many versions of wheat bread over the years. You can make whole wheat bread many different ways including with eggs and without eggs.
Milk Wheat Bread - making wheat bread entirely with milk makes the wheat bread soft and moist.
Wheat Bread with Eggs - Making wheat bread with eggs yields softer bread. You can check brown bread recipe for complete recipe.
Using Vital Wheat Gluten - Vital wheat gluten adds extra gluten into the bread dough, hence making it more elastic and soft.
Wheat Bread Dough Texture
Kneading wheat bread dough is very important to achieve chewy texture. You can either knead it in a mixing bowl by hand or use stand mixer.
If you don't have a stand mixer, you have to take all the ingredients in a large mixing bowl. Mix the ingredients together using your hands. Bring the dough together using your hands. Then transfer the mixture to a work surface or silipat sheet and mix the dough till it is soft and smooth. You have to keep kneading this for 10 to 15 minutes.
If using stand mixer, You have to mix the dough for 8 to 10 minutes. The dough would have pulled away from the sides of the bowl. It should look smooth and supple.
Step by Step Pictures
Pre-preparation & Activating Yeast
1)Grease a loaf pan with some butter. My loaf pan size is 25 x 11,5 x 7cm.
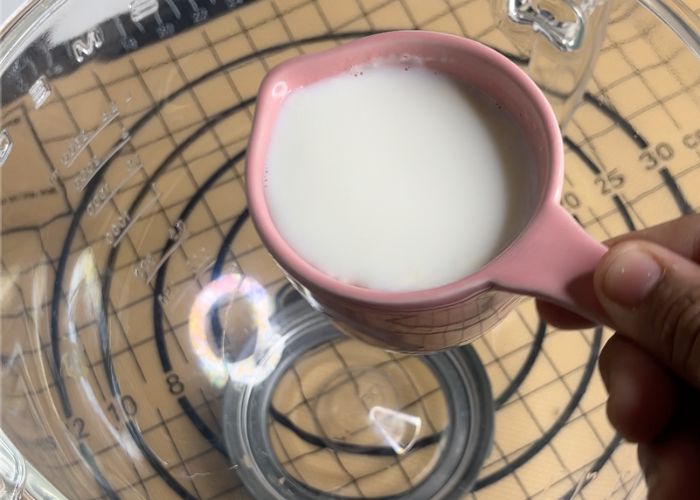
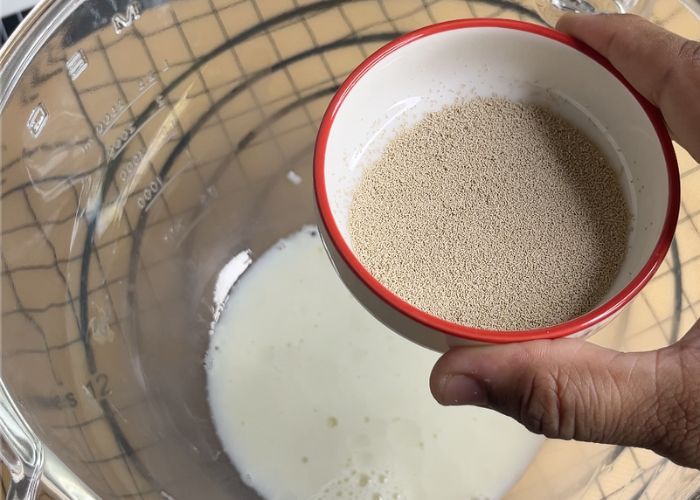
Take ½ cup warm milk into the bowl of the stand mixer. Make sure the milk is around 100°-110°F (luke warm) which is the ideal temperature for dry yeast. Don't use too hot milk else the yeast will die.
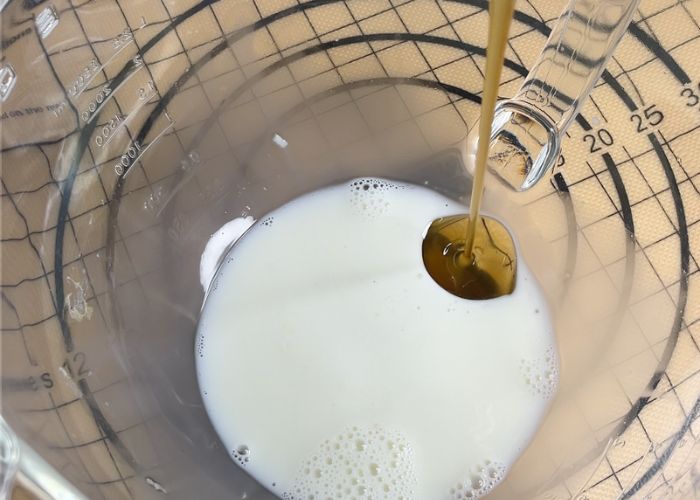
2)Now you have to use some kind of sweetener. I used 3 tablespoon of honey for making this bread. You can use sugar as well. But honey works great in this recipe.
3)Now take 2 teaspoon of dry yeast. Sprinkle yeast over the warm milk. Once yeast is added into the milk, allow it to activate for few minutes.
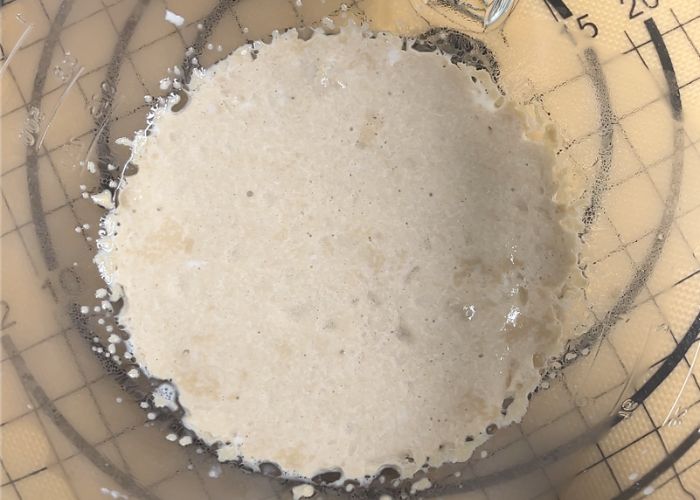
4)In around 5 minutes, the mixture will look foamy and bubbly like this. This means the yeast is activated.
If your mixture looks watery with no active yeast bubbles. Don't proceed with the recipe, else the bread won't rise.
Adding Remaining Ingredients
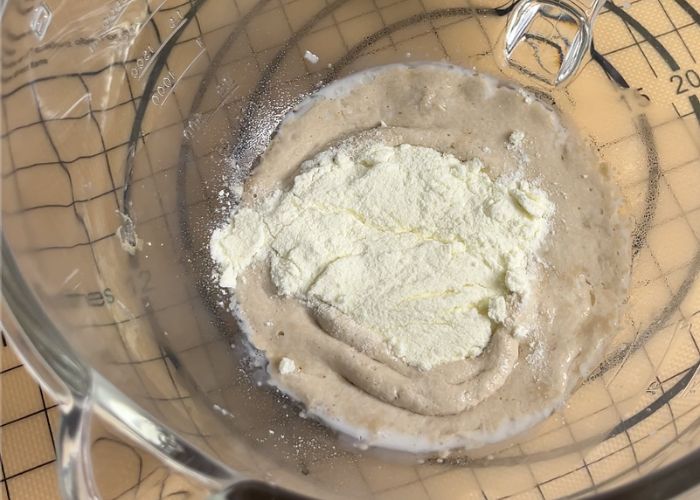
5)Now to the active yeast mixture. Add in milk powder. I used around ⅓ cup of dry milk powder.
6)Now add in whole wheat flour into the stand mixer bowl. This is store bought whole wheat flour.
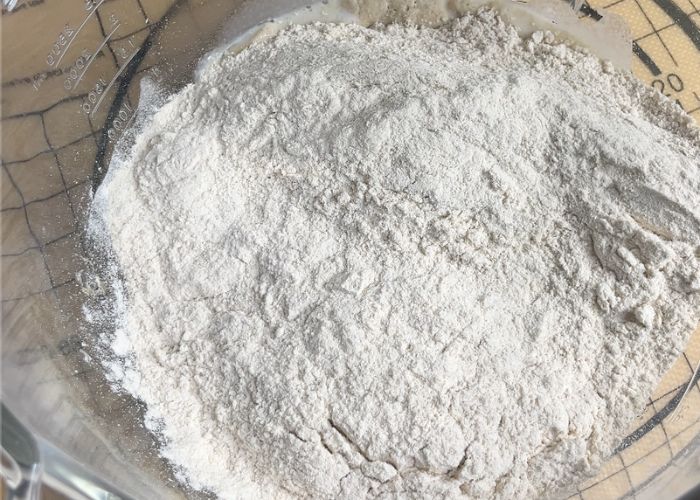
7)Add in salt.

Kneading Dough
8)Now that all ingredients is added into the stand mixer. Place the bowl in the stand mixer and start kneading.
Pro Tip: If you don't have a stand mixer, you have to take all the ingredients in a large mixing bowl. Mix the ingredients together using your hands. Bring the dough together using your hands. Then transfer the mixture to a work surface or silipat sheet and mix the dough till it is soft and smooth. You have to keep kneading this for 10 to 15 minutes.
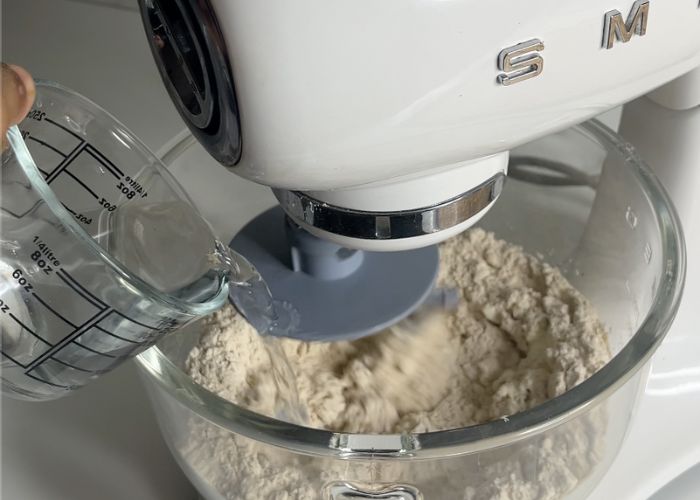
9)Once the dough starts to mix, pour in warm water into the stand mixer while the machine is mixing. Make sure the water is warm and not hot.
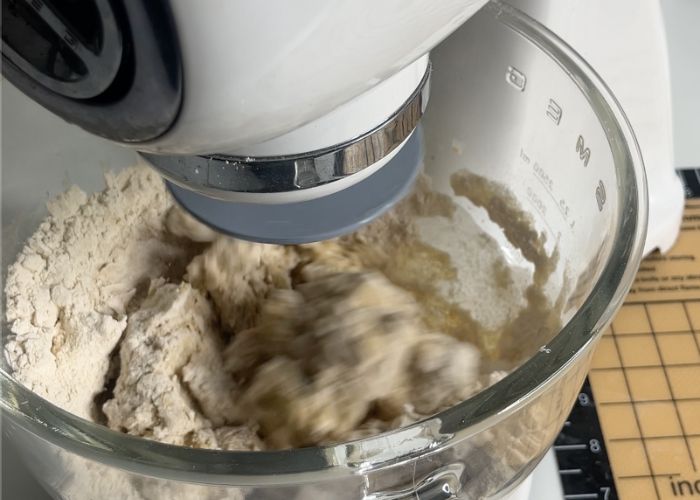
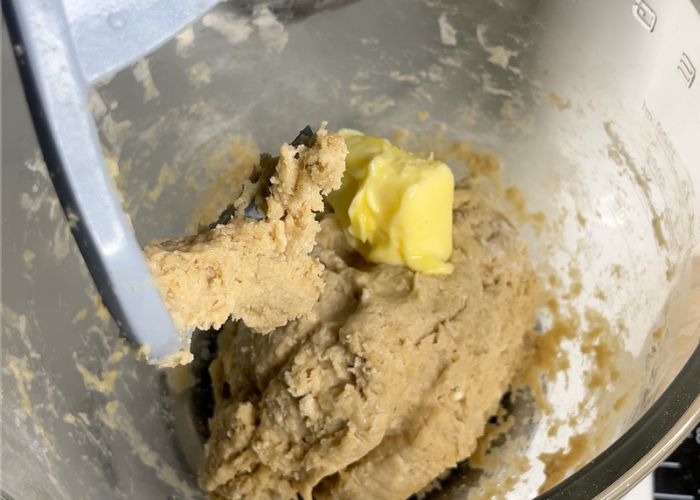
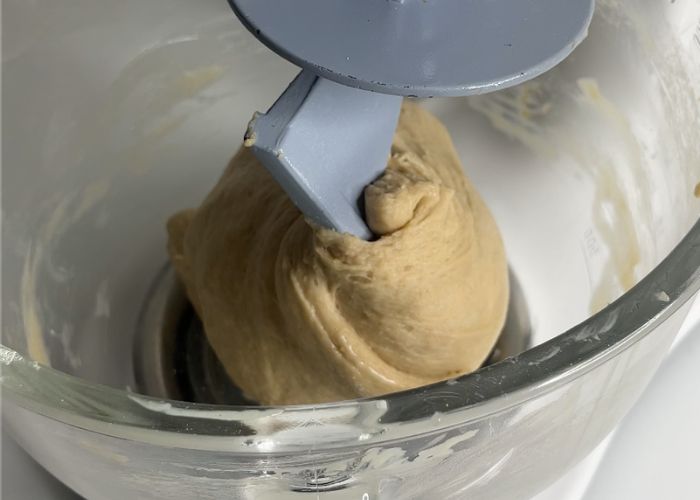
10)Once the dough starts to come together. Add in 3 tablespoon of soft butter into the dough and continue mixing.
11)This is how it looks after 5 minutes of mixing. The dough will look smooth and the butter would have incorporated into the dough.
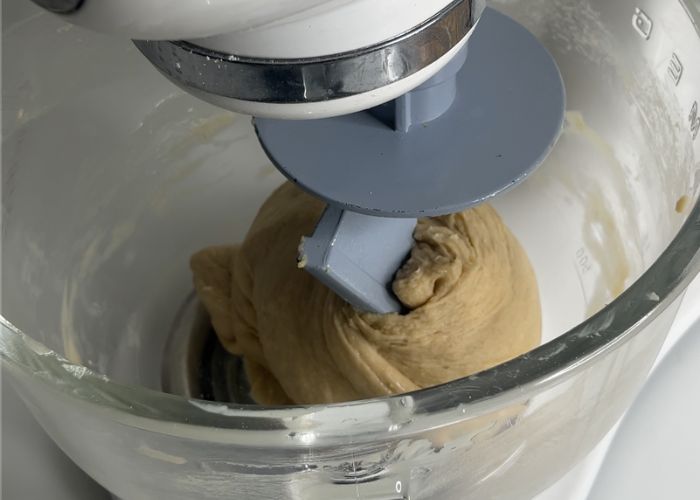
12)This is after 5 more minutes of mixing. You have to mix the dough for 8 to 10 minutes. The dough would have pulled away from the sides of the bowl. It should look smooth and supple.
Pre shaping Dough for First Proofing
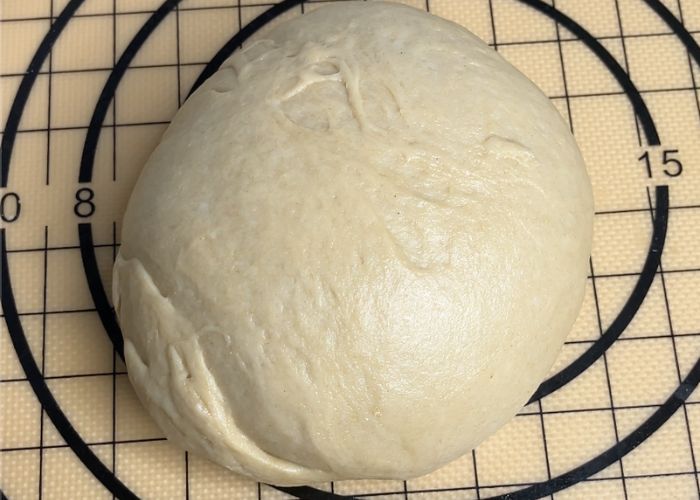
13)I removed the dough to a work surface. The dough will look soft and supple. Shape the dough into a smooth ball like shape. This is pre shaping, it allows the dough to rise more evenly and smoothly.
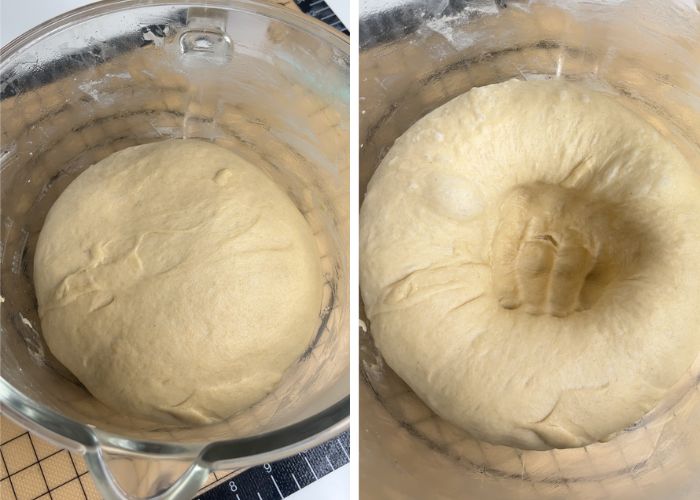
14)Place the dough into the slightly greased stand mixer bowl. Cover the bowl using a kitchen towel and allow the dough to rise for 1 to 2 hours in a warm spot.
Pro Tip: I like to place the bowl inside the oven with light alone turned on. This ensure the place is warm enough for the dough to rise faster. You can follow this method for rising dough in winter.

15)Now the dough has risen. You can see it looks more than doubled in size.
Shaping Proofed Dough into Bread Shape
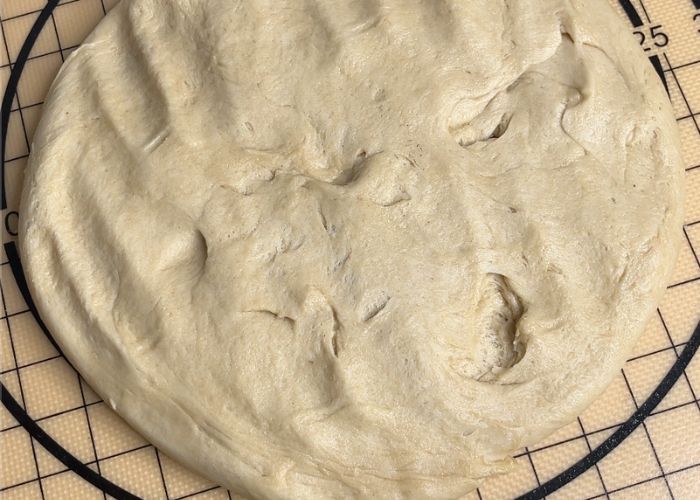
16) Remove the proofed dough into the work surface with smooth surface facing down. Flatten it evenly similar to the size of the loaf pan.
17)Start rolling and tucking the dough more tightly. Shape it into a loaf like. I like to keep the loaf pan near me as a guide.
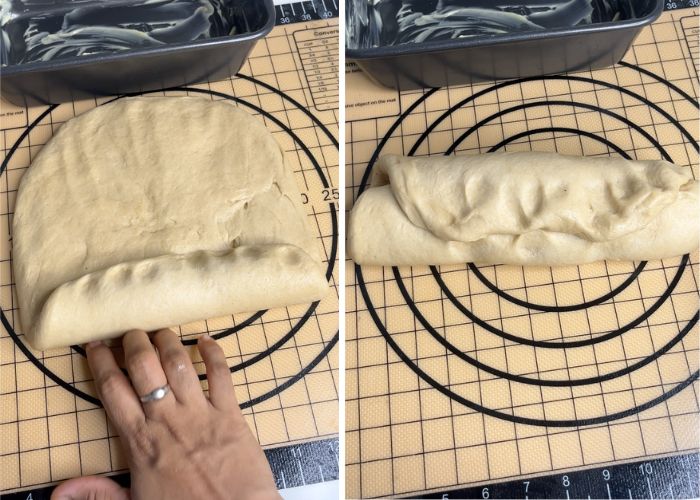
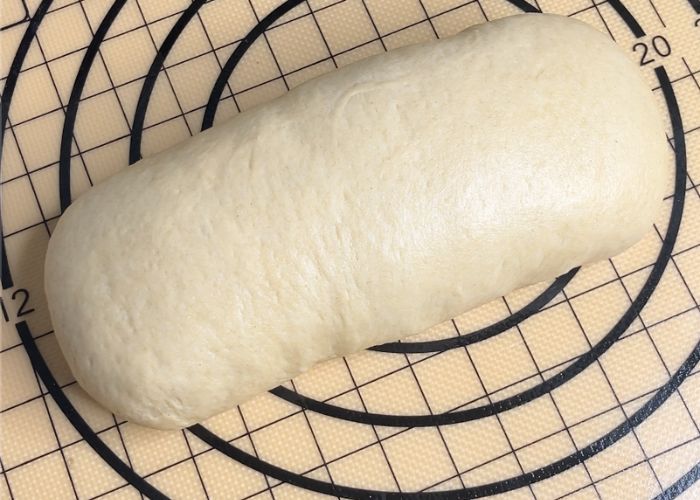
18)Once you invert the dough it should look like this with a smooth top.
Proofing Bread
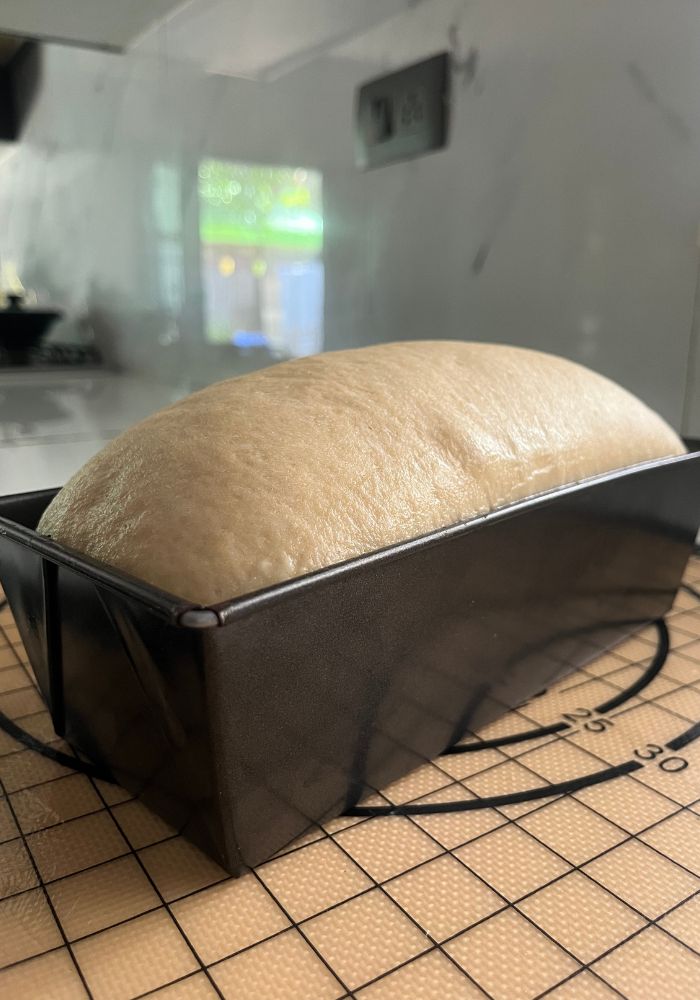
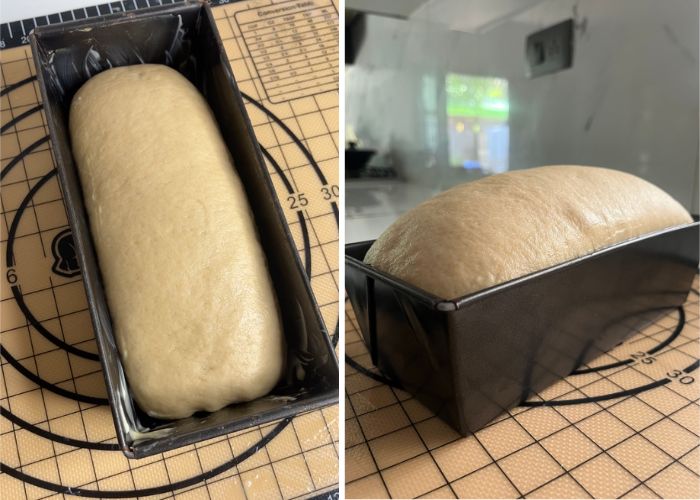
19)Place the shaped loaf bread into a greased loaf pan. I grease it with some soft butter. Once the dough is placed inside the loaf pan, cover it loosely with a kitchen towel.
Allow the loaf pan to rise for 1 hour till it is almost doubled in size. The bread should rise 1 inch above the rim of the loaf pan.
Baking Bread
20)While the bread was proofing. Preheat oven to 180 degree C | 356 degree F just 10 minutes before baking.
Once the dough has proofed, place it inside the oven and bake for 32 to 35 minutes in the centre rack of the oven. If you find the bread is getting too dark on top, you can tent it (cover loosely) with aluminium foil and continue baking.
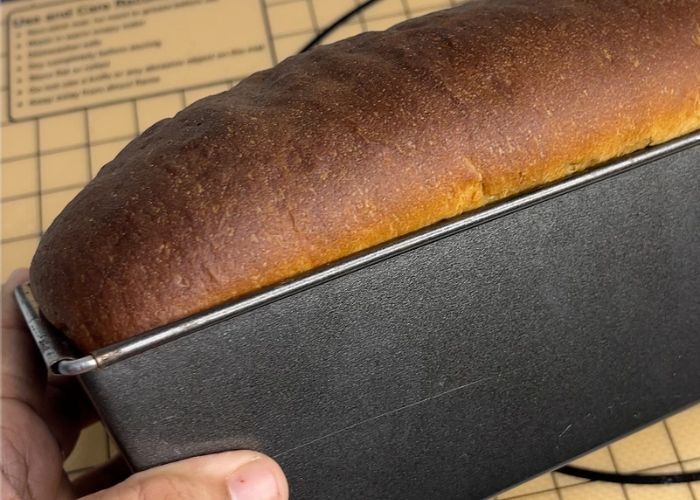
21)Once the bread is baked, remove it from oven. Let the bread cool for 10 minutes in the pan. After 10 minutes, remove the bread from loaf pan and allow it to cool for at least 2 to 3 hours.
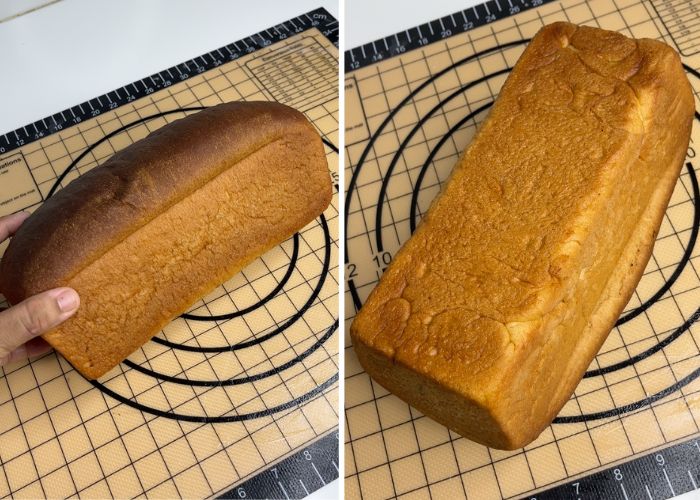
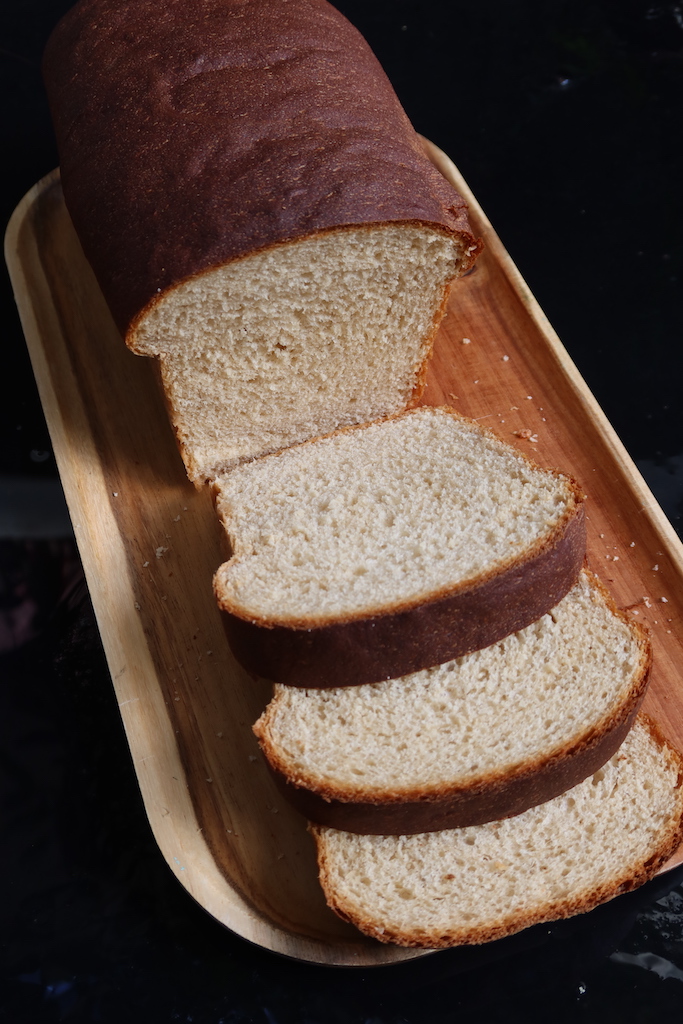
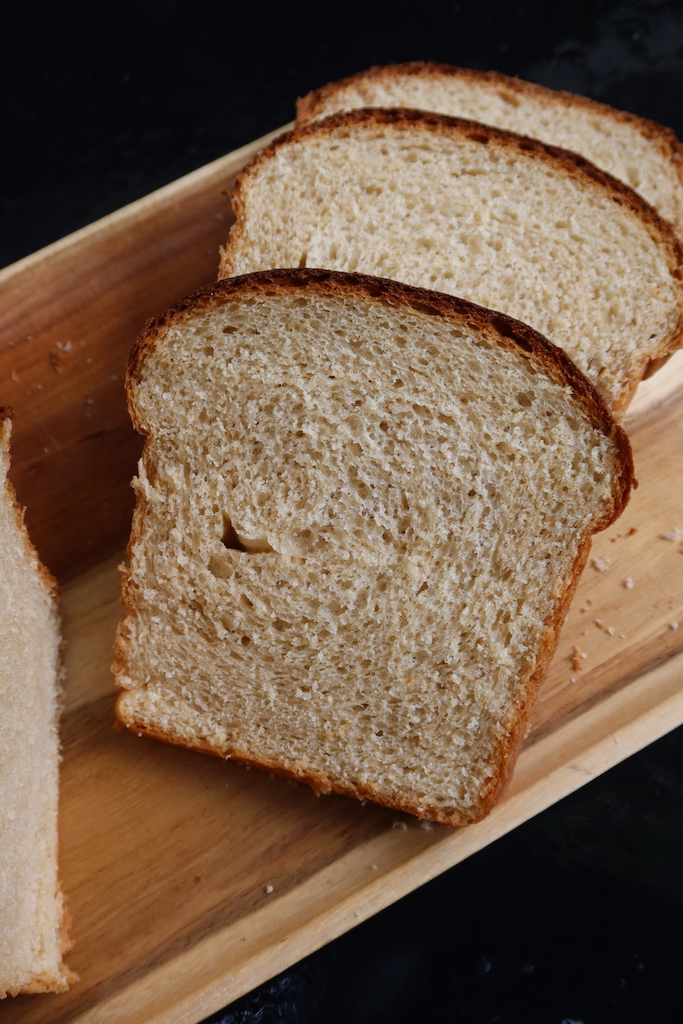
22)Once the bread is completely cooled. Slice and serve.
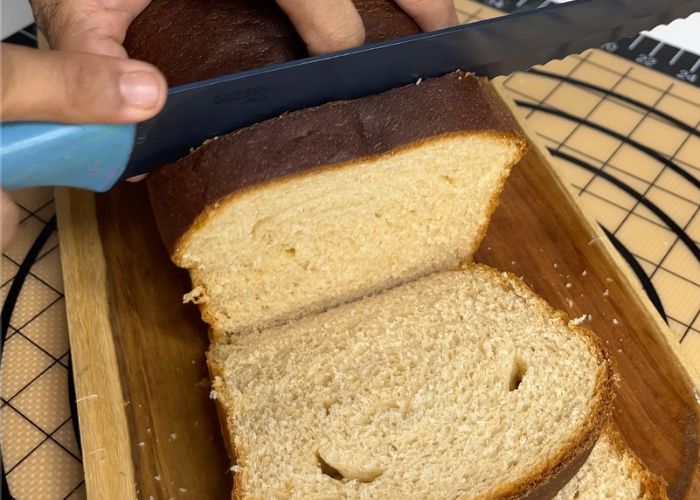
23)Enjoy.
Expert Tips
Choose Right Wheat Flour - I use whole wheat flour or whole meal flour which I buy from store. Homemade wheat flour doesn't work in this recipe. So try and source best quality whole wheat flour from stores to yield soft bread.
Milk Powder is Important - You have to use milk powder in this recipe to get the proper soft texture. The fat molecules in the milk powder combines with milk and butter adds moist texture to the bread making wheat bread soft.
Right Temperature - use warm milk and warm water for making dough. Make sure the milk is around 100°-110°F (luke warm) which is the ideal temperature for dry yeast. Don't use too hot milk else the yeast will die.
Kneading is Key - if you make bread often, you now know how important it is to knead the dough. So take your time and knead it.
Shaping - Make sure you shape the dough before proofing and after shaping into loaf pan. This helps with better texture in bread.
Cool Bread - Once the bread is baked, remove it from oven. Let the bread cool for 10 minutes in the pan. After 10 minutes, remove the bread from loaf pan and allow it to cool for at least 2 to 3 hours.
FAQ
1)How to Activate Yeast?
One of the questions which I often get is Why my bread is not rising. Why my dough is not doubling up. Why my bread is dense.
- Take warm water in a bowl. Use Luke warm water. Dip your finger in the water and it should be very warm. Just like a warm bath water.
- sprinkle little sweetness like sugar, honey. Because yeast loves warm and sweet environment.
- now sprinkle yeast over it. I use dry yeast.
- leave aside for 5 mins to activate. The yeast mix should be bubbly and foamy. This means yeast is activated.
2)Why my yeast is not activating or looking foamy?
There is 3 reason for your yeast not activating. You must have added yeast to too hot water so the yeast has died. You have used cold water so yeast didn't activated. Finally your yeast must have expired. Always store yeast in freezer in an air right container.
📖 Get Recipe
Wheat Bread Recipe | Whole Wheat Bread Recipe | 100% Wholemeal Bread (Atta Bread)
Equipment
Ingredients
- ½ cup Warm Milk (120 ml)
- 2 teaspoon Dry yeast
- 3 tablespoon Honey or Sugar
- ⅓ cup Dry Milk powder (40 grams)
- 3 cups Whole Wheat Flour (360 grams) plus more if needed
- 2 teaspoon Salt
- ¾ cup Warm Water (180 ml)
- 3 tablespoon Butter
Instructions
- Grease a loaf pan with some butter. My loaf pan size is 25 x 11,5 x 7cm.
- Take ½ cup warm milk into the bowl of the stand mixer. Make sure the milk is around 100°-110°F (luke warm) which is the ideal temperature for dry yeast. Don't use too hot milk else the yeast will die. Now you have to use some kind of sweetener. I used 3 tablespoon of honey for making this bread. You can use sugar as well. But honey works great in this recipe. Now take 2 teaspoon of dry yeast. Sprinkle yeast over the warm milk. Once yeast is added into the milk, allow it to activate for few minutes. In around 5 minutes, the mixture will look foamy and bubbly. This means the yeast is activated.
- Now to the active yeast mixture. Add in milk powder. I used around ⅓ cup of dry milk powder. Now add in whole wheat flour and salt into the stand mixer bowl. This is store bought whole wheat flour. Now that all ingredients is added into the stand mixer. Place the bowl in the stand mixer and start kneading.
- Once the dough starts to mix, pour in warm water into the stand mixer while the machine is mixing. Make sure the water is warm and not hot. Once the dough starts to come together. Add in 3 tablespoon of soft butter into the dough and continue mixing. Knead the dough for 10 minutes, The dough will look smooth and the butter would have incorporated into the dough.
- I removed the dough to a work surface. The dough will look soft and supple. Shape the dough into a smooth ball like shape. This is pre shaping, it allows the dough to rise more evenly and smoothly. Place the dough into the slightly greased stand mixer bowl. Cover the bowl using a kitchen towel and allow the dough to rise for 1 to 2 hours in a warm spot so it doubles in size.
- Remove the proofed dough into the work surface with smooth surface facing down. Flatten it evenly similar to the size of the loaf pan.Start rolling and tucking the dough more tightly. Shape it into a loaf like. I like to keep the loaf pan near me as a guide. Once you invert the dough it should look like this with a smooth top. Place the shaped loaf bread into a greased loaf pan. I grease it with some soft butter. Once the dough is placed inside the loaf pan, cover it loosely with a kitchen towel. Allow the loaf pan to rise for 1 hour till it is almost doubled in size. The bread should rise 1 inch above the rim of the loaf pan.
- While the bread was proofing. Preheat oven to 180 degree C | 356 degree F just 10 minutes before baking. Once the dough has proofed, place it inside the oven and bake for 32 to 35 minutes in the centre rack of the oven. If you find the bread is getting too dark on top, you can tent it (cover loosely) with aluminium foil and continue baking.
- Once the bread is baked, remove it from oven. Let the bread cool for 10 minutes in the pan. After 10 minutes, remove the bread from loaf pan and allow it to cool for at least 2 to 3 hours. Once the bread is completely cooled. Slice and serve.
Video

Notes
- Activating yeast before adding is important. The yeast should turn foamy. If the yeast is not activated then the bread won't rise. If you use instant yeast, then you can add it straight to the wheat flour. Don't need to activate it separately.
- You can add sugar instead of honey to the dough.
- Milk powder is essential for the soft wheat bread. So don't skip it.
- You can use oil or margarine instead of butter, but butter adds better flavour.
- If you don't have stand mixer, you can use a mixing bowl. If you are kneading it by hand, you might need to knead it for longer time. Knead the dough for 10 minutes till it turns soft and supple.


Selvi john
This came out very well. Thank you.
If possible, can you pleaae add shelf life of such recipies.
Parvathi
Can you please tell me replacement for egg?
Aarthi
You can skip the egg and use extra milk
Jeen
Hello,
I tried your wheat bun recipe it came out well..
Thanks for sharing the recipe.
I have a doubt..After shaping the loaves can I just refrigerate over night? So that i can bake bread first thing in the morning.
Or
Can I just mix the dough and refigerate overnight and make the loaves in the morning and bake it?
Thanks for the guidance
Keerthi R
It was yum and successful recipe ...love it
Keerthi R
Mam..such a great successful recipe...done twice and was very happy...tq
TRADOLOGIE
Thank you for providing such an enriching piece of information. Your way of putting things out was simply brilliant.
Priya
What is the shelf life of wheat bread with egg?
Aarthi
2 days room temperature and a week in fridge.
Jyotsna
I am trying your whole wheat bread recipe. Should I keep the bottom heat on for baking the bread or both top and bottom. Also do I need to dust flour on the greased baking pan?
Geetha
What kind of milk powder can be used for this recipe?
tanya
HI, it seems like a lovely recipe. Do i need to change yeast amount if using instant yeast?
Jen
Hello,
I tried your whole wheat bun and it came out well. Thanks for the receipe.
I have a doubt in baking wheat brread. Can I just mix the dough and after fermentation, shape the loaves and keep it in fridge overnight so that I could bake bread first thing in the morning?
or
Can I just mix the dough and let it ferment overnight in fridge?
Thanks
Reenu Rebecca Joseph
Is it store bought atta or grinder wheat flour
Aarthi
it is store bought.
Usha
If I want to use vita gluten for this recipe how much do I add . Tq
Aarthi
2 tbsp would be sufficient.