
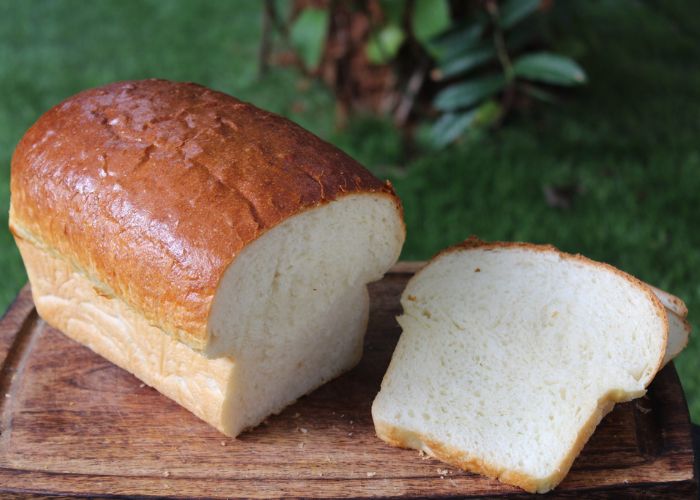
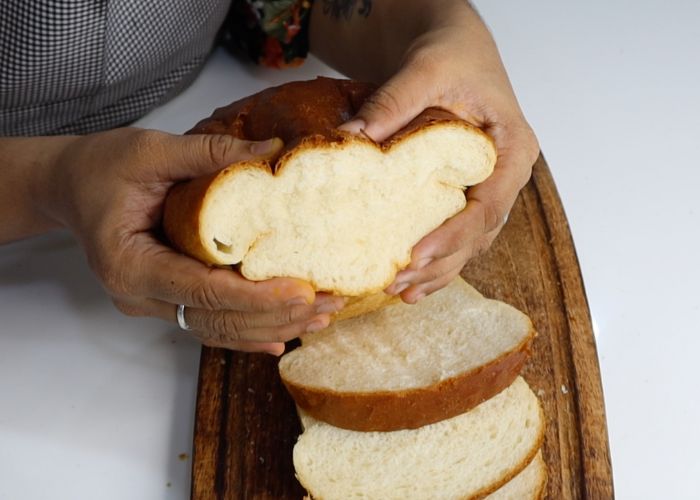
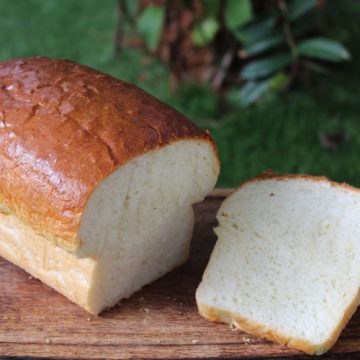
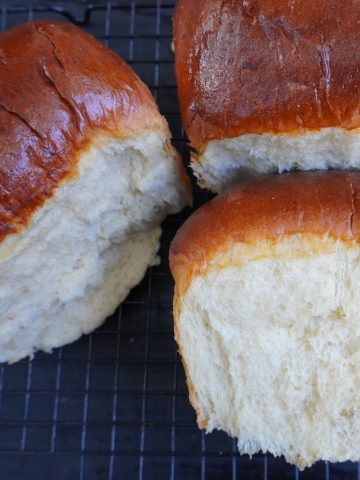
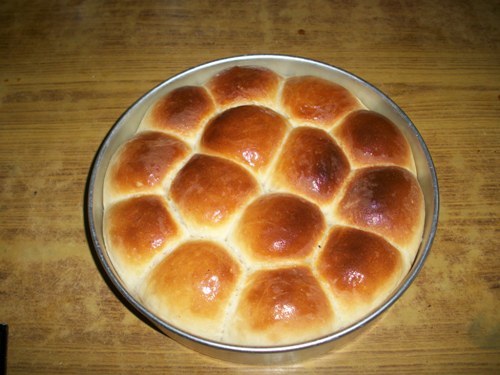
White bread is fluffy, tender and better than store bought loaves. Try this foolproof white bread recipe and you will definitely never buy bread from stores again. If you are looking for healthy bread option, then you definitely have to check my whole wheat bread. In this blog post, I have shared simple basic recipe for making soft fluffy white bread recipe with step by step pictures and video.
White Bread Recipe
I have made hundreds of bread recipes over the past decade. But I always wonder how store bought bread are light weight airy and tender. Finally last week I made a very basic white bread recipe and it turned out super yummy and very similar to store bought bread (or even better). For a healthy alternative check rye bread recipe.
Jump to:
About White Bread Recipe
White bread typically refers to breads made from wheat flour from which the bran and the germ layers have been removed (and set aside) from the whole wheat berry as part of the flour grinding or milling process, producing a light-coloured flour.
This milling process can give white flour a longer shelf life by removing the natural oils from the whole grain. Removing the oil allows products made with the flour, like white bread, to be stored for longer periods of time avoiding potential rancidity. Check my sandwich bread.
If you are making bread with hands. You might have to knead the dough using your heels of your hand to push the dough out and bring it back to the centre, turning it over and repeating the process again until it passes the window pane test.
Kneading dough with hands takes time, energy and patience. It will take around 15 to 25 mins. Meanwhile If you are using stand mixer or hand mixer then the process of kneading will be much faster. I found out that it takes a good 10 to 15 mins for the stand mixer to knead the bread dough.
Related Recipes
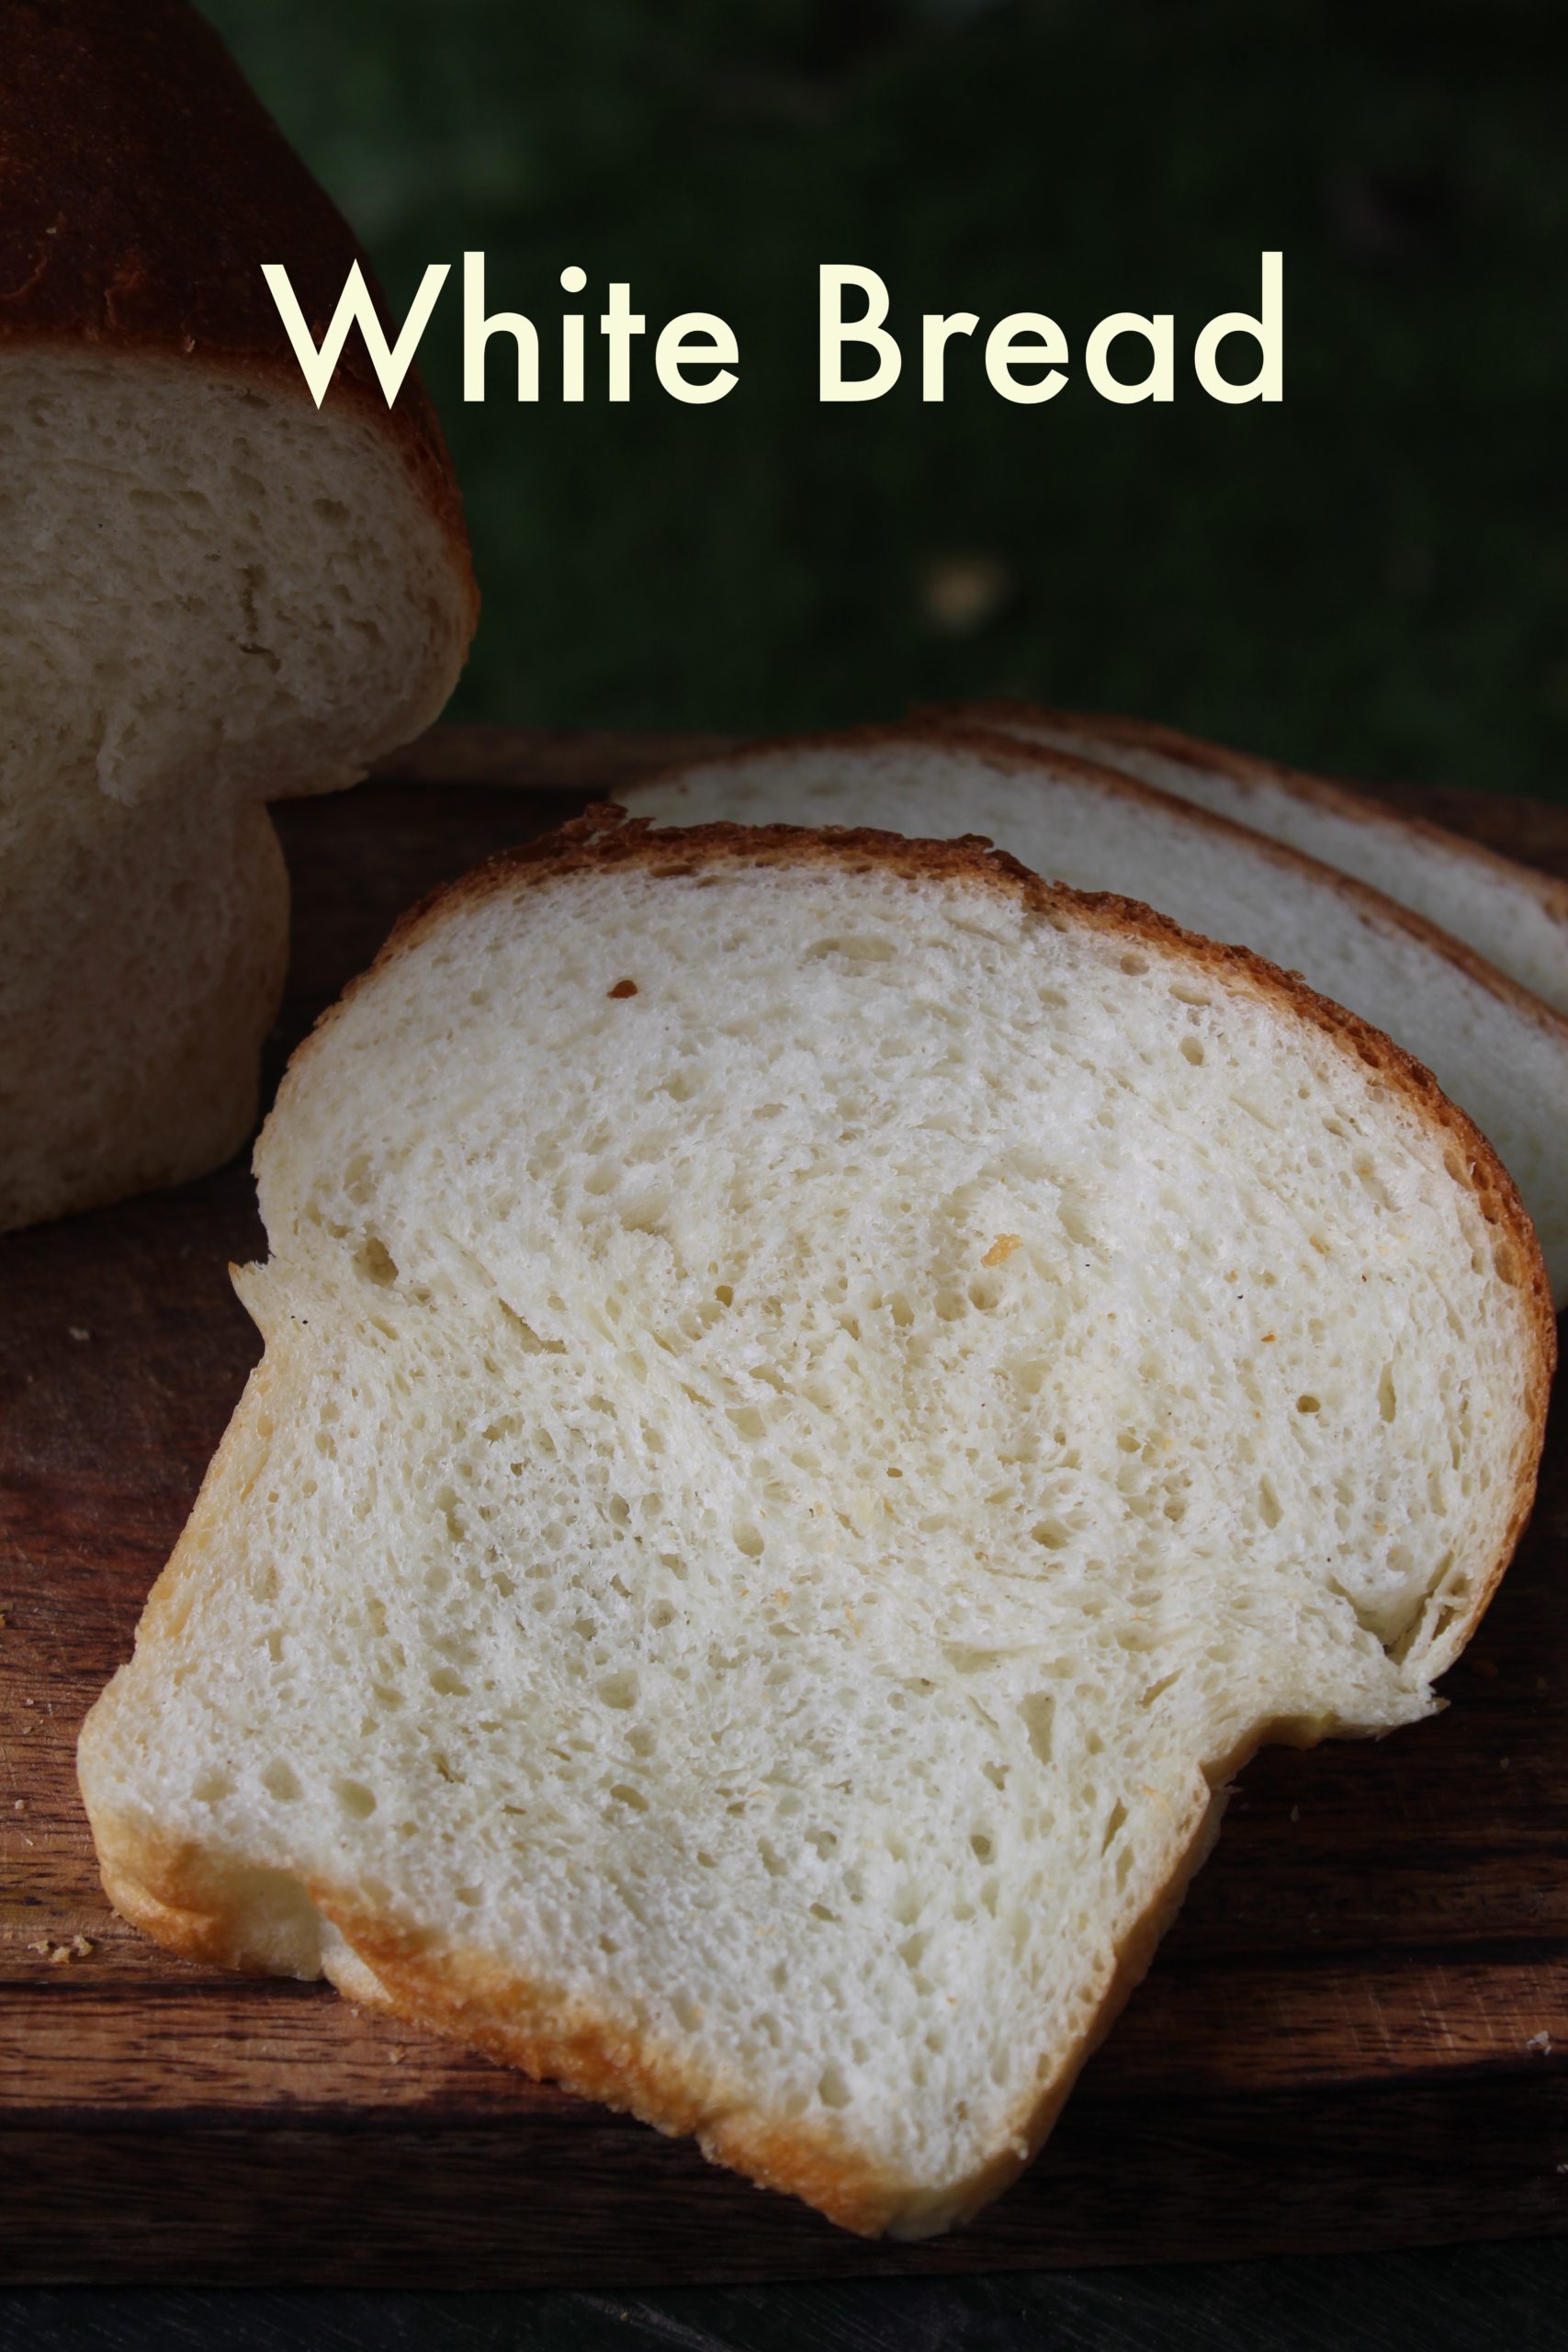
Bread has to be light, airy and little chewy in texture to get you the satisfaction in bite. This bread passed all the best plus it very easy to make. It can be made from start to finish in less than 2 hours.
White bread calls for ingredients like flour, sugar, salt, yeast, milk, oil and egg. Ingredients used are very basic and definitely you might have all the ingredients on hand. There are few techniques which I am sharing here to get you the perfect texture.
Eggs are used in this white bread recipe which helps in making the bread light weight and airy.
Similar Recipes,
Ingredients
- All Purpose Flour - use good quality refined flour also known as all purpose flour or maida. If you can, you can opt for bread flour which results if more delicious bread.
- Dry Yeast - make sure your yeast is fresh and active before using. I have shared all the info about yeast below. Make sure you read.
- Sugar - I prefer using white sugar for making bread. You can use honey.
- Salt - one of the most important ingredients for the taste of bread.
- Milk (Luke Warm) - I prefer whole milk. It helps to keep the bread moist and tender.
- Egg - using egg in bread and buns gives fluffy soft results. Egg is used as egg washing the bread to get soft crust.
- Olive Oil - you need some kind of fat for the bread. You can use melted butter as well.
Step by Step pictures
Dry Ingredients
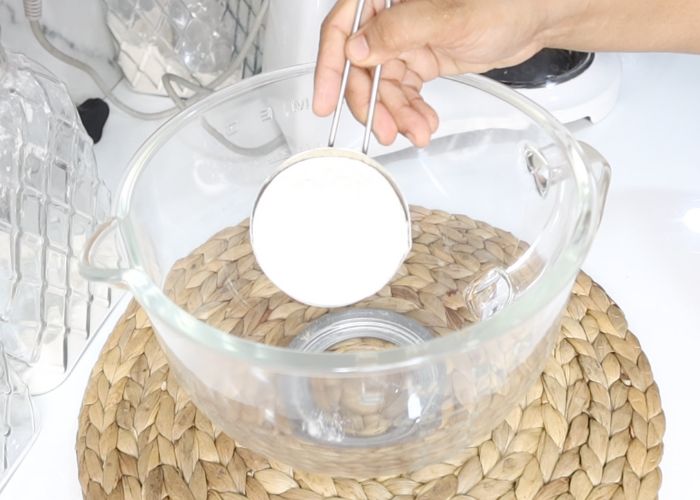
1)I am making this bread dough in a stand mixer. It is fast easy and effective. if you don't have a stand mixer, you can easily mix the dough in a large mixing bowl. You might need to knead the dough for a longer time.
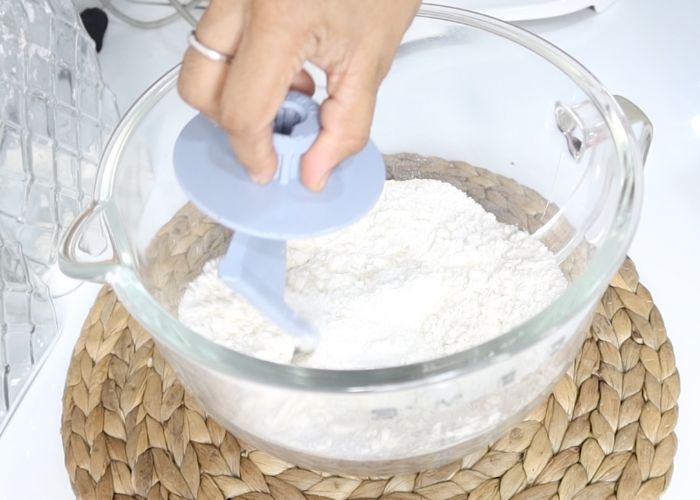
In a stand mixer bowl add in plain flour. This is refined flour.
2)Add all the ingredients directly into the stand mixer bowl. Add sugar into the flour.
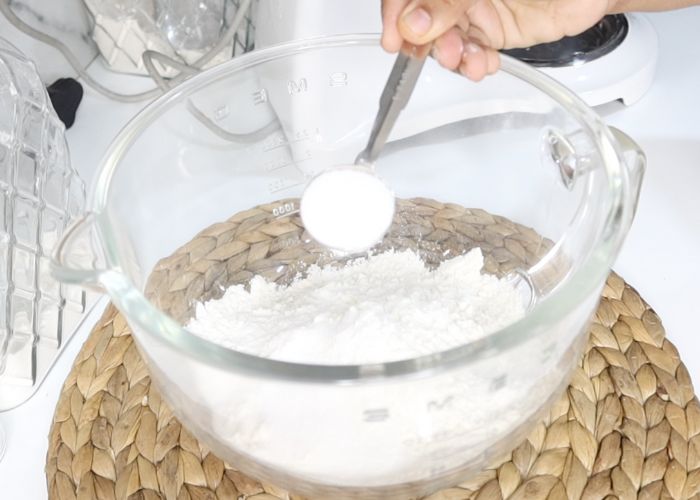
3)Now add salt into the stand mixer.
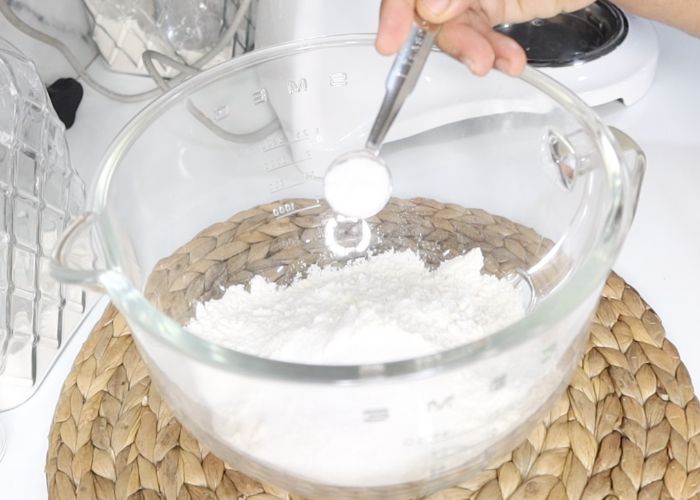
4)Sprinkle dry yeast into the plain flour.
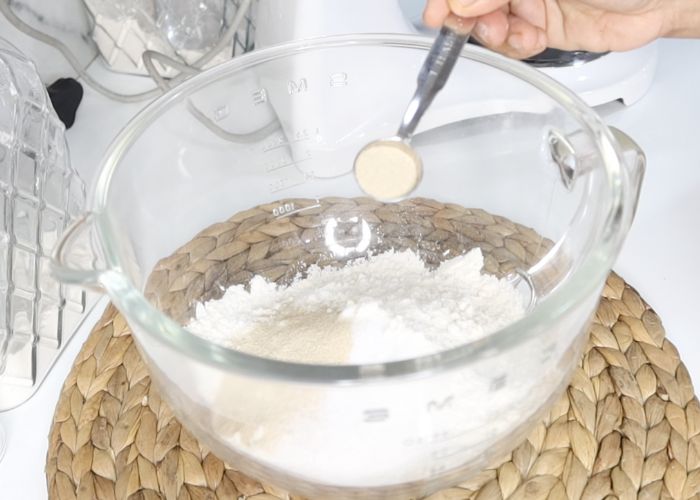
5)I am using my dough hook to mix the sugar, salt and dry yeast into the plain flour. This is your dry ingredients.
Wet Ingredients
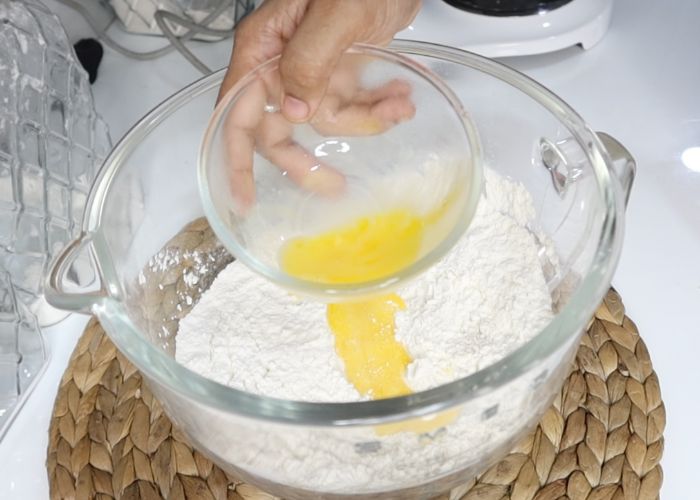
6)Crack open an egg in a bowl and use a fork or whisk to mix it really well. Now pour most of the egg into the flour leaving just 2 teaspoon of the egg mixture.
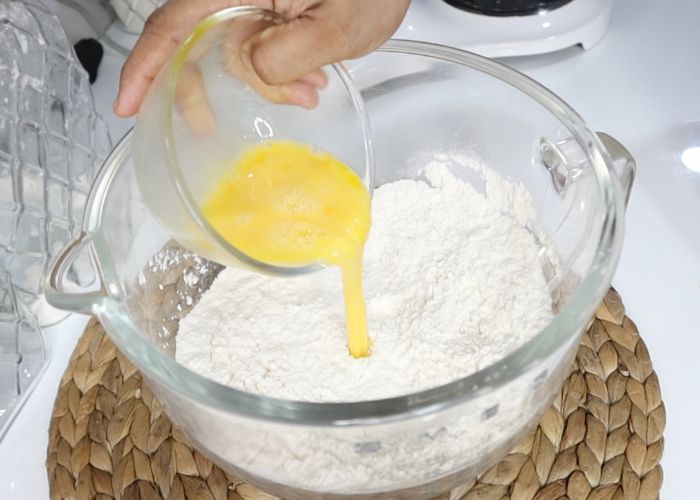
7)You need just 2 teaspoon of beaten egg for egg wash. Reserve this for later.
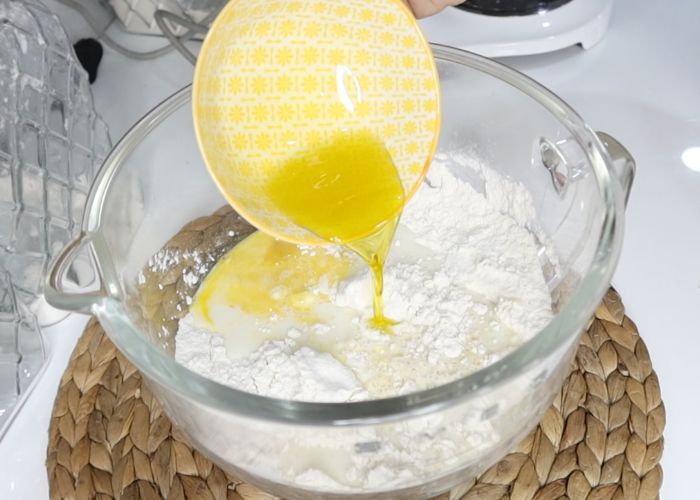
8)Now to the stand mixer, pour in warm milk. Make sure the milk is luke warm and not hot or cold. If you use too hot milk in the flour, then the yeast won't activatel
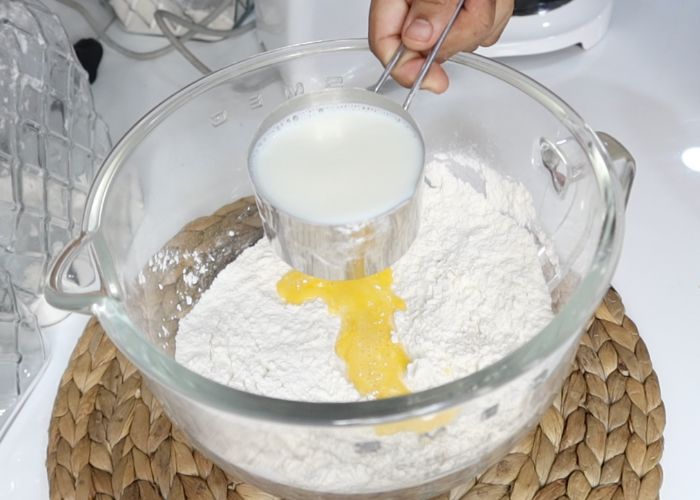
9)Now pour in oil. I am using olive oil, you can use melted butter instead of oil.
Mixing Dough
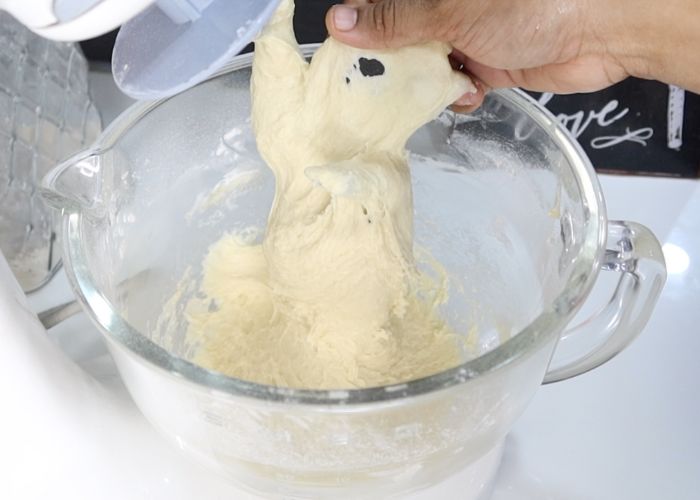
11)Place the bowl in the stand mixer. Start kneading the dough at slow speed till milk and flour is mixed through.
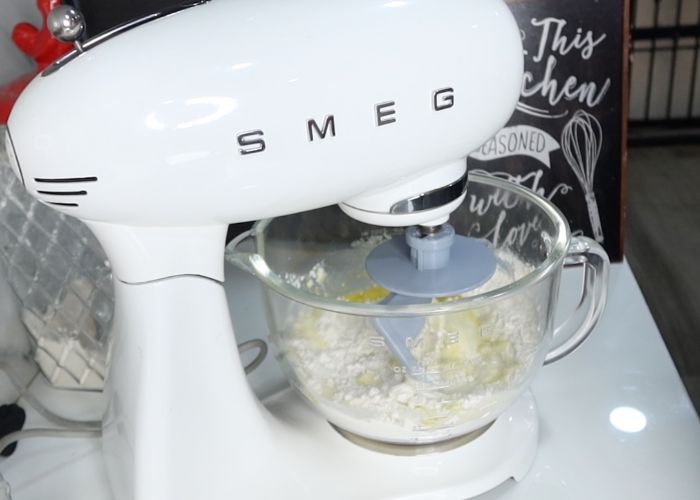
12)After few minutes of kneading, you will see the dough looks slightly sticky.
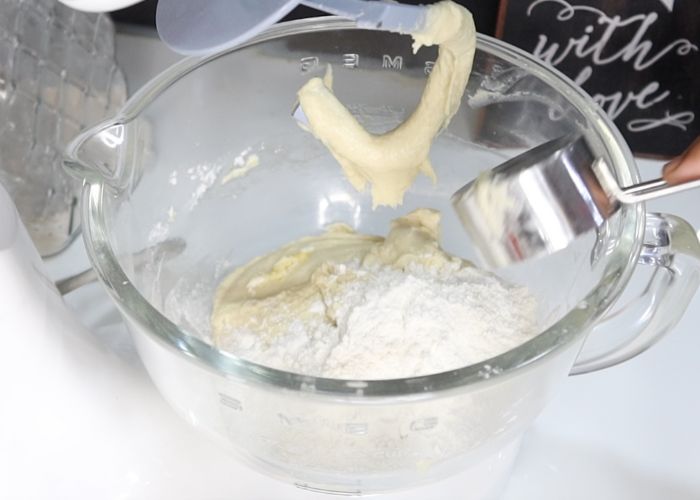
13)Now add some more flour if needed, and continue mixing at low speed.
Window Pane test
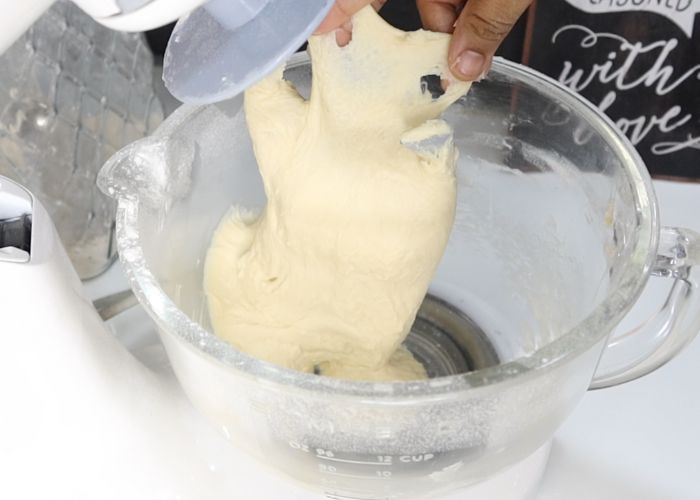
14)Once the dough is kneaded for 5 minutes, take some of the dough and check for window pane test.
Take a small ball of the dough and stretch it into a square. Keep on stretching until it becomes a thin film in the middle without breaking. The dough must be thin enough to pass light through it. If it is obtained without any tear, then your dough is properly kneaded.
As you can see now the dough has torn. Now the dough is not ready and gluten hasn't developed enough. Continue kneading for another 5 more minutes.
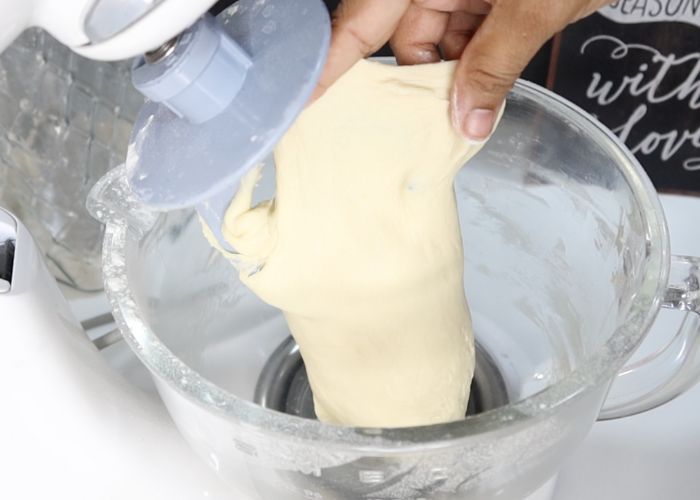
15)This is after 5 minutes, I checked for window pane test again. As you can see the dough dough tears, so knead for some more time.
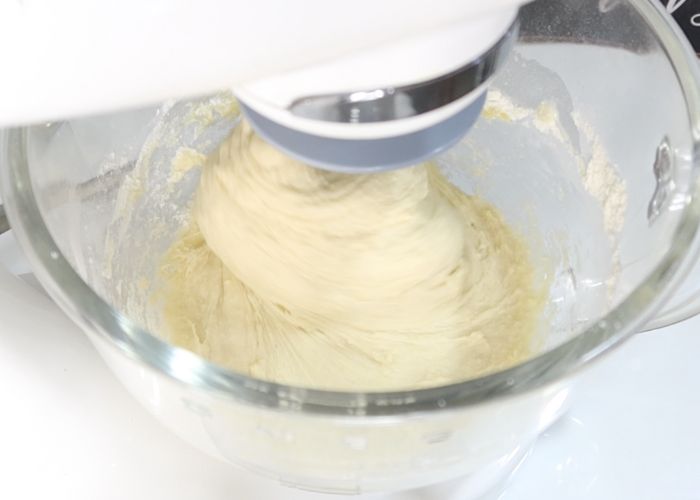
16)After another 5 minutes of knead. The dough starts to pull away from the sides of the bowl in one large mass. This indicates the dough has kneaded enough.
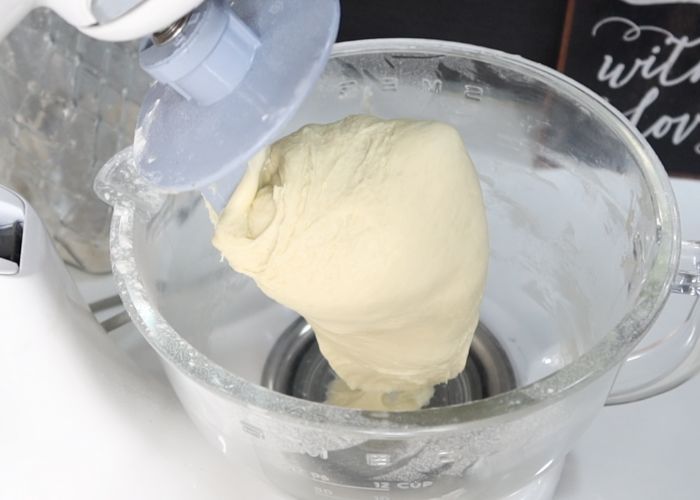
17)Now let's check for window pane test. As you can see the dough has stretched and gluten has developed.
First Proofing
18)Once the dough passes the window pane test. Remove the dough from stand mixer. Use a spatula or plastic bench scraper to remove to the dough from the bowl to a work surface. Shape it into a smooth dough ball. Place it in an oiled large bowl.
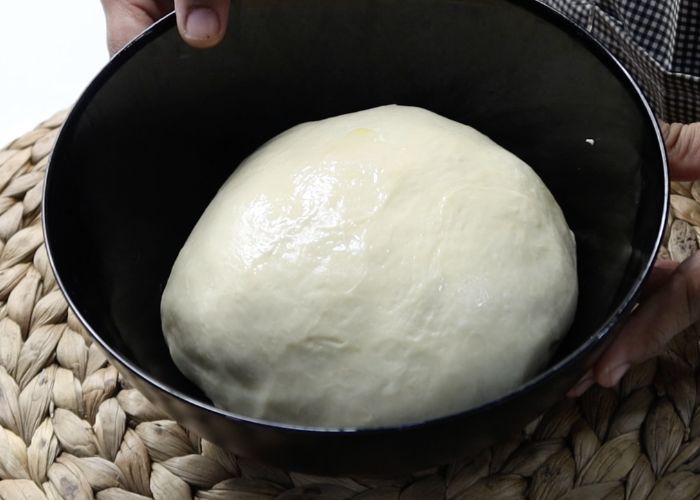
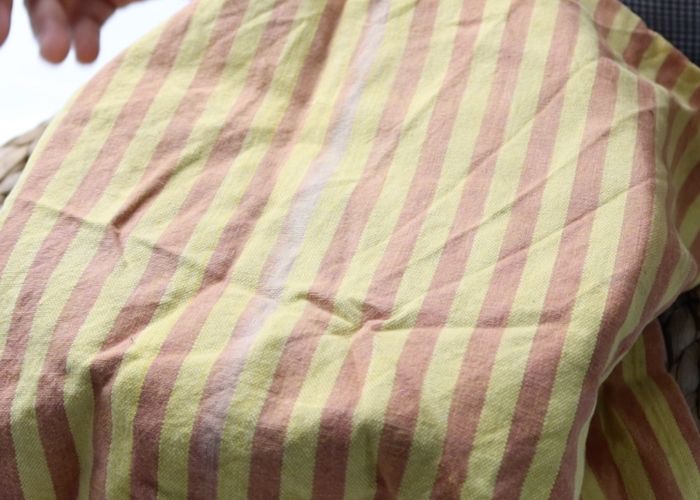
19)Coat the dough with oil on all sides. Cover the dough with a clean kitchen towel and let it proof in a warm place for at least 1 to 2 hours till the dough is doubled in size. I like to put my bowl inside an oven with lights only turned on. Cover and let it proof
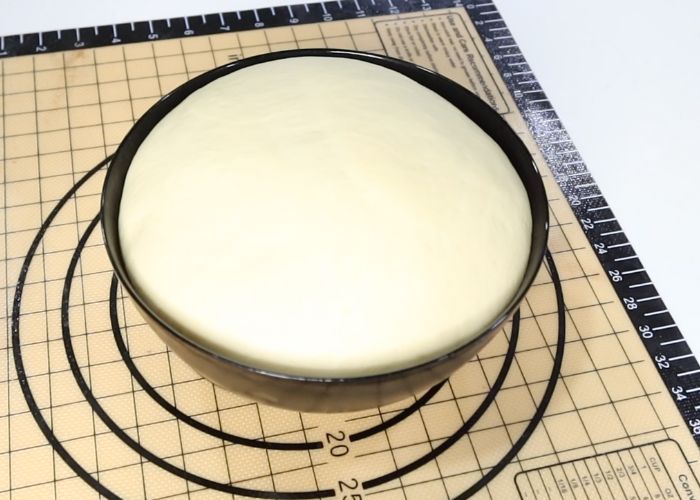
20)As you can see, the dough looks more than double in volume and puffy. It has proofed enough.
Shaping Loaf
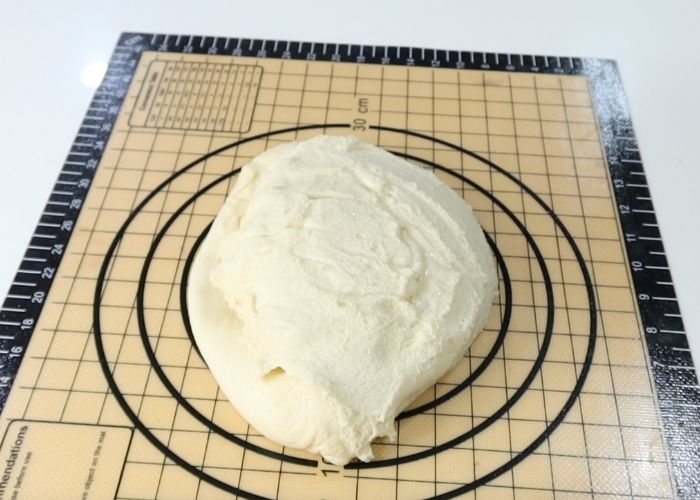
21)Once the dough has doubled in size. Remove the dough on to a silicon mat. You can use clean work surface. Dust the work surface slightly with some dry flour if needed.
22)Place the smooth side facing down. Flatten it gently into a rectangle as shown in the image.
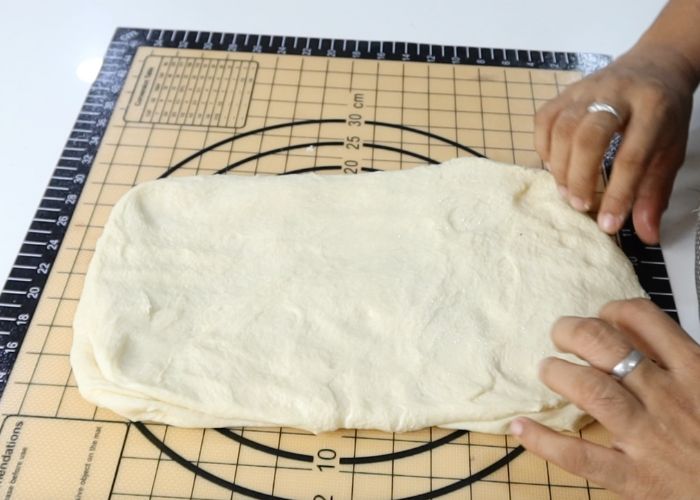
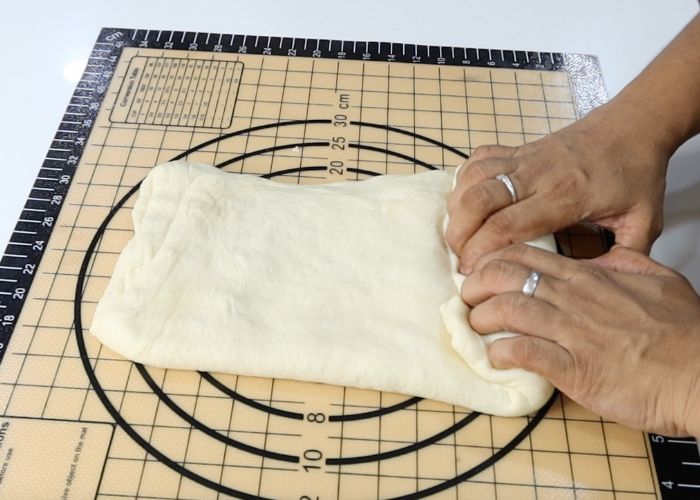
23)Now we are going to fold the dough to tighten the gluten which strenthens the dough structure. fold the dough in third. Press it gently to stick to the dough.
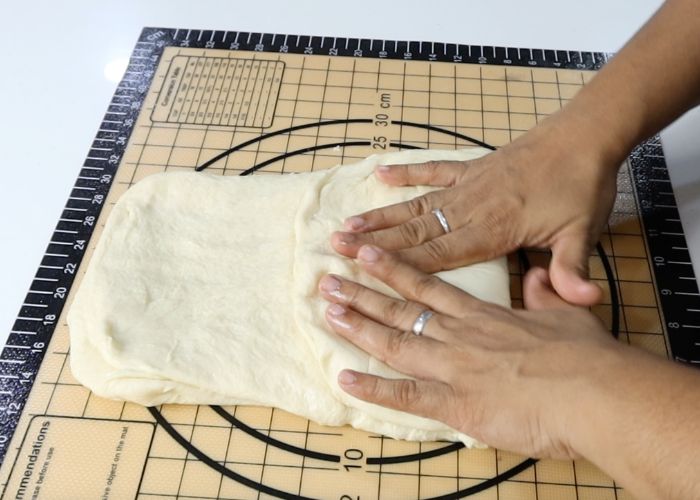
24)Now fold from the other side and press firmly. Now you have a smooth folded dough.
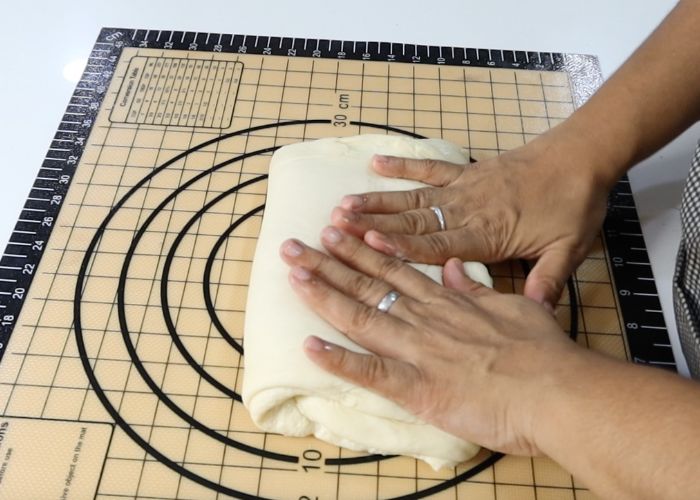
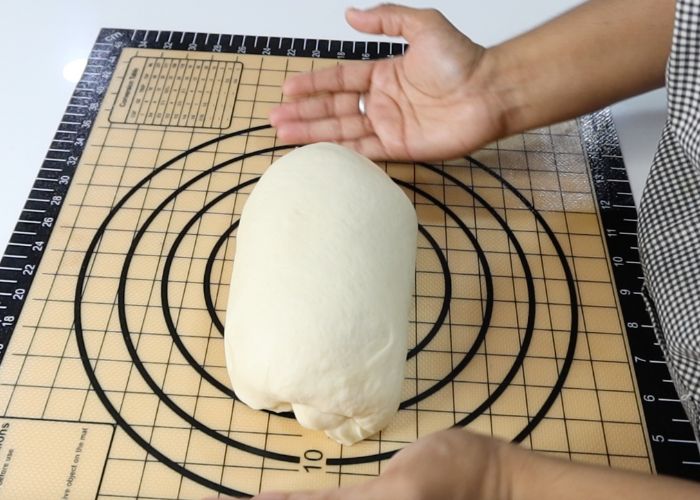
25)Now turn the dough and place it vertical to you. We are going to roll it into a burrito like shape. It is important to place the loaf pan near you to guide with the size.
You can gently flatten the dough at this point to shape it to the loaf pan size you are using.
26)Place the smooth side facing down. Start rolling it into a tight log like a bread. Seal the edges well.
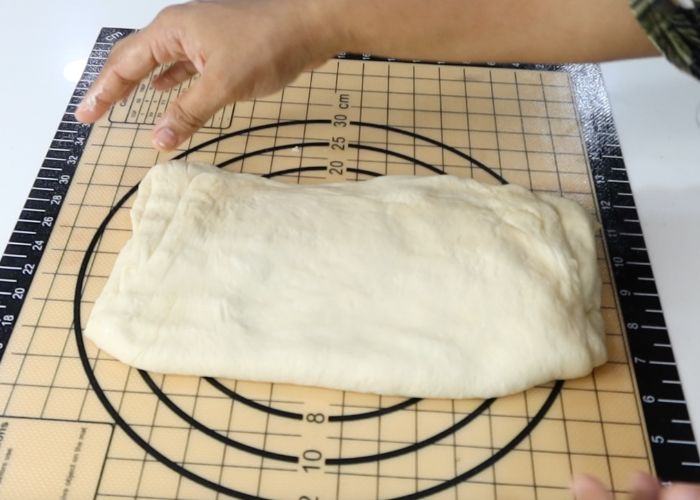
Pro Tip: Make sure the dough is tightly rolled so it doesn't break when slicing.
27)Now the bread is shaped. Gently use your hands to seal the ends and base so it is sealed properly.
Second Proofing
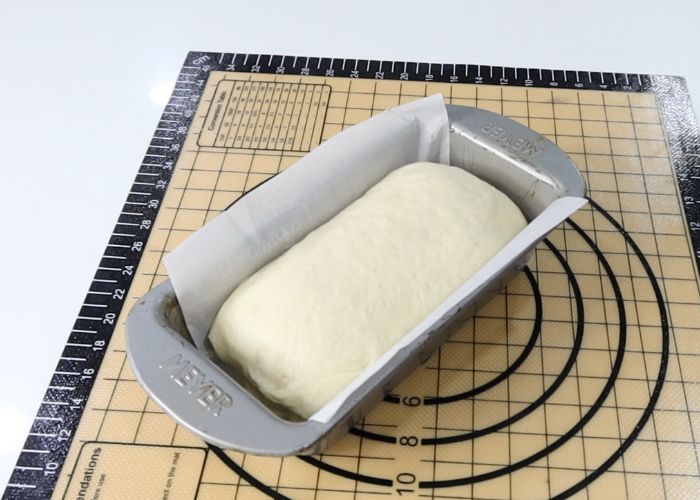
28)Once the bread is shaped. Place it gently into the loaf pan seamed side down.
I am using a 2lb loaf pan. It is a 11x5 inch loaf pan. I liked the pan with a sheet of parchment paper which is optional.
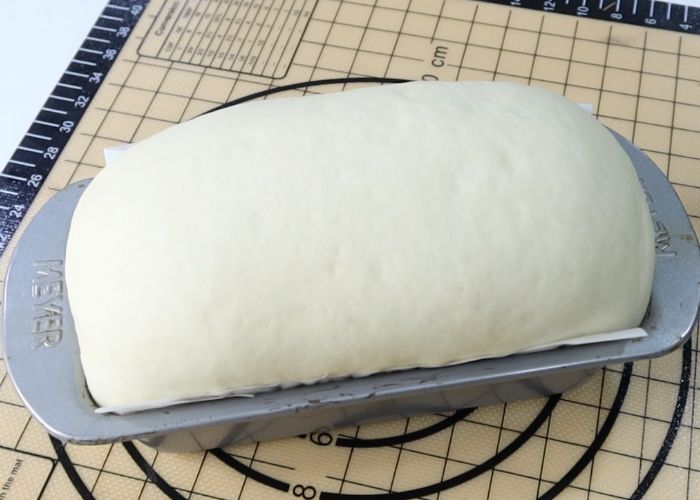
29)Cover it again with kitchen towel and let it rest on a warm spot for another 45 mins to 1 hour till the bread rises over 3 inch over the loaf pan. This is the time to bake the bread.
Egg Wash
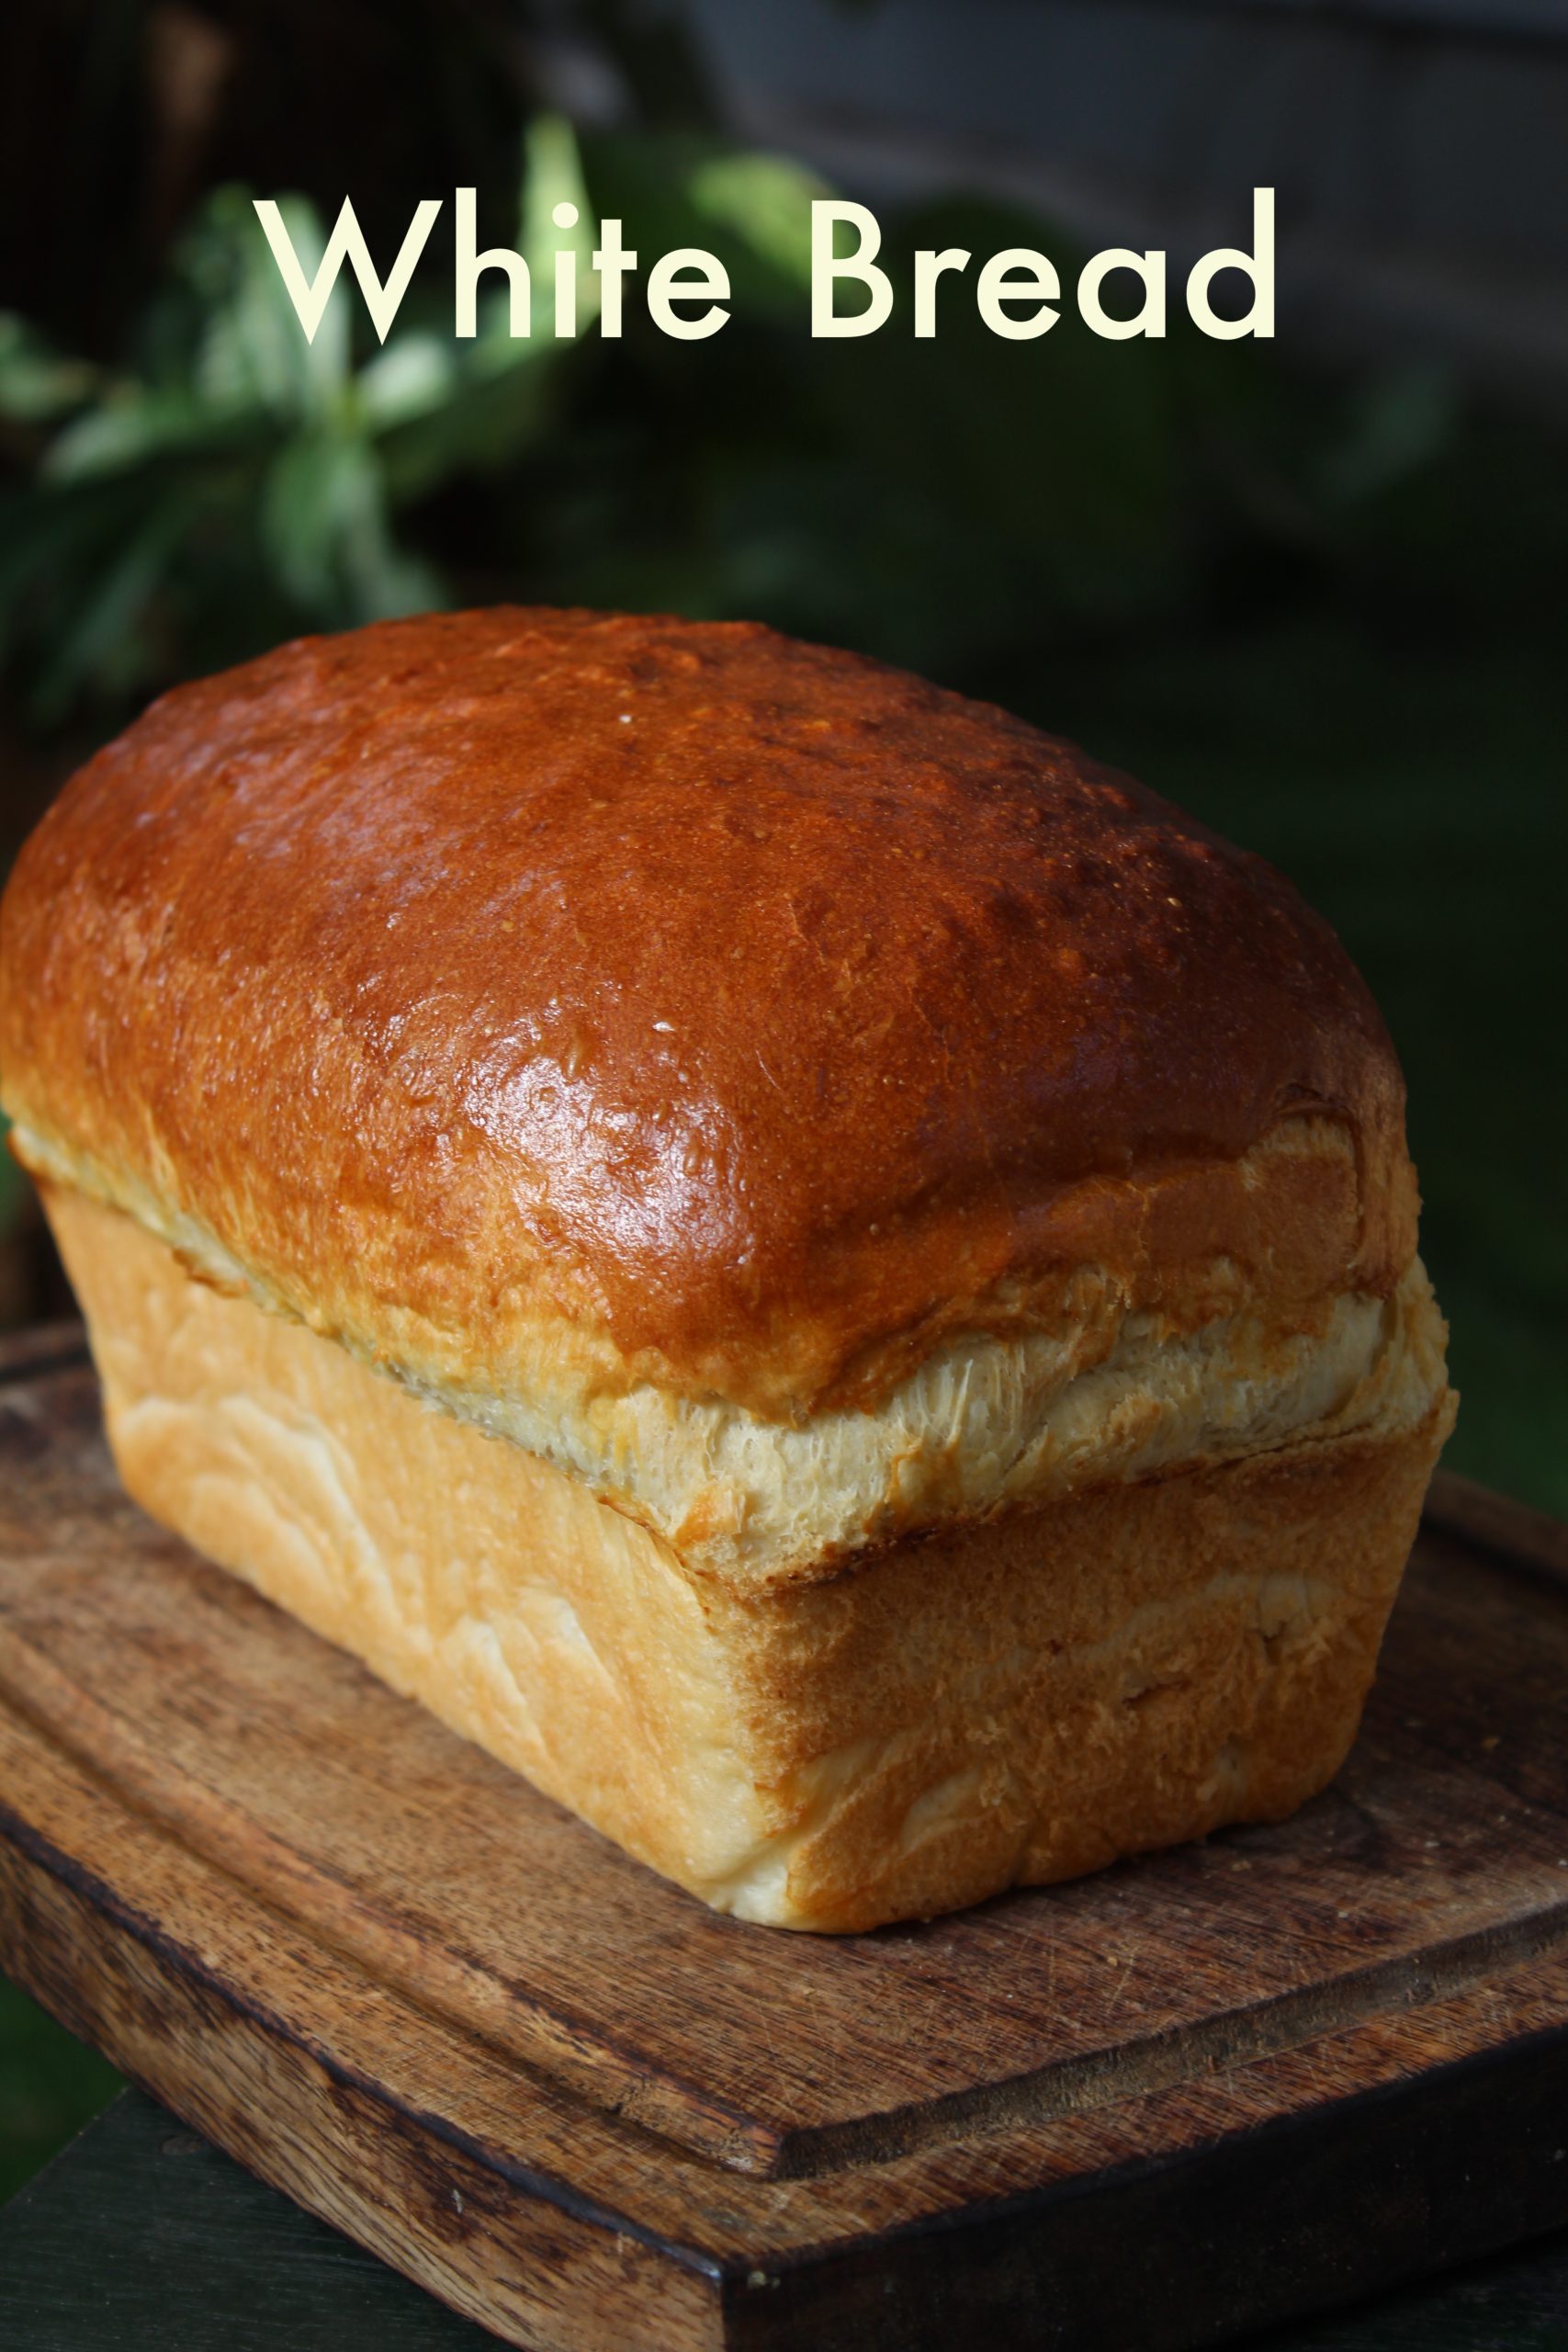
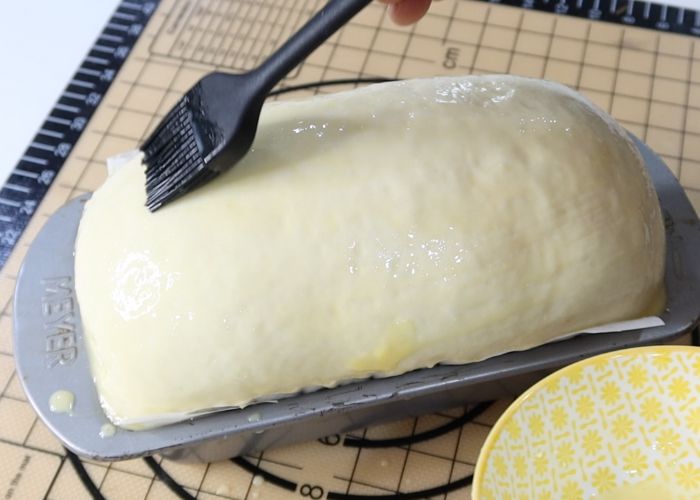
30)For getting the bakery style bread finish and soft chewy crust, you must egg wash the bread.
I like to add 1 tablespoon of milk to the reserved 2 teaspoon of egg and mix well. Use a pastry brush to brush this egg wash all over the bread.
Baking Bread
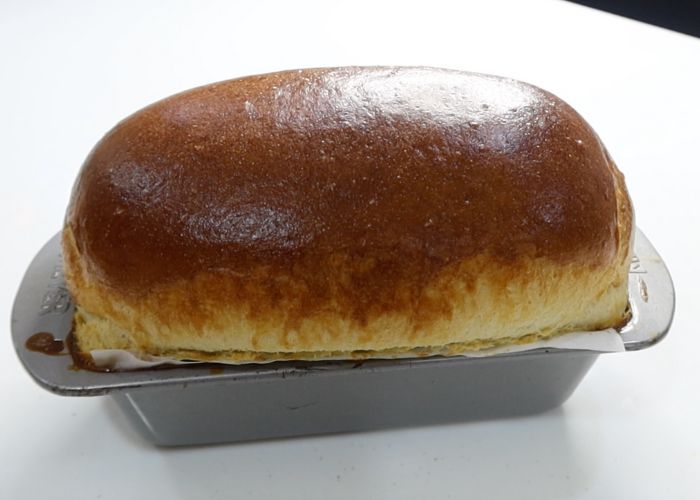
31)Preheat oven to 190 degree C for at least 10 mins. Place the loaf pan on a baking tray. Place the baking tray into the oven and bake for 30 to 35 mins till the top is golden brown.
You might want to cover the top of bread loosely (tent it with) a piece of foil if the top of bread gets too dark.
Cooling the Bread
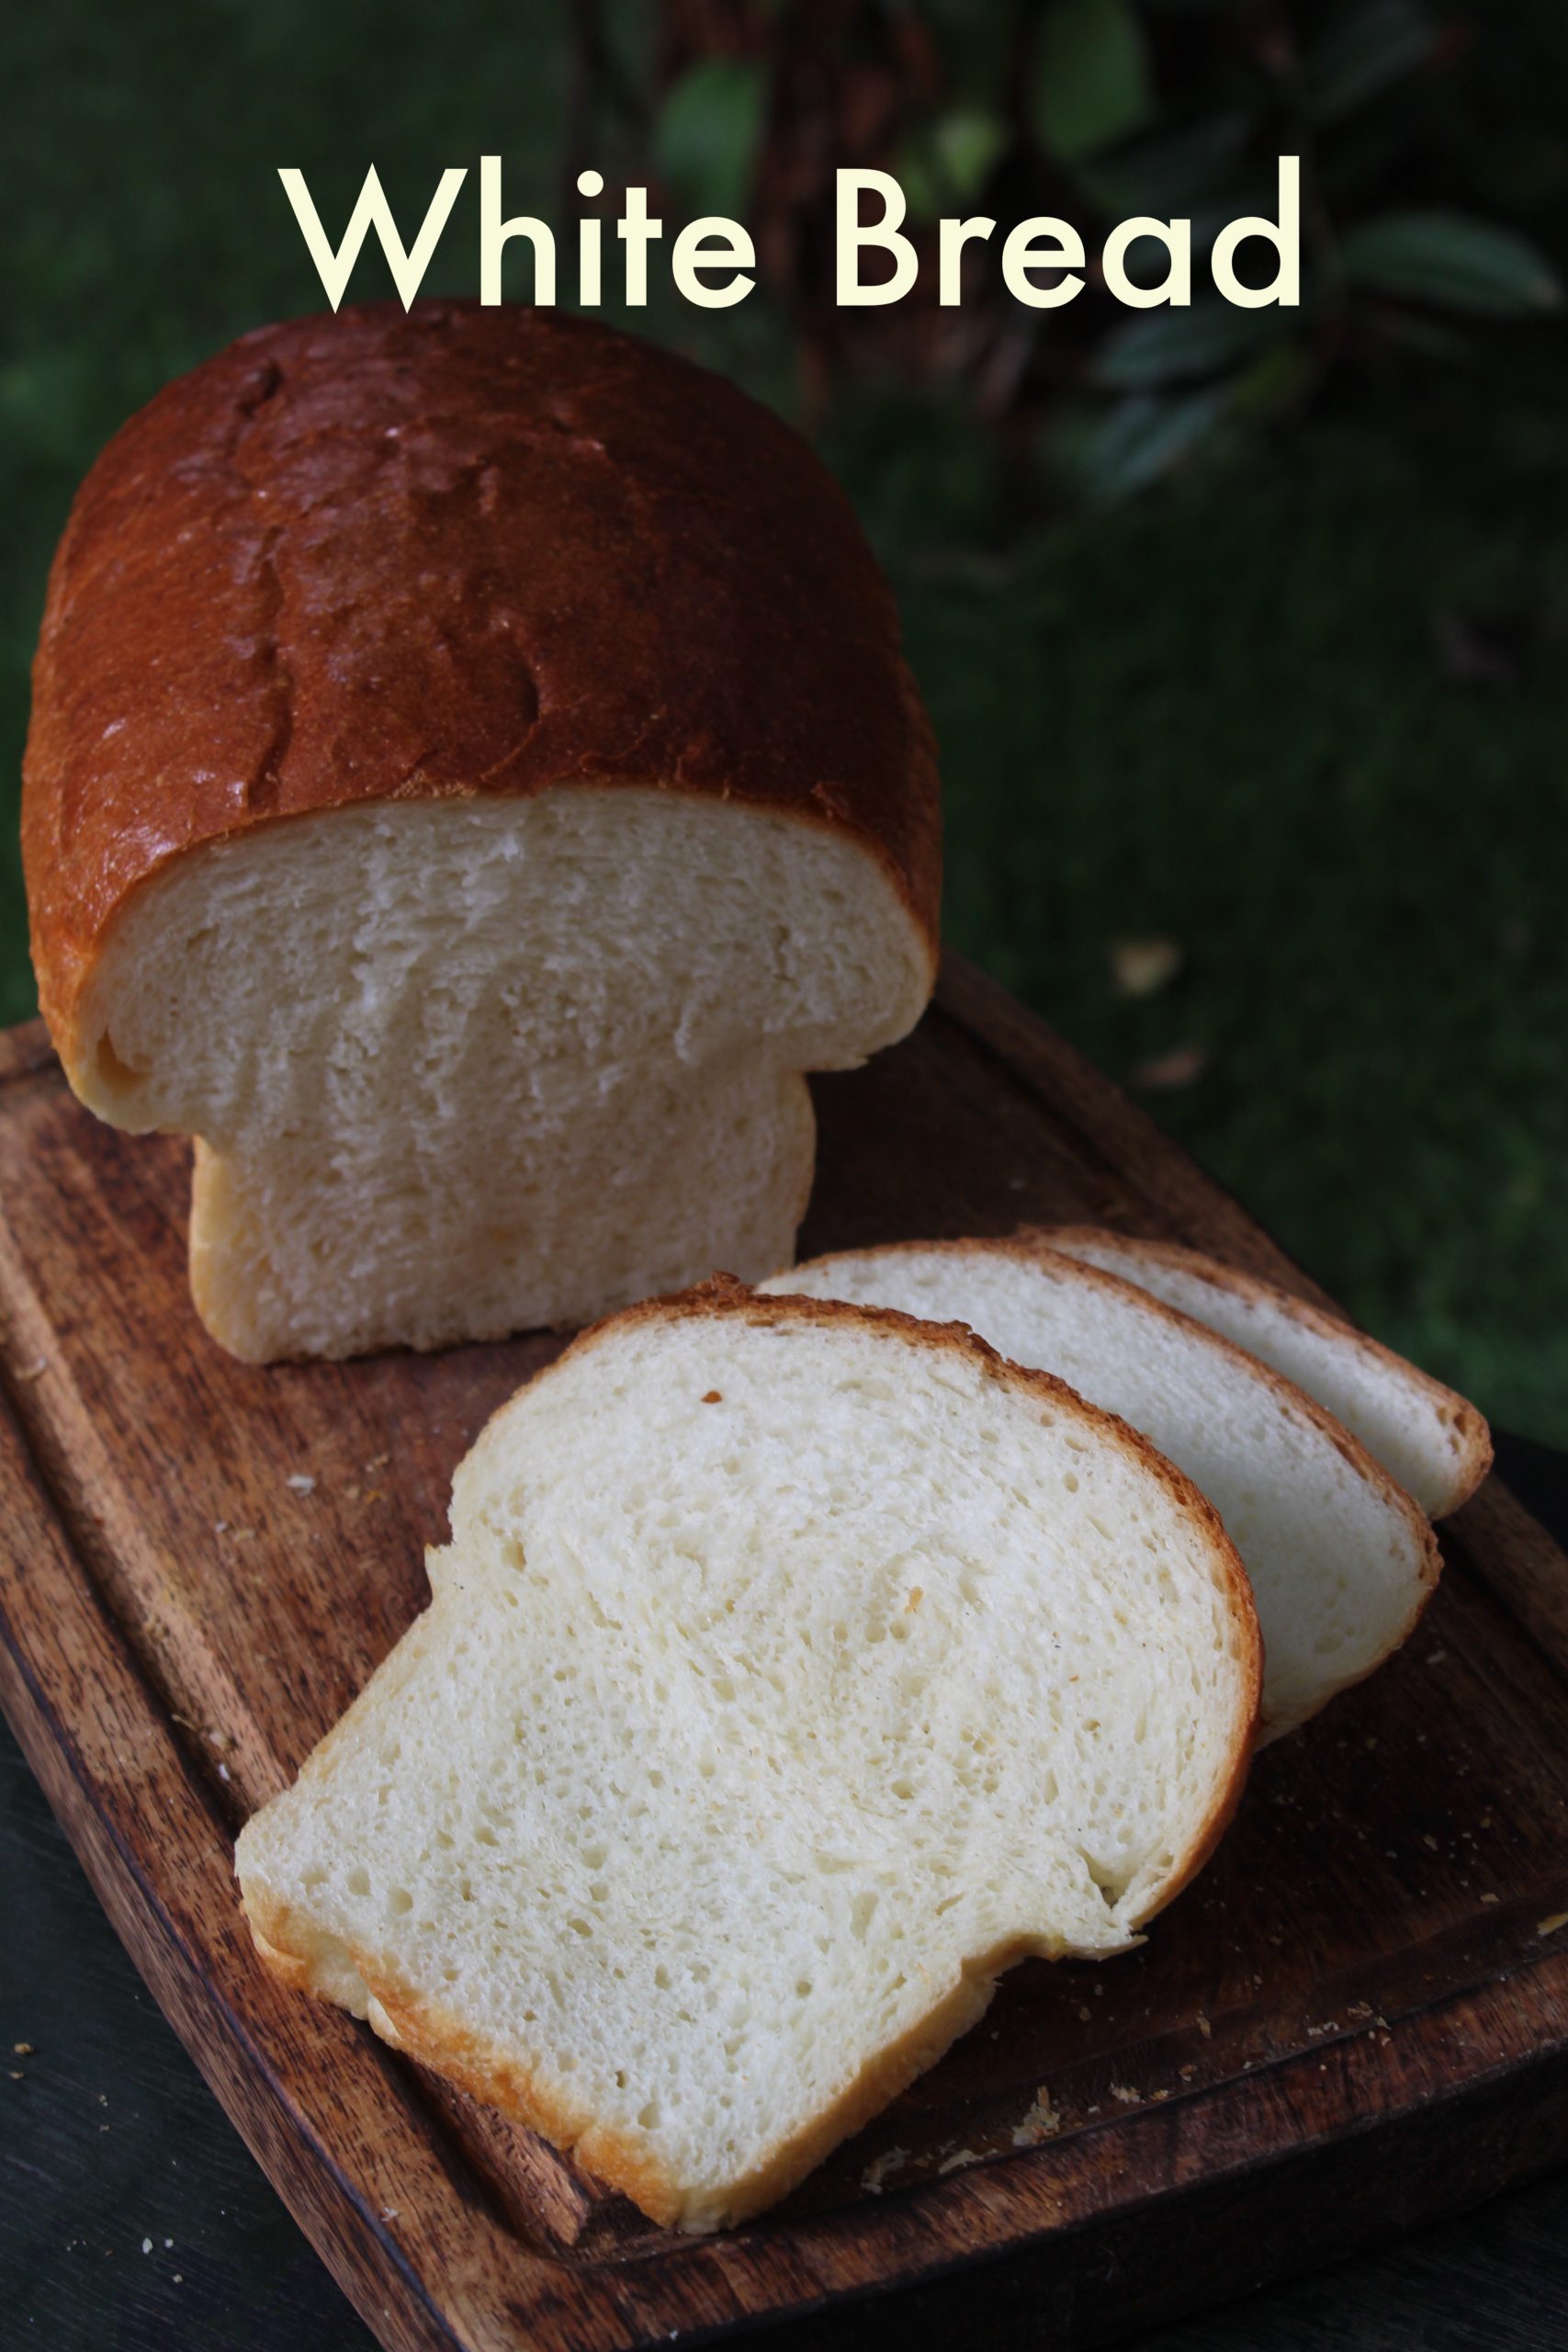
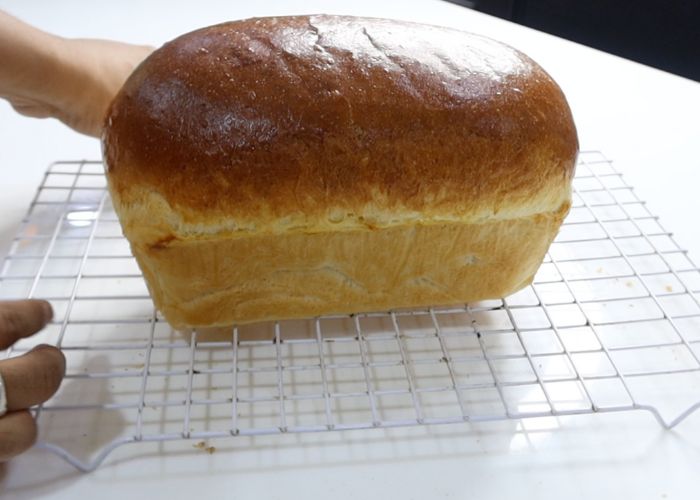
32)Once the bread is done baking, remove the bread from the oven and place it on a cooling rack to cool for 10 mins on the pan. Now gently remove the bread from the loaf pan and place it on a cooling rack to cool completely before slicing to get perfect slices.
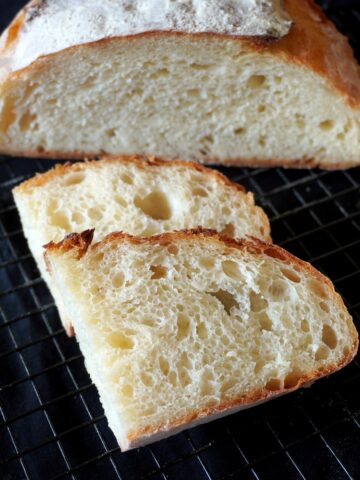
33)Once the bread is completely cold. You can slice it.
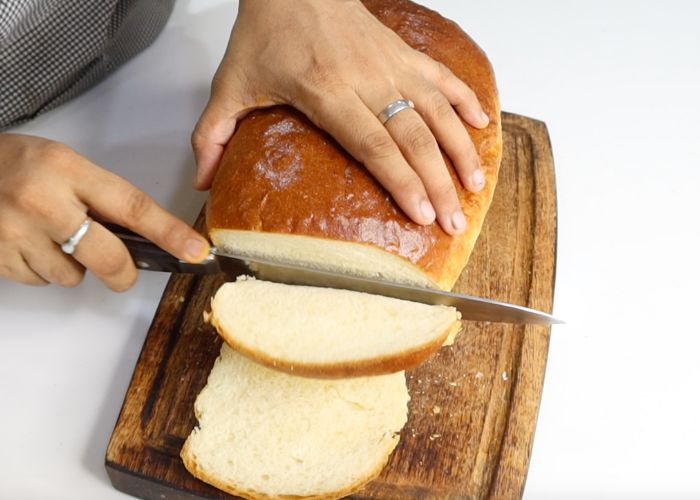
34)So squishy. Enjoy.
Expert Tips
- This bread is very simple to make but the important step is to knead the dough till it passes the window pane test which helps to achieve the smooth finish and fluffy texture on the bread.
- Adding egg helps to get the fluffy pillow like texture on the bread and also makes it light and fluffy.
- Use warm milk to make the bread dough which makes it so soft.
- Melted butter can be used instead of oil.
- Brushing the top of bread with egg gives the golden sheen to the bread.
Serving & Storage
On the First Day : Enjoy fresh slices of warm bread with a generous spread of butter.
On Day 2 : You can toast the bread in butter or ghee till golden brown and enjoy with a cup of tea or coffee. You can spread almond butter, peanut butter or any nut butters or jam when serving.
On Day 3: This white bread recipe is perfect for making toasties, sandwiches and grilled cheese. Check my sandwich recipes to get idea.
Storing White Bread
- Homemade white bread can be kept in a bread box at room temp for around 2 days.
- White bread can be stored in fridge in an air tight container upto a week.
- Wrap the bread tightly in foil and freeze upto 2 months.
FAQ
Homemade white bread can be kept in a bread box at room temp for around 2 days.
Wrap the bread tightly in foil and freeze upto 2 months.
Yes homemade white bread is great for freezing. Wrap the bread tightly in foil and freeze upto 2 months.
Letting the dough rise for too long makes the structure of the bread weak, so it can't support itself.
you did not knead it or leave it to prove for long enough or you could have killed the yeast by leaving the dough to rise in a place that was too hot.
If you don't knead your dough enough by hand or if you don't allow it enough time in your mixer, the dough will lack strength. Once baked, an under-kneaded bread loaf will be flat and dense in texture
Here are some of the reasons bread can come out hard and flat. if your yeast is not activated, then dough wont rise and the bread will be hard. Over baking can make your rolls hard. Also not letting the dough rise enough also makes it hard.
The rising will take about an hour on the counter. You can speed up the rising process by these steps. Placing the pan in a warm oven (about 200°F). Set the pan on the oven while it's preheating. Place the pan on a rack set over a large roasting pan full of boiling water.
📖 Get Recipe
Bread Recipe | White Bread Recipe
Equipment
Ingredients
- 3 ¾ cups All Purpose Flour (450 grams)
- 2 ½ teaspoon Dry Yeast
- 2 tablespoon Sugar
- 2 teaspoon
Salt
- 1¼ cup Milk Luke Warm (300 ml)
- 1 large Egg
- 2 tablespoon Olive Oil
Instructions
Making Bread Dough
- Take egg in a bowl and whisk it well to combined. You need to reserve 2 teaspoon of egg for egg wash from this egg. In your stand mixer bowl, add in flour, sugar, salt, yeast, and give it a rough mix with a spatula. Add in milk, egg(reserve 2 teaspoon of egg for egg washing) and oil right over the flour. Place the bowl onto the stand mixer and start kneading. If you don't have stand mixer, you can use your hands to knead the dough or You can use a hand mixer dough hook attachment to knead the dough.
Kneading the dough
- If you are making bread with hands. You might have to knead the dough using your heels of your hand to push the dough out and bring it back to the centre, turning it over and repeating the process again until it passes the window pane test. Kneading dough with hands takes time, energy and patience. It will take around 15 to 25 mins. Meanwhile If you are using stand mixer or hand mixer then the process of kneading will be much faster. I found out that it takes a good 10 to 15 mins for the stand mixer to knead the bread dough.
Window Pane Test in Bread
- Window pane test is very important to check whether the gluten development in dough is formed. This helps in getting the texture of the bread. Take a small ball of the dough and stretch it into a square. Keep on stretching until it becomes a thin film in the middle without breaking. The dough must be thin enough to pass light through it. If it is obtained without any tear, then your dough is properly kneaded.
First Proof of the dough
- Once the dough passes the window pane test. Remove the dough from stand mixer. Use a spatula or plastic bench scraper to remove to the dough from the bowl to a work surface. Shape it into a smooth dough ball. Place it in an oiled large bowl. Coat the dough with oil on all sides. Cover the dough with a clean kitchen towel and let it proof in a warm place for at least 1 to 2 hours till the dough is doubled in size. I like to put my bowl inside an oven with lights only turned on.
Shaping the bread
- Once the dough has doubled in size. Remove the dough on to a silicon mat. Flatten it gently. Place the smooth side facing down. Start rolling it into a tight log like a bread. Seal the edges well. Place the bread seamed side down on a parchment lined baking loaf pan or well greased loaf pan.
Second proofing of the bread
- Once the bread is shaped. Cover it again with kitchen towel and let it rest on a warm spot for another 45 mins to 1 hour till the bread rises over 3 inch over the loaf pan. This is the time to bake the bread.
Egg washing
- For getting the bakery style bread finish and soft chewy crust, you must egg wash the bread. I like to add 1 tablespoon of milk to the reserved 2 teaspoon of egg and mix well. Use a pastry brush to brush this egg wash all over the bread.
Baking
- Preheat oven to 190 degree C for at least 10 mins. Pop the baking tray into the oven and bake for 30 to 35 mins till the top is golden brown. You might want to cover the top of bread loosely (tent it with) a piece of foil if the top of bread gets too dark.
Cooling the bread
- Once the bread is done baking, remove the bread from the oven and place it on a cooling rack to cool for 10 mins on the pan. Now gently remove the bread from the loaf pan and place it on a cooling rack to cool completely before slicing to get perfect slices. Serve the warm bread with butter.
Video

Notes
Expert Tips
- This bread is very simple to make but the important step is to knead the dough till it passes the window pane test which helps to achieve the smooth finish and fluffy texture on the bread.
- Adding egg helps to get the fluffy pillow like texture on the bread and also makes it light and fluffy.
- Use warm milk to make the bread dough which makes it so soft.
- Melted butter can be used instead of oil.
- Brushing the top of bread with egg gives the golden sheen to the bread.
Serving Suggestions
On the First Day : Enjoy fresh slices of warm bread with a generous spread of butter. On Day 2 : You can toast the bread in butter or ghee till golden brown and enjoy with a cup of tea or coffee. You can spread almond butter, peanut butter or any nut butters or jam when serving. On Day 3: This white bread recipe is perfect for making toasties, sandwiches and grilled cheese. Check my sandwich recipes to get idea.Storage Suggestions
- Homemade white bread can be kept in a bread box at room temp for around 2 days.
- White bread can be stored in fridge in an air tight container upto a week.
- Wrap the bread tightly in foil and freeze upto 2 months.
Nutrition
Tried this Recipe
Mention @yummytummyaarthi or tag #yummytummyaarthi!Explore More in Bread Baking
If you have any questions not covered in this post and if you need help, leave me a comment or mail me @aarthi198689@gmail.com and I'll help as soon as I can.
Follow me on Instagram, Facebook, Pinterest ,Youtube and Twitter for more Yummy Tummy inspiration.


Shabana asmi
Hi arthi,instead of dry yeast how much tsp of instant yeast to be required for this recipe.Thanking you.
Aarthi
Use same amount.
Praveena
Hi Aarthi ...
In this recipe, u have used instant dry yeast ,right .... If we use active dry yeast ,then it has to be proofed..right??
Aarthi
yes proof yeast and use in this recipe.
M.Rajendran
Very good explanation . Neat video. While trying to make Bread or Buns , the top layer gets hard and not turned into brown colour. what is the reason...Madam
M.Rajendran
Very good explanation . Neat video. While trying to make Bread or Buns , the top layer gets hard and not turned into brown colour. what is the reason...Madam