
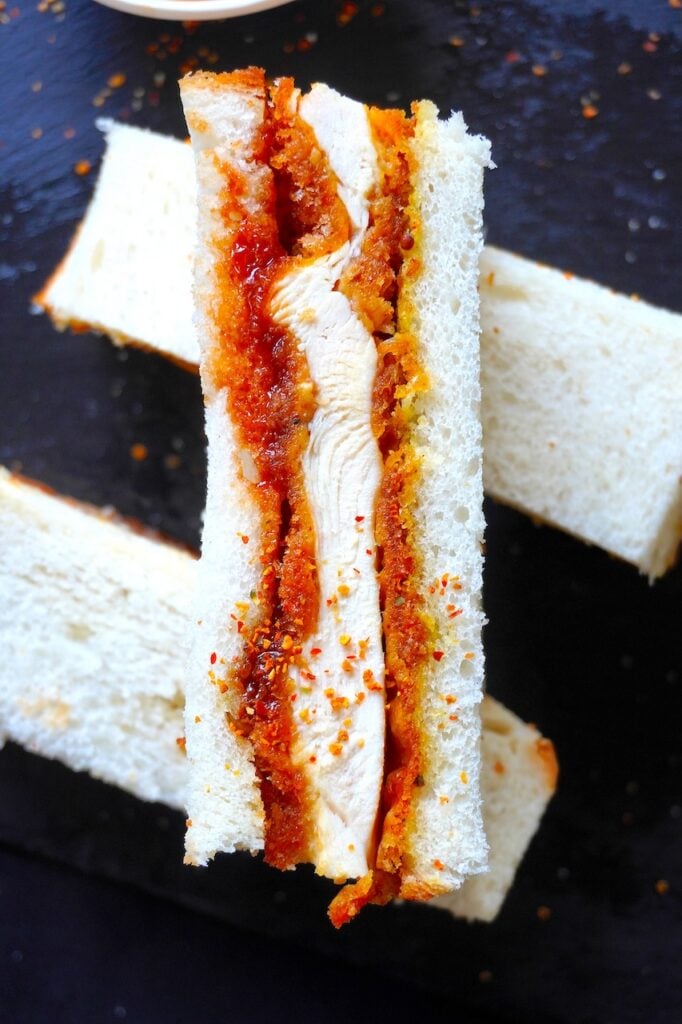
Katsu Sando is a popular sandwich originated in Japan. It is nothing but crispy fried tonkatsu (pork cutlet) sandwiched between soft white bread. In this recipe, I am sharing how to make a chicken katsu sando the authentic way. This sandwich tastes delicious as soon as it is made or great to pack in lunch box.
Chicken Katsu Sando Recipe
I am in my Japanese food creation era. I travel for food, Every time we travel, I love to try lot of local foods. During our last trip to Japan, I tried out many amazing dishes and I am on a mission to recreate all those recipes for Blog. This Japanese Sando is one sandwich, which I had so many times during the trip.
Even though I loved the Egg Sando from Japan, this Katsu Sando turned to be my daughter's favourite. Crispy fried chicken cutlet stuffed between the pillow soft bread is what Katsu Sando means. Last week I finally got a chance to try this at my home and everyone loved it.
About Katsu Sando
Japanese chicken katsu sando is nothing but crispy fried chicken cutlet, also known as chicken katsu stuffed inside soft bread known as shokupan, which is a popular Japanese milk bread. The bread slices spread with a sweet umami packed sauce known as tonkatsu sauce which act as a flavour packed glue between the bread.
'Katsu' comes from the Japanese adaptation of the English word 'cutlet'. While 'sando' is the Japanese shortening word for 'sandwich'.
It is pretty easy to make this sandwich. You can easily prepare the tonkatsu sauce a week in advance and store in fridge upto a month. Chicken katsu can be marinated and coated in panko and stored in fridge for up to two days. When making the sandwich fry the chicken katsu and stuff them between the bread.
Even though the sandwich tastes best, when made fresh, it's still tastes great when packed in a lunch box.
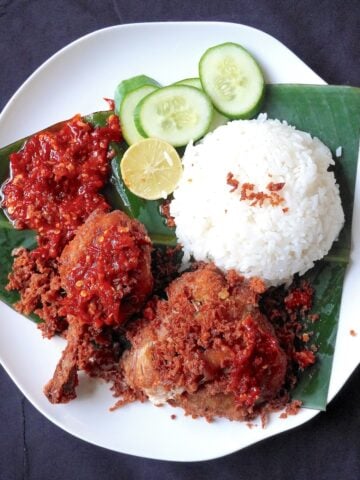
Similar Recipes
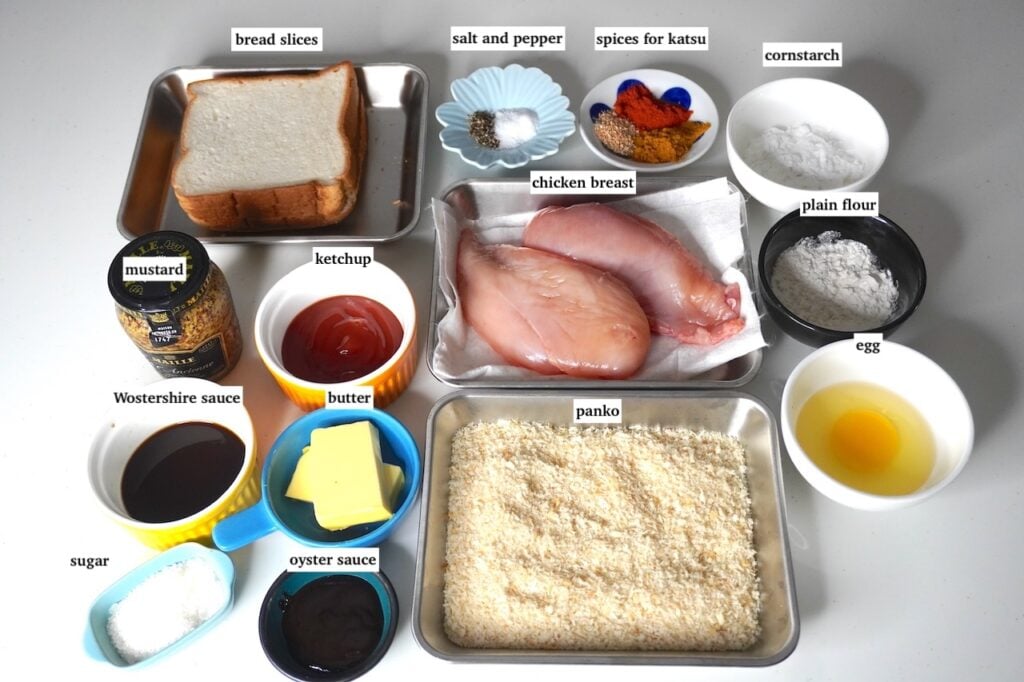
Ingredients
- Bread slices - it is important to use soft white bread. You can use either shokupan( Japanese milk bread).
- Tonkatsu Sauce - a combination of ketchup, Worcestershire sauce, sugar and oyster sauce is mixed together to make this sweet slightly tangy sauce that is perfect with fried katsu.
- Oil - use any neutral flavour oil like vegetable oil or sunflower oil.
- Butter - Use good quality butter to spread on the bread which prevents the sauce from seeping into the bread slices.
- Mustard - I also applied mustard over the butter for flavour.
- Chicken - I used boneless chicken breast for katsu. You can use chicken thigh also. Prepare the chicken as mentioned below to make it juicy.
- Seasonings - traditionally salt and pepper is used. but I like to season my chicken with garlic powder, paprika, Japanese curry powder, salt and pepper.
- Flour Mix - a combination of plain flour and cornstarch is used to create the batter which make the chicken katsu super crispy.
- Egg - you need to use one large egg to bind the chicken batter.
- Breadcrumbs - panko, Japanese style flaky breadcrumbs gives crispiest chicken. If you don't have panko, the next best choice would be freshly pulverised white bread.
Step by Step Pictures
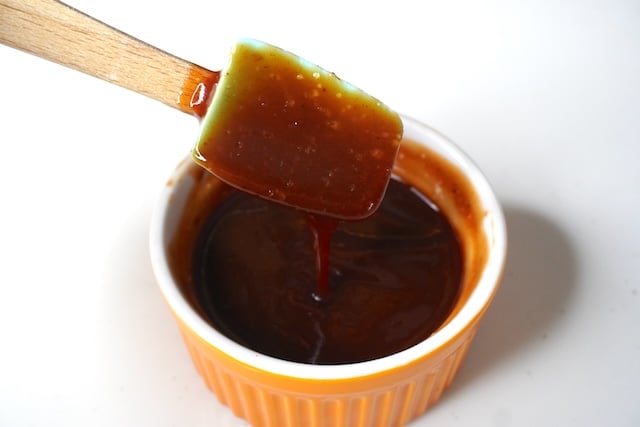
Tonkatsu sauce
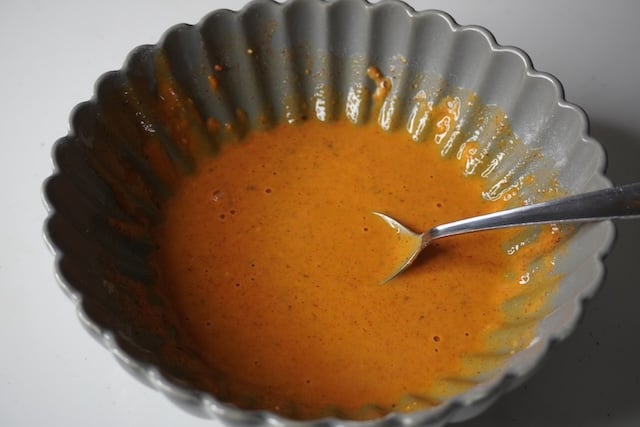
1) I used tomato ketchup, Worcestershire sauce, sugar and oyster sauce. Mix together to make this sweet slightly tangy sauce that is perfect with fried katsu.
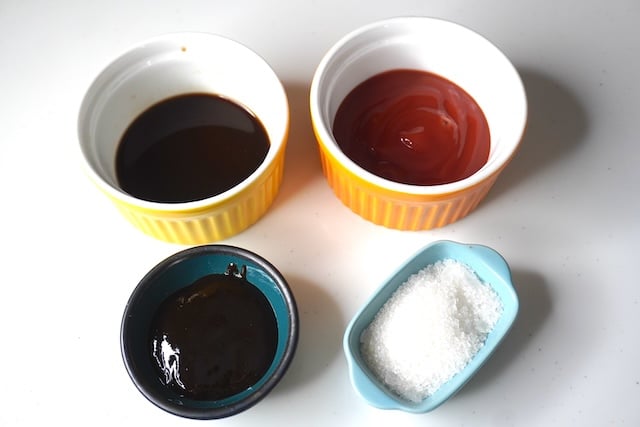
2)You can keep this sauce in fridge upto a month.
How I make Chicken Katsu (Step by Step)
3)Now that the sauce is ready, lets make chicken katsu.
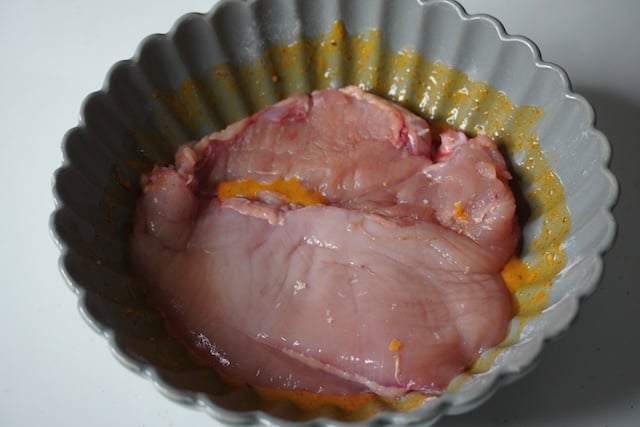
Take couple of boneless chicken breast. Pat them dry completely with paper towel. Take them on a cutting board. Use a sharp knife to butterfly the chicken breast so it opens like a book.
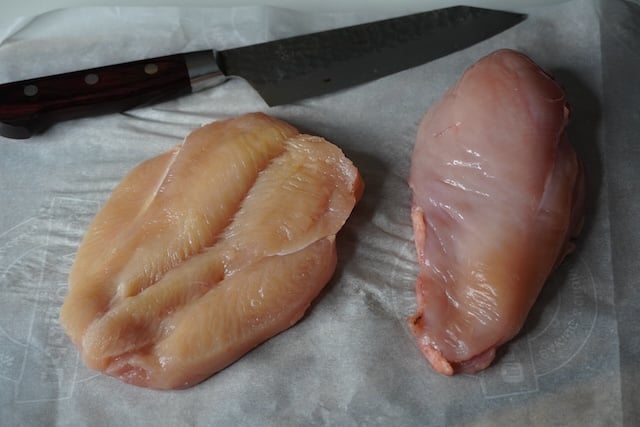
4)Place another sheet of plastic wrap or parchment on top and use a meat mallet or a rolling pin to gently smash the chicken breast so it gets slightly thin and in even thickness.

5)Remove the plastic wrap and this is how the chicken looks like. Now you can keep it as it is for one big chicken katsu. Or slice it in half so each chicken breast gives you 2 chicken cutlets.

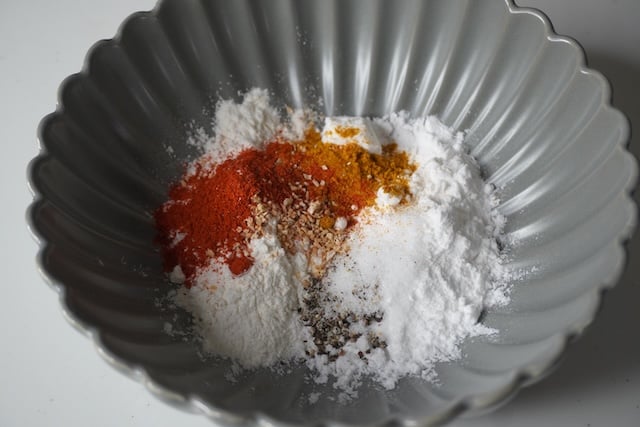
6)Take plain flour and cornstarch in a bowl.

7)Add in your seasoning ingredients. That is totally to your wish. I used garlic powder, Japanese curry powder, salt, black pepper powder and paprika. Once the seasonings are added, mix it really well.
8)Crack open one egg and add it into the flour mix. Mix the egg into the flour. If the batter is too thick, you can add a splash of water and mix well.
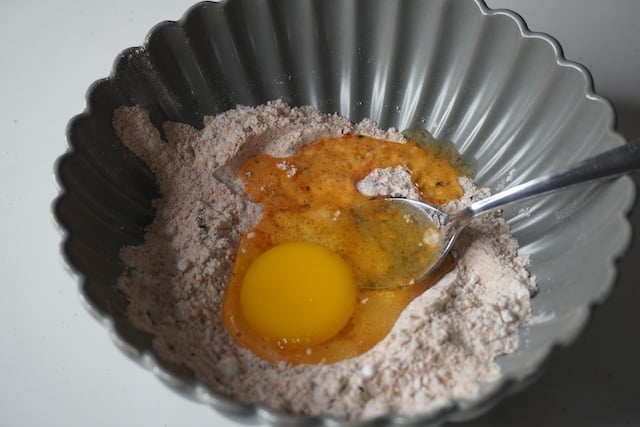
9)The batter has to be sligthly pourable consistency.
Coating Chicken
10)Now take your chicken cutlets and drop into the batter.
11)Coat the chicken on both sides, so each side is coated with the batter.

12)Drop the chicken on some panko breadcrumbs.
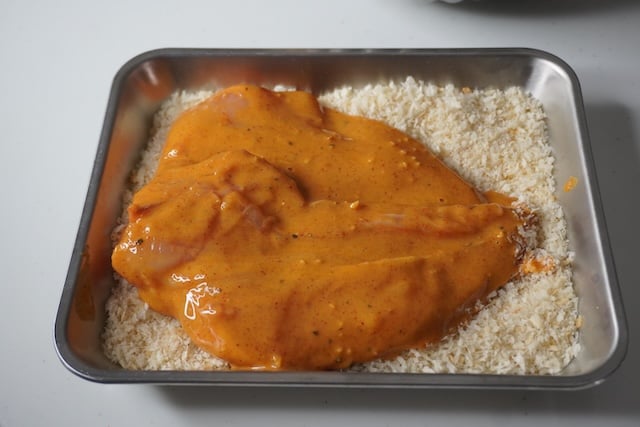
13)Coat both sides of the chicken in panko really well.

14)Once it is well coated, remove the chicken and place it on a wire rack while you heat the oil.

Frying Chicken
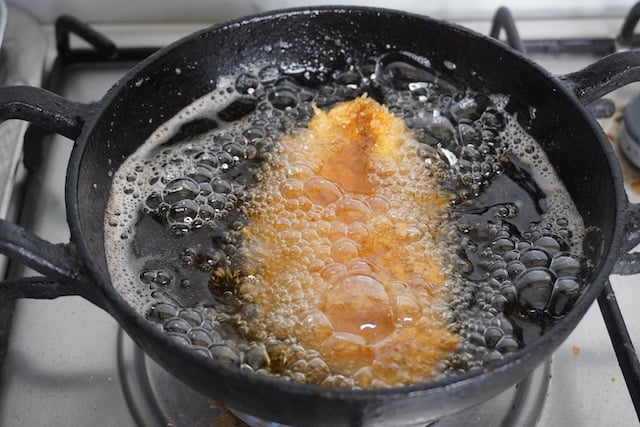
15)Heat neutral cooking oil in a pan and place it on medium high heat. Let the oil get hot. If you insert a chopstick into the oil, you will see small bubbles around the chopsticks which indicates the oil is at the right temperature.

16)Drop the chicken into the oil. The chicken should be completely immersed in the oil. So it fries from all sides.

17)Let the chicken fry on medium high heat for 4 to 5 minutes. It will get golden brown in colour.

18)Remove the fried katsu from oil. It should be super crispy and crunchy.

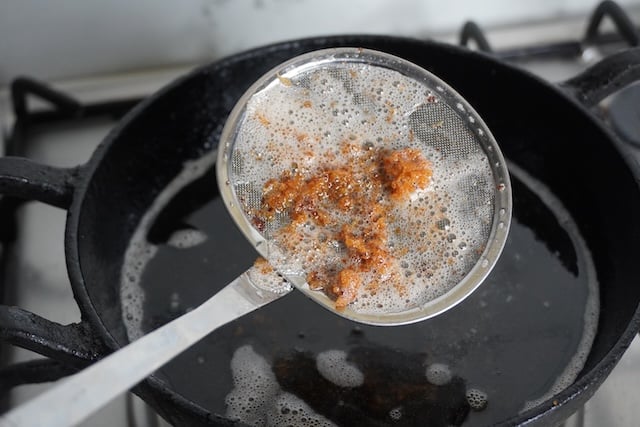
18)After every batch, use a skimmer to remove any fried crumbs from the oil. So it doesn't burn.
19)I dropped the half chicken cutlets into the oil and fried that for 3 to 4 minutes.
20)Once fried, remove it from oil.

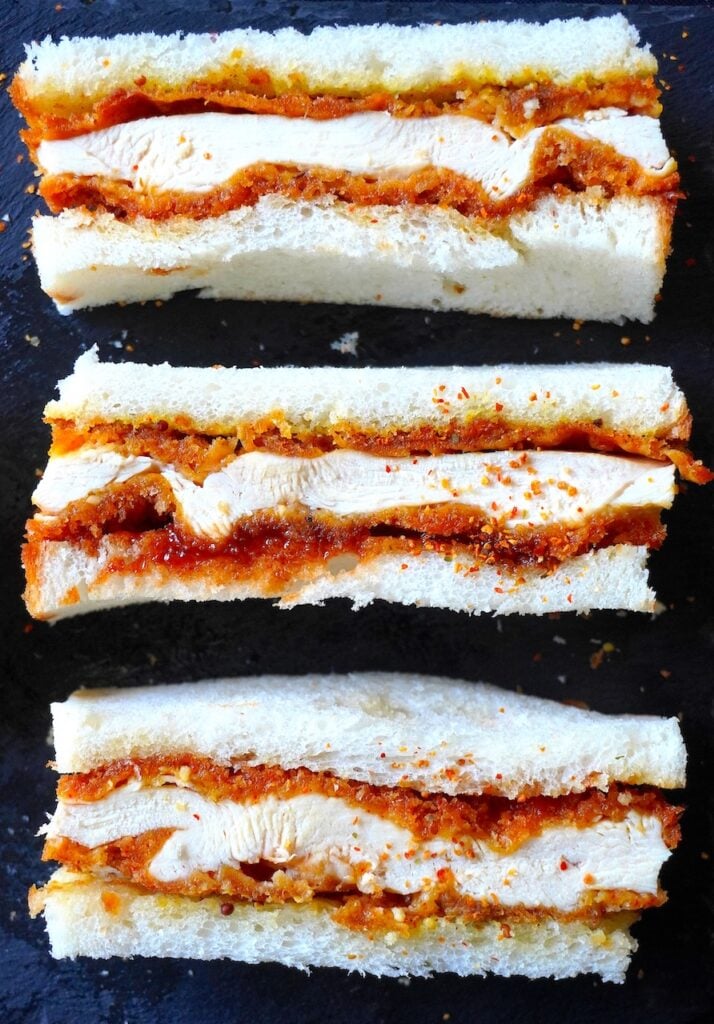
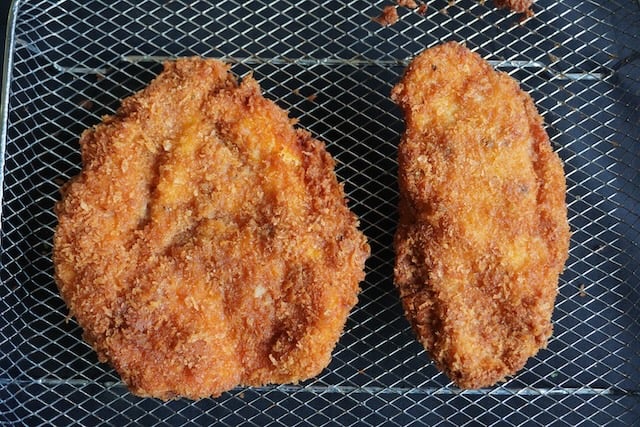
21)Place the chicken katsu onto a wire rack so it doesn't get soggy. Let it sit for 3 to 4 minutes before serving. Cut into slices and serve.
Assembling Katsu Sando
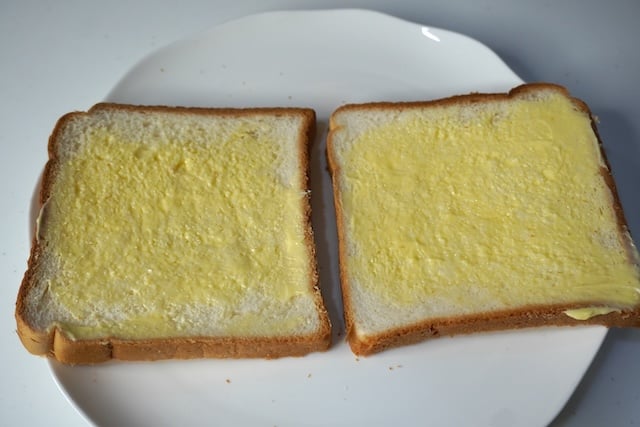
22)Take 2 bread slices. Make sure to use soft white bread.

23)Spread generous amount of butter on both side of the bread which prevents the tonkatsu sauce seeping into the bread.
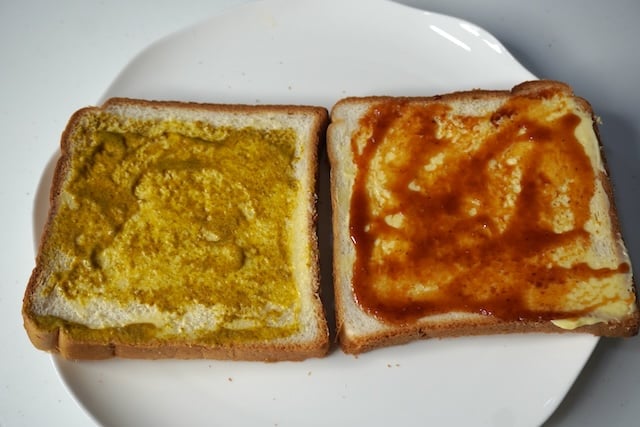
24)Spread a layer of mustard and tonkatsu sauce.
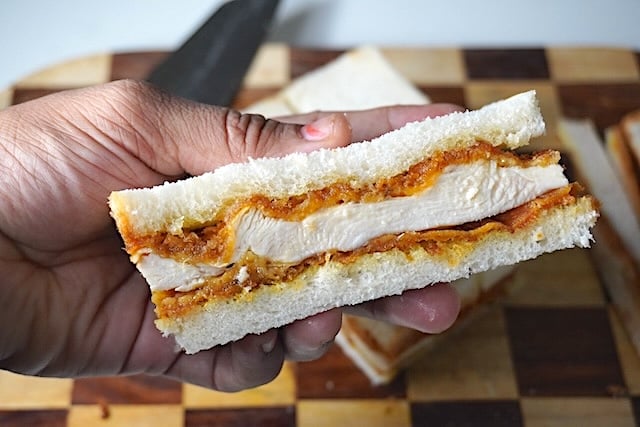
25)Place a fried chicken katsu on top of the bread. Cover with other slice of bread.

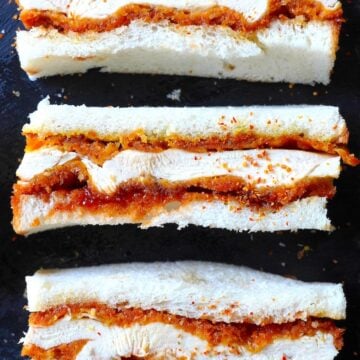
26)Remove the crust off the bread. Slice into thirds.
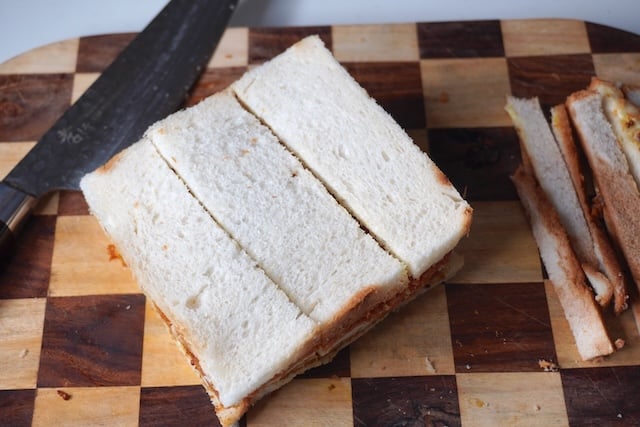
27)Enjoy.
📖 Get Recipe
Japanese Katsu Sando Recipe (Chicken Katsu Sandwich Recipe)
Equipment
Ingredients
For Chicken Katsu
- 2 large Boneless chicken breast
- Sunflower oil for Deep frying
For Batter
- 2 tablespoon Plain flour
- 4 tablespoon Cornstarch
- 1 large Egg
- 3 tablespoon Water or as needed
For Seasoning
- 1 teaspoon Garlic powder
- 1 teaspoon Paprika
- 1 teaspoon Japanese curry powder
- 1 teaspoon Salt or to taste
- ½ teaspoon Black pepper powder
For Coating
- 2 cups Panko Breadcrumbs or as needed
For Tonkatsu sauce
- ¼ cup Tomato ketchup
- 3 tablespoon Worcestershire sauce
- 1 tablespoon Oyster sauce
- 2 tablespoon Sugar
For Katsu Sando
- 8 slices White Bread
- 8 teaspoon Butter
- 8 teaspoon Mustard sauce
- 8 teaspoon Tonkatsu sauce
Instructions
For Chicken Katsu
- Take couple of boneless chicken breast. Pat them dry completely with paper towel. Take them on a cutting board. Use a sharp knife to butterfly the chicken breast so it opens like a book.
- Place another sheet of plastic wrap or parchment on top and use a meat mallet or a rolling pin to gently smash the chicken breast so it gets slightly thin and in even thickness.
- Remove the plastic wrap and this is how the chicken looks like. Now you can keep it as it is for one big chicken katsu. Or slice it in half so each chicken breast gives you 2 chicken cutlets. Set aside till needed.
- Take plain flour, cornstarch, seasonings, salt, pepper in a bowl and mix well. Add in egg and mix to a batter, add little water at a time to make a slightly thin batter. The batter has to be sligthly pourable consistency.
- Now take your chicken cutlets and drop into the batter. Coat the chicken on both sides, so each side is coated with the batter.
- Take the chicken from batter, let the excess batter drip off, Drop the chicken on some panko breadcrumbs. Coat both sides of the chicken in panko really well. Once it is well coated, remove the chicken and place it on a wire rack.
- Heat neutral cooking oil in a pan and place it on medium high heat. Let the oil get hot. If you insert a chopstick into the oil, you will see small bubbles around the chopsticks which indicates the oil is at the right temperature.
- Drop the chicken into the oil. The chicken should be completely immersed in the oil. So it fries from all sides. Let the chicken fry on medium high heat for 4 to 5 minutes. It will get golden brown in colour. Remove the fried katsu from oil. It should be super crispy and crunchy. Place on a wire rack. After every batch, use a skimmer to remove any fried crumbs from the oil. So it doesn't burn. Chicken katsu is ready.
For Tonkatsu Sauce
- Mix together ketchup, Worcestershire sauce, sugar and oyster sauce. Set aside till use. You can store this sauce upto a month in fridge.
Assembling sandwich
- Take 2 bread slices. Make sure to use soft white bread. Spread 1 teaspoon of butter on both side of the bread which prevents the tonkatsu sauce seeping into the bread. Spread 1 teaspoon of mustard on one side of the bread and 1 teaspoon of tonkatsu sauce on other side of the bread. Place a fried katsu, cover with another slice of bread. Remove off the crust from the bread and cut into pieces. Serve.

Leave a Reply