
One pot egg biryani made in a pressure cooker. Easy lunch recipe made in less than 30 mins. This pressure cooker egg biryani is delicious.
 |
| Egg briyani |
Egg Biryani Recipe
Hai Everyone. Hope everyone had a great weekend. I had a calming weekend, because most of the time is spend at home. Slept and relaxed and watched my favorite shows on TV and also tried out so many good dishes. Tried out Italian Pasta and Garlic bread last night (I will update recipe soon), It is possibly one of the yummy combinations in food and it came out pretty good.
Ok then coming back to todays recipe. Tried this one for Saturday Lunch. As you know eggs are the one of the most versatile ingredient in the world. You can make it in any form. Fried, curries, omelette, scrambled. But this dish is one of the exclusive menu for parties. I served this with chicken 65 (will put recipe soon) and onion tomato raita. It was absolutely delicious. So please try it out and let me know what you think.
SIMILAR BIRYANI RECIPES
Mughlai Chicken Dum Biryani
Chicken Kofta Dum Biryani
Fish Dum Biryani
Vegetable Dum Biryani
Mughlai Vegetable Dum Biryani
Mushroom Dum Biryani
📖 Get Recipe

Egg Biryani in Pressure Cooker
Ingredients
- Basmati Rice-2 cup
- Onion-1 sliced thinly
- Ginger Garlic paste-1 tblspn
- Coriander leaves-1 handful
- Mint Leaves-1 handful
- Green chilli-3 sliced
- Cashew-1 tblspn
- Raisans kismis-1 tblspn
- Curd-1 cup
- Red chilli powder-1 tblspn
- Turmeric powder-1 tsp
- Coriander powder-1 tblspn
- Garam masala powder-2 tsp
- Cinnamon pattai-1 small piece
- Cardamom yelakai-2
- Cloves krambu-4
- Saunf sombu-1 tsp
- Cumin seeds jeerakam-1 tsp
- Ghee-½ cup
- Salt to taste
- Butter-2 tblspn
- For Marinating:
- Egg-4 boiled
- Gram flour Kadalai mavu-½ cup
- Egg -1
- Salt to taste
- Red chilli powder-1 tsp
Instructions
- Marinate the Boiled eggs in Gram flour.Red chilli pdr,Salt and one beaten egg for 10min.Fry this in a pan with a little oil till golden and set it aside.
- In a pressure cooker add ghee and crackle some cinnamon,,Cloves,Cardamom,Cumin seeds,Saunf for 1 min.
- Add in sliced onions,Ginger garlic paste,Green chilli,Cashews,Kismis and fry till golden brown.
- Add coriander and mint leaves and fry for 1 min.Add in all the spices and mix well.
- Add in the curd and mix well.Now add in the Soaked rice and mix well.Season with salt.
- Now add about 4 cups(For each cup of rice add 2 cups of water) of water and let it boil.
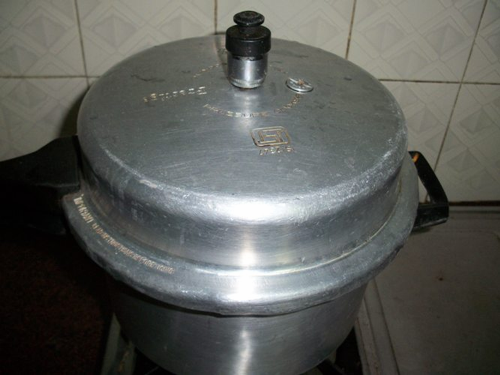
- Cover it and let it cook for 2 whistle or for about 15 min.
- Open it and put in the seared eggs and add small blobs of butter and cover it for 5min.
- Garnish with some coriander leaves and serve hot with Raita.
Tried this Recipe
Mention @yummytummyaarthi or tag #yummytummyaarthi!If you have any questions not covered in this post and if you need help, leave me a comment or mail me @aarthi198689@gmail.com and I'll help as soon as I can.
Follow me on Instagram, Facebook, Pinterest ,Youtube and Twitter for more Yummy Tummy inspiration.
IF YOU MAKE THIS RECIPE OR ANYTHING FROM YUMMY TUMMY, MAKE SURE TO POST IT AND TAG ME SO I CAN SEE ALL OF YOUR CREATIONS!! #YUMMYTUMMYAARTHI AND @YUMMYTUMMYAARTHI ON INSTAGRAM!
Biryani step by step pictures
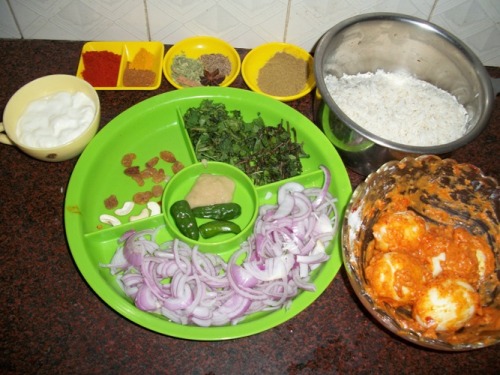 |
| Take your ingredients |
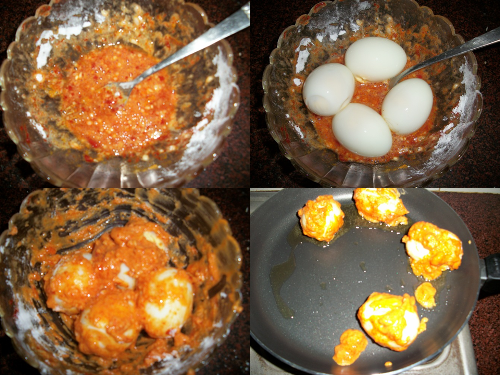 |
| marinate the egg and fry in oil |
 |
| Crackle whole spices in oil |
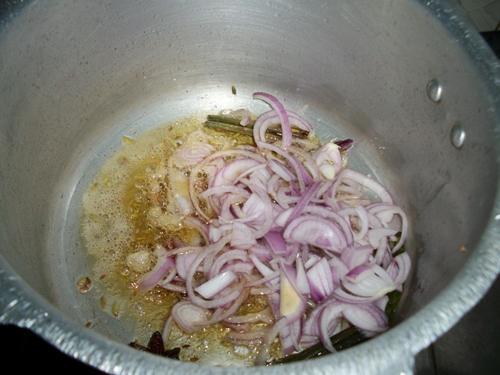 |
| add in onions |
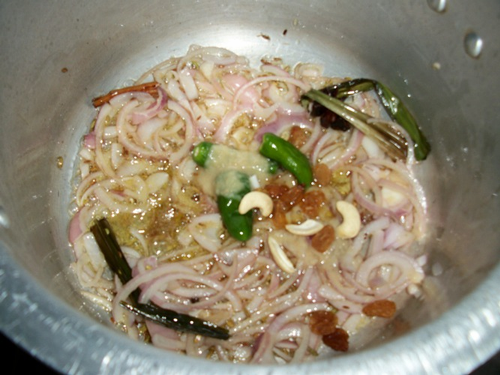 |
| add some green chillies, cashews and raisins |
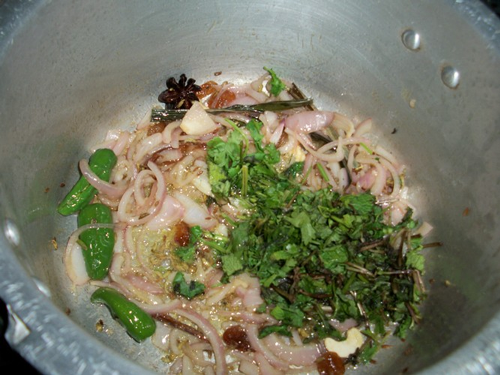 |
| mint and cilantro |
 |
| spices |
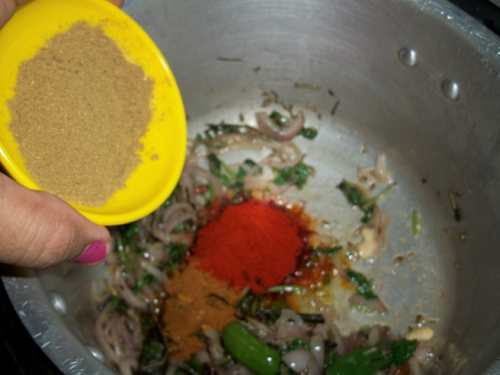 |
| some more spices |
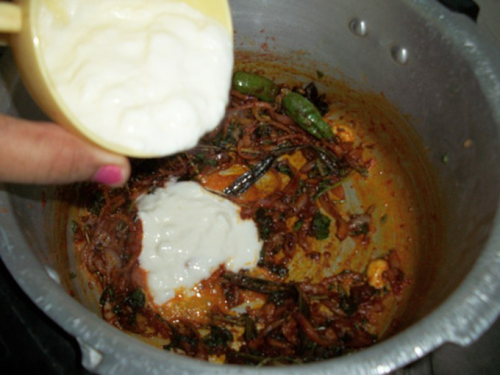 |
| add some curd |
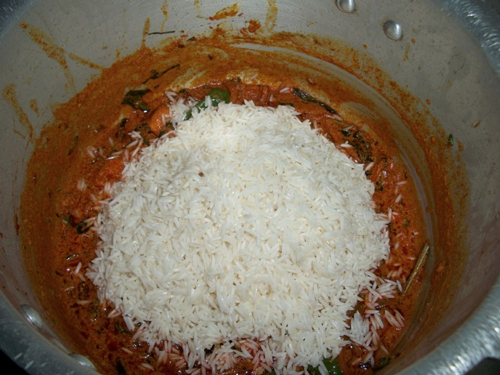 |
| in with rice |
 |
| mix well |
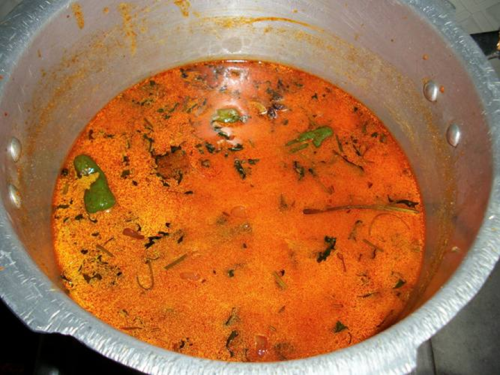 |
| add water |
 |
| Bring that to boil |
 |
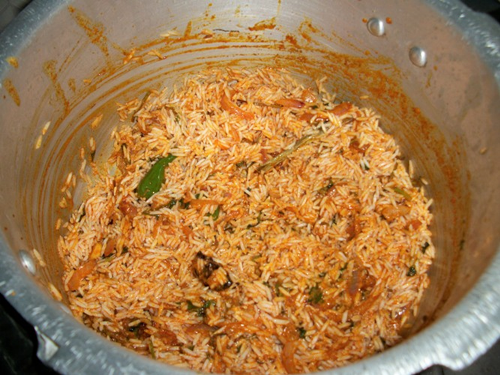
| Cook it. |
 |
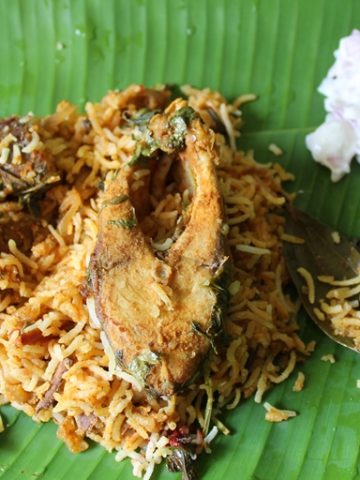
| Place the fried eggs on top and serve. |
 |
| ENJOY |
Related Recipes


Nags
this looks absolutely delicious! i am surely going to try it soon aarthi. thanks for writing me and sharing your link 🙂
spuppala
lovely pics and excellent detailed recipe..
Davis
Good Information. Thank you for sharing and I want to share information about Tandoori Chef which is An authentic North Indian, fine dining restaurant, Tandoori Chef offers Hackensack and the surrounding area a wonderful taste of Indian cuisine.
Anonymous
Nice recipe. But 1 cup off basmati rice will cook nicely in 1and half water right arthi?
Aarthi
@AnonymousIf you soak the basmati, then it will cook in 1.5 cup of water. If u didn't soak then it needs 2 cups of water. You can follow any of these steps.
Anonymous
Superb recipe
Anonymous
Nice one. Will give it a try.
Jaswinder
How long should we soak the river Pls?
Aarthi
@JaswinderYou need to soak rice for 30 mins
Jessie Deol
Can I make this in a rice cooker or pot ? I don't have a pressure cooker
Aarthi
@Jessie Deolyes u can
sabrina ali
plz explain the quqntity of rice nd water insted of cup
Aarthi
@sabrina alirice is 500 grams..what is 1 liter
sabrina ali
water 1 liter hav to use?
Aarthi
@sabrina aliyes 1 liter.
Anonymous
can i use tomato?instead of curd
Aarthi
@Anonymousyes u can use
Anonymous
Hi arthi, ur recipies r too gud n easy to follow. I usually cook biryani in pressure cooker following ur measurenent . But, the rice becomes mushy in the bottom. Plz advice.. I used it kee p in simmer for 15- 20 mts with double the quantiry of water.
Aarthi
@Anonymousadd about 4 cups(For each cup of rice add 2 cups of water) of water and let it boil.
Cover it and let it simmer for 1 to 2 whistle or for about 15 min.
Anonymous
If i use a pot instead of a pressure cooker,then do i just mix the soaked rice with the onion mixture and pour water and set it to cook?
Aarthi
@Anonymousyes u have to cook likethat
Deepthi K Nair
I tried this recipe with tomatoes instead of curd and it was delicious... Thanks for sharing such a tasty recipe...
Manjula Vanapalli
Hi Aarthi ji, plz tell me which gram flour u used??
Recipe Kitchen
I made it at home, it is a very tasty and royal dish.