
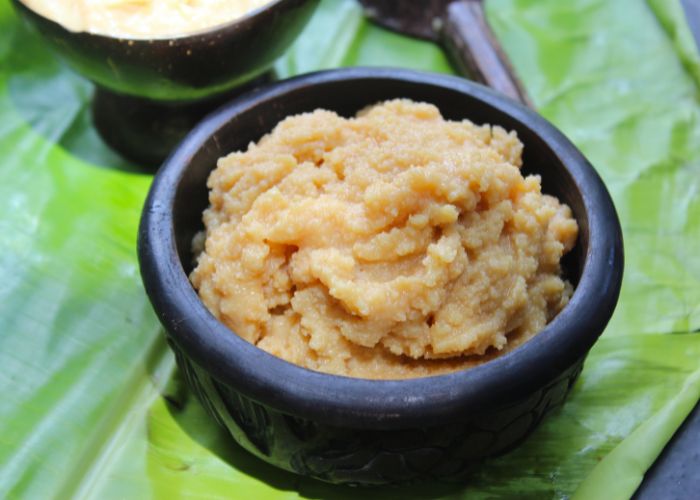
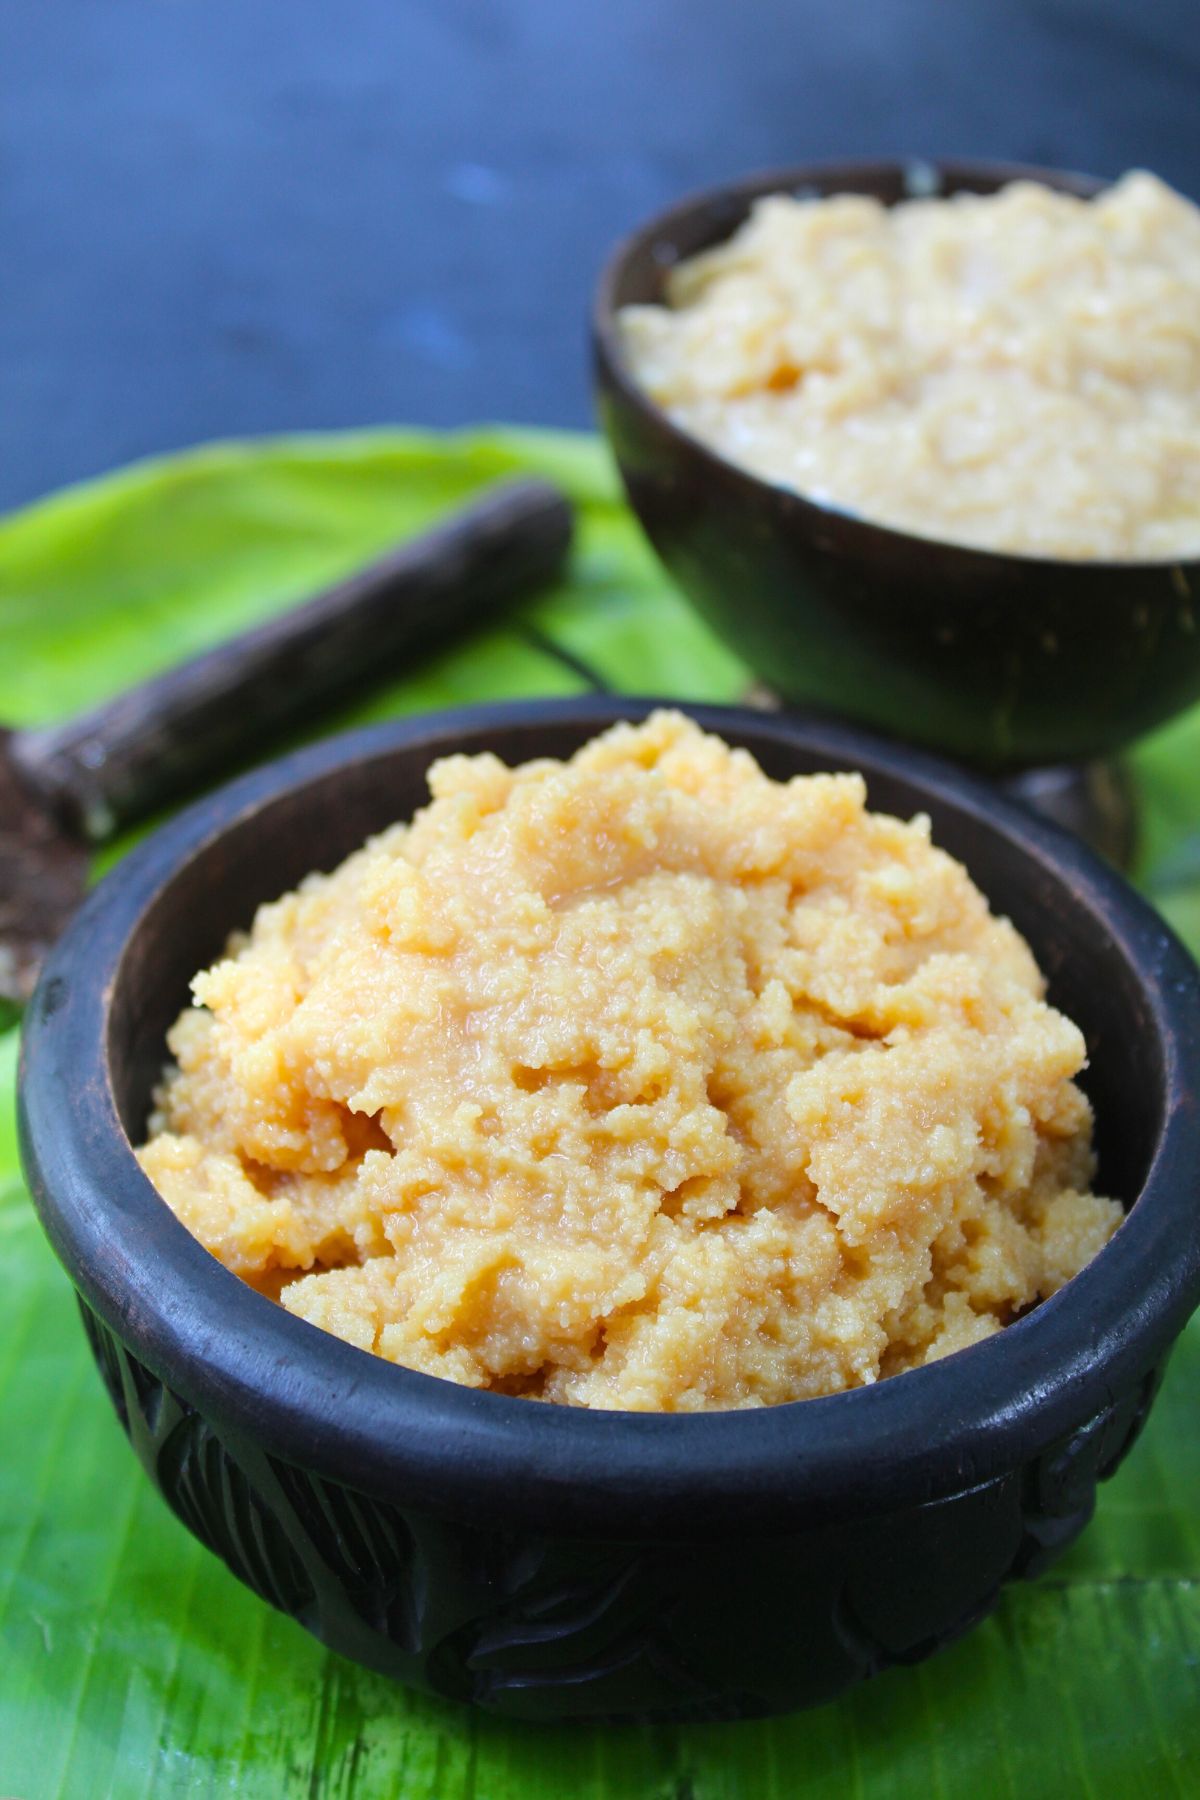
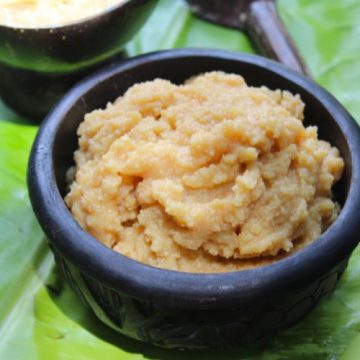
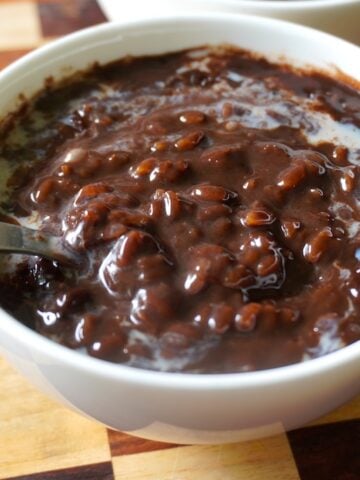
Palkova is a popular and favorite Indian sweet which is literally milk thickened to halwa consistency with sugar. It is often known as therattipal in southern part of tamilnadu. In this blog post, I have shared traditional method and also an Instant 5 minutes version. Learn how to make palkova recipe with step by step pictures, instructions and video.
Palkova Recipe
Palkova is one of the sweet which is a labour of love. If you have the time and patience you can try making this dish. All it needs is just milk and sugar. Milk and sugar is cooked down till it thickens like a jam. I love it so much specially the one which you get in Srivilliputhur or aavin paal kova.
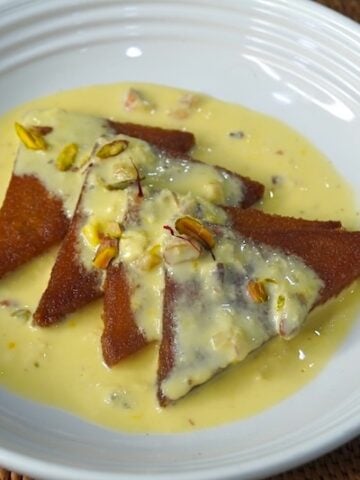
Yesterday I made this yummy therattipal desert, because want to make paal poli out of it. This is one of the recipe which takes lots of your time to make. The cool thing is you can do any work at that time, but make sure that you stir the pot often. You can do your laundry or wash vessels or anything in that time. But the end result of this tiring work is so worth it, each spoonful taste so heavenly.
About Palkova Recipe
Palkova is a popular Indian sweet made with milk and sugar. Traditionally palkova is cooked in a huge uruli like vessel. Milk and sugar is cooked down till it gets thick and halwa like consistency.
In this blog post I have shared instant version and traditional method of making palkova. For instant version you need only sweetened condensed milk and yogurt. Traditional method uses just milk and sugar to create Srivilliputhur style paalkova.
Watch Palkova Recipe Video
Similar Recipes,
Kalakand
Coconut Burfi
Khoya Burfi
Walnut Burfi
Beetroot Burfi
Ingredients for Palkova
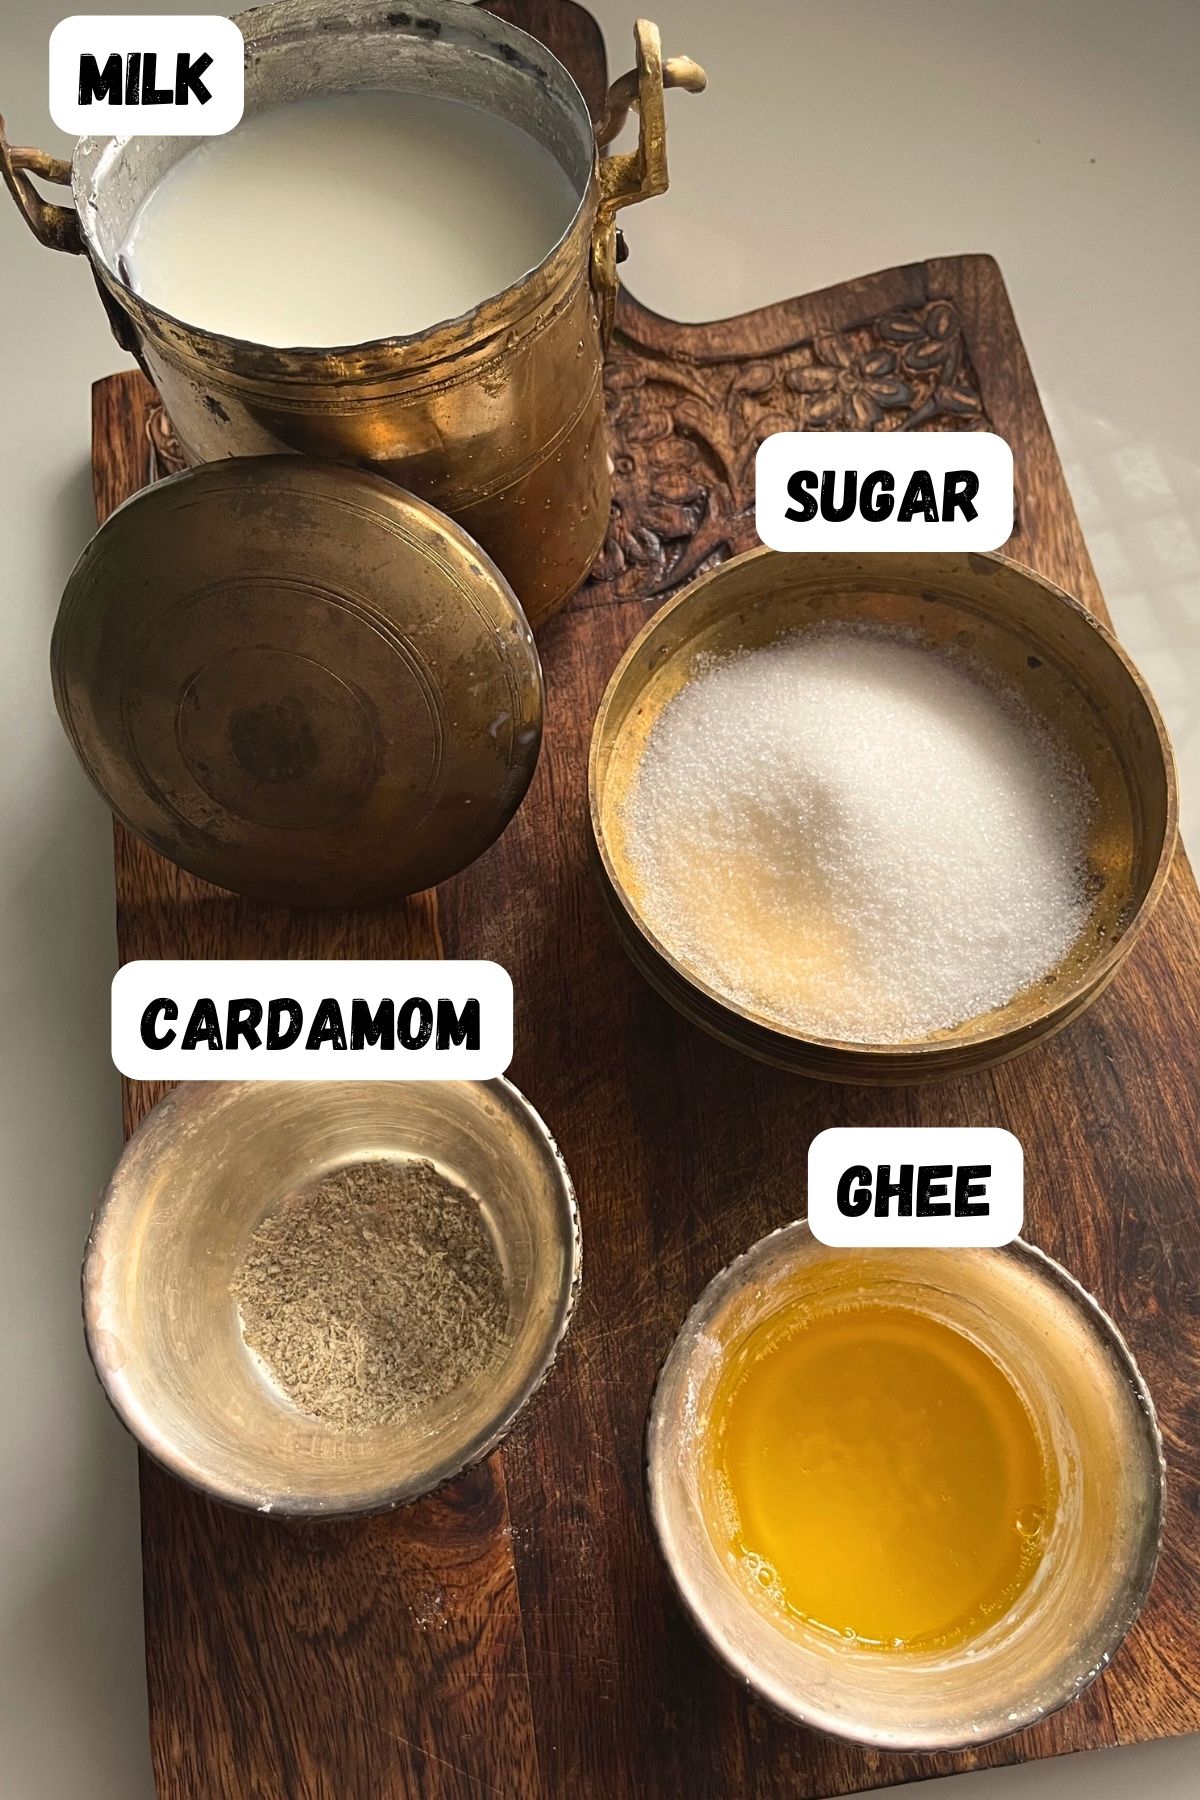
Milk
Milk is the main ingredient in making a traditional palkova sweet. Use full fat milk in the recipe. Full cream milk results in richer and thicker therattipal.
Sugar
Even though palkova is rich and sweet. You don't need much sugar when making it. For every 1 litre of milk you will be using ¾ cup of sugar. Traditionally refined sugar is added in palkova, But some recipes is made using jaggery or palm sugar which is often referred as thirattu paal.
Ghee
Ghee enhances the flavour of the sweet and makes it taste delicious.
Cardamom
Ground cardamom is added in palkova which enhances the flavour of the sweet.
Expert Tips for Perfect Palkova
Quality of Milk
Make sure you use full fat milk for making palkova. It gives you more palkova when it is reduced.
Pan Size Matters
Use large pan so that the milk reduces fast. Keep stirring milk, so it don't get stuck in the bottom and get burned.
Sweetener
Palkova doesn't need too much sugar. Add sugar only when the milk is reduced completely. Add sugar in the very end so that the kova gets the right consistency. You can use jaggery in making thirattu paal, which will curdle the milk if added in the earlier stage.
Consistency
Turn off the heat as soon the palkova looks thick. Don't cook till it comes together or look like halwa. Because as the kova cools it will thicken a lot more, So adjust the timing accordingly.
Traditional Palkova Recipe (Step-wise Pictures)
1) Take a large heavy bottom pan and add milk to it.
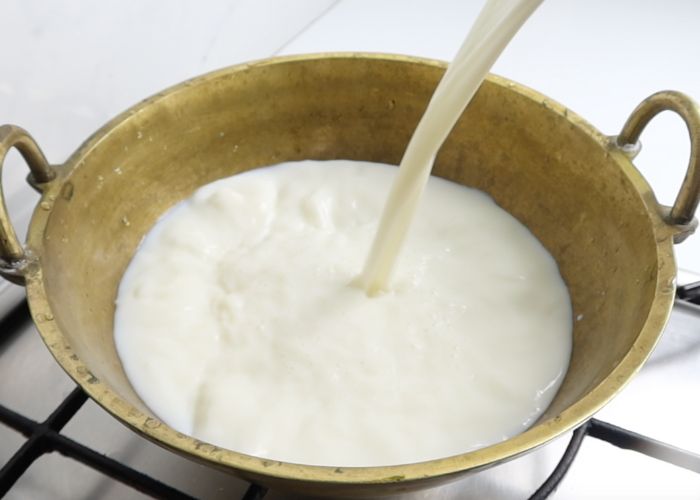
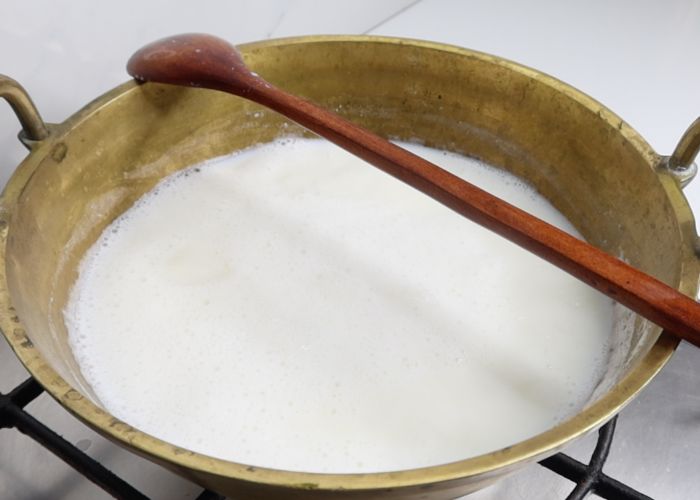
2)Bring this to a boil. Use a wooden spoon to scrape the sides of pan else the milk might get burnt in the bottom.
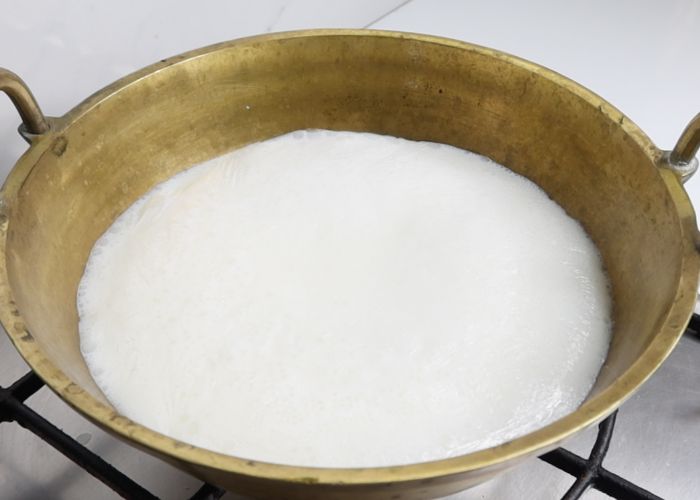
3)Allow this to boil for around 20-30 mins on high heat. Stir this constantly to prevent it from sticking to the pan.
Pro Tip: Placing a wooden spatula across the kadai will prevent the milk from overflowing.
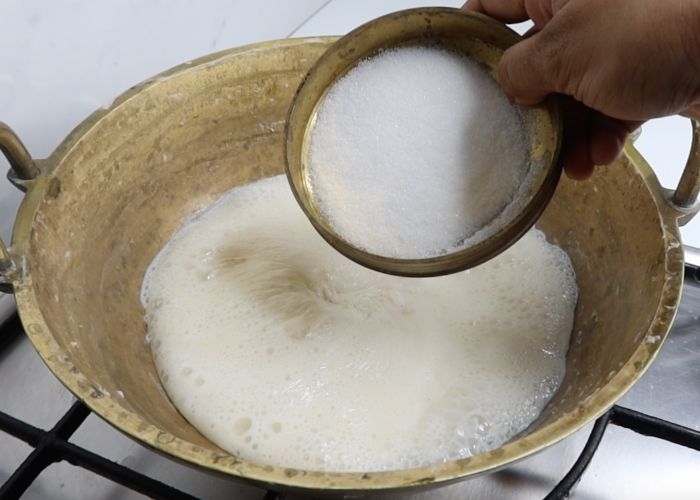
4)Once the milk is reduced to ⅓rd of its original volume.

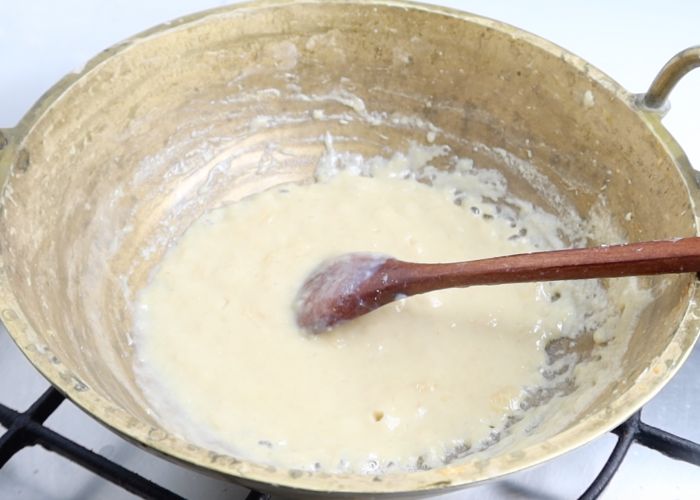
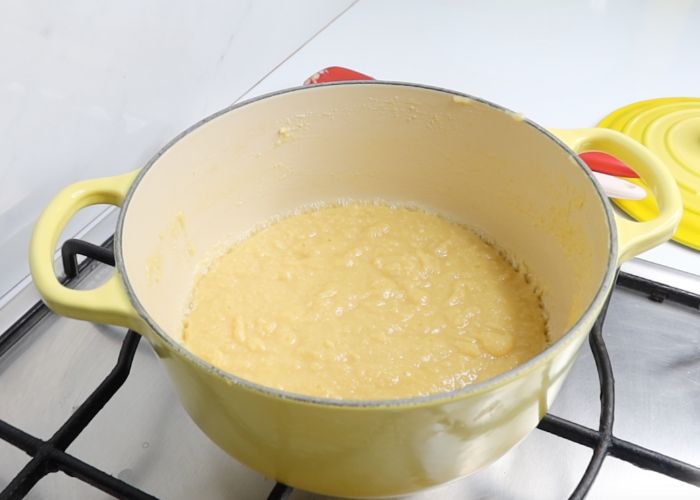
5)Add sugar and give it a good mix. At this point keep mixing constantly.
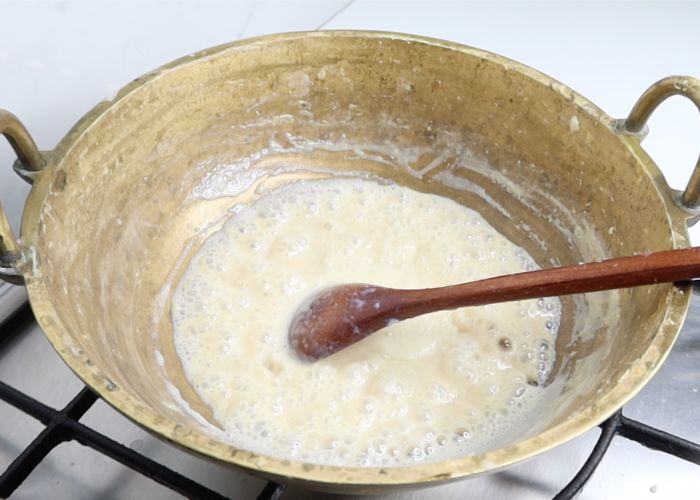
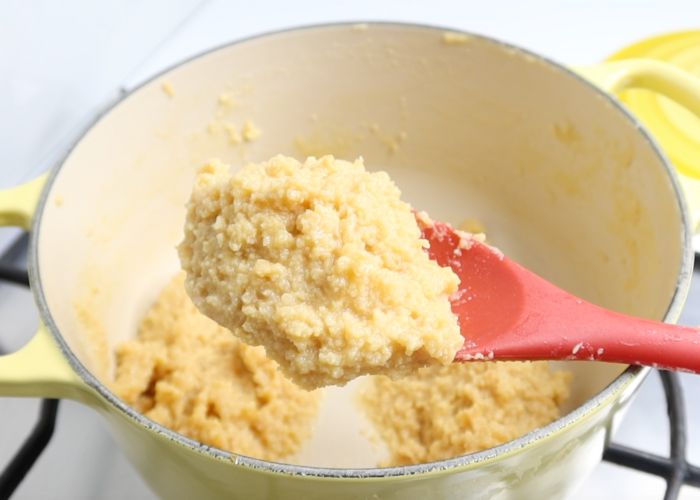
6)Once sugar is added. The milk will start to thicken fast.
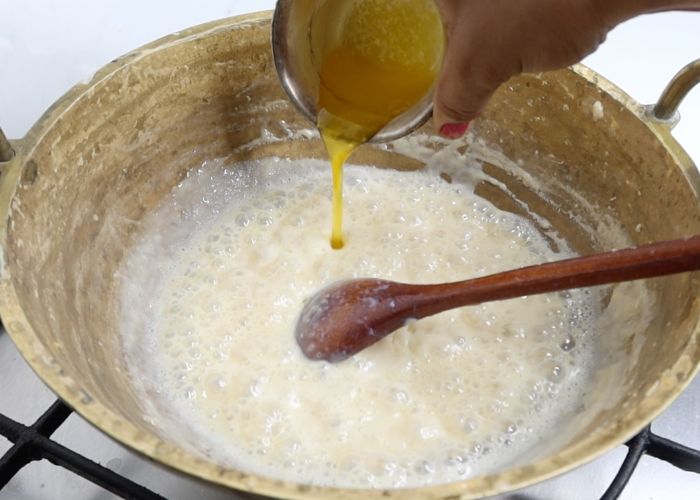
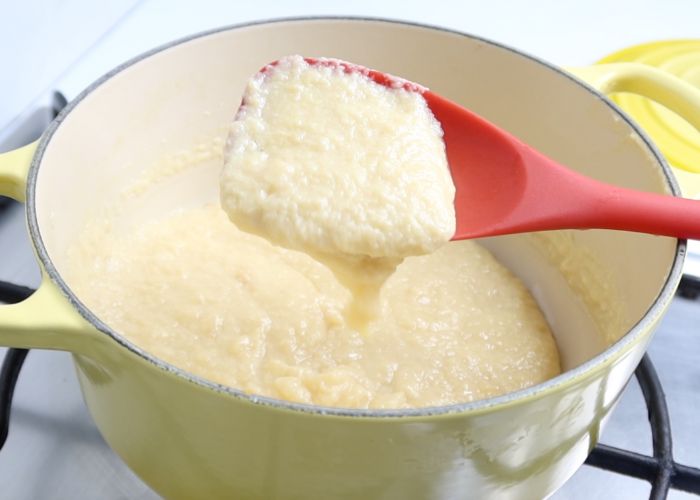
7)After 2 to 3 mins add in ghee little at a time and mix well. The palkova will thicken.Once the ghee is mixed in, The colour will change to a light golden colour.
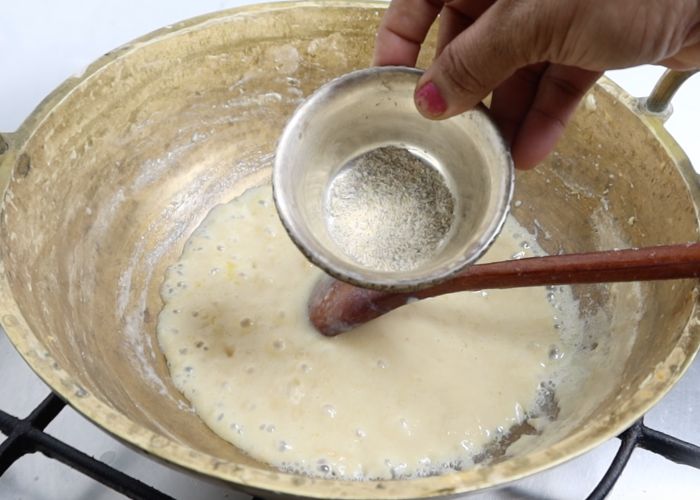
8)Add in cardamom powder and mix well. Switch off the flame and let it cool down.
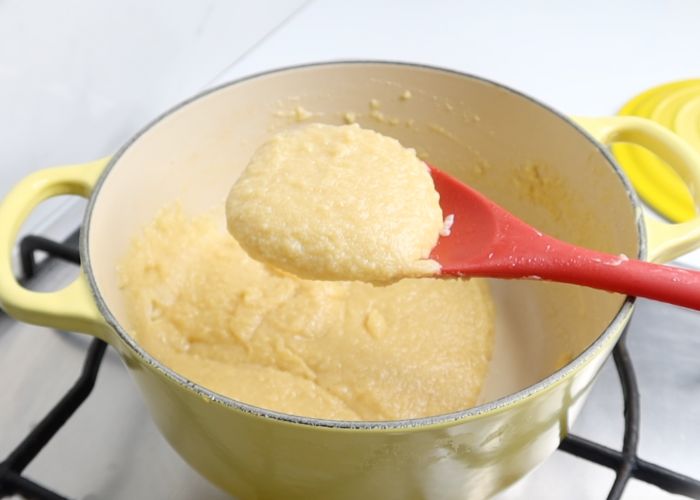
9)The palkova may look a bit runny at this point. But as it cools it will thicken more.
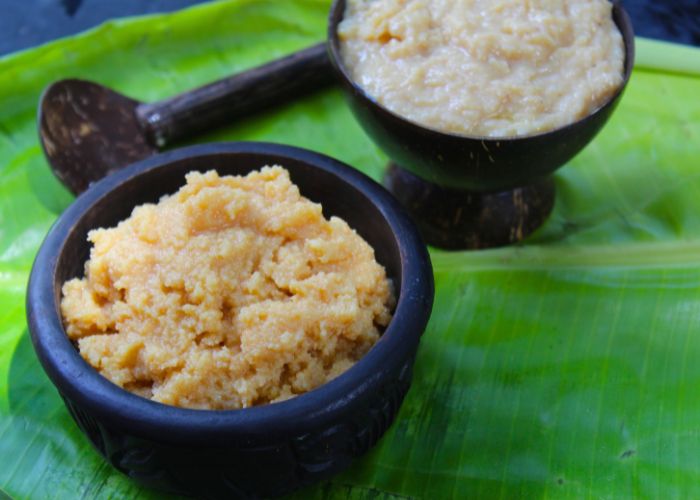
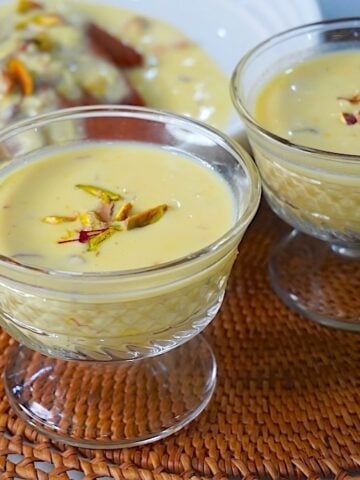
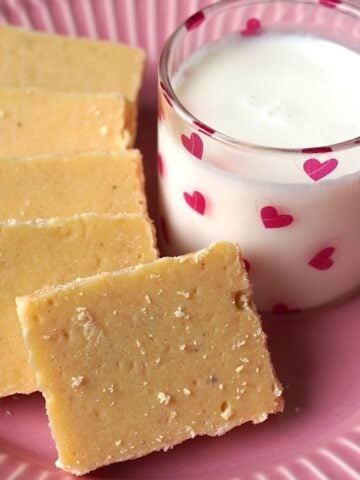
10)Look how thick palkova looks once completely cooled.

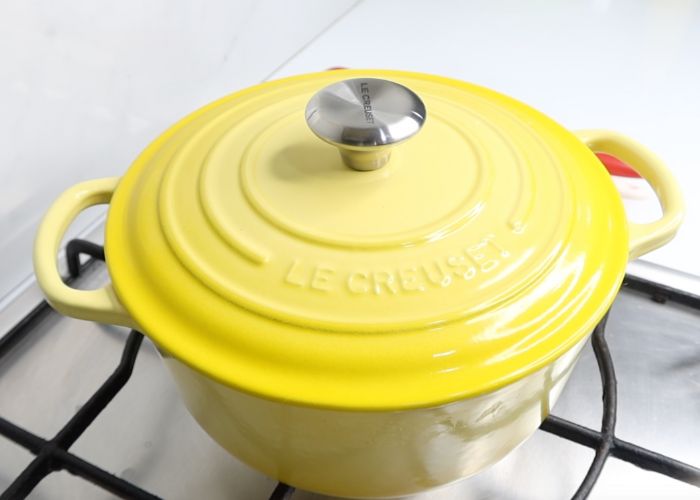
11)Once completely cooled, you can serve this or transfer to a container.
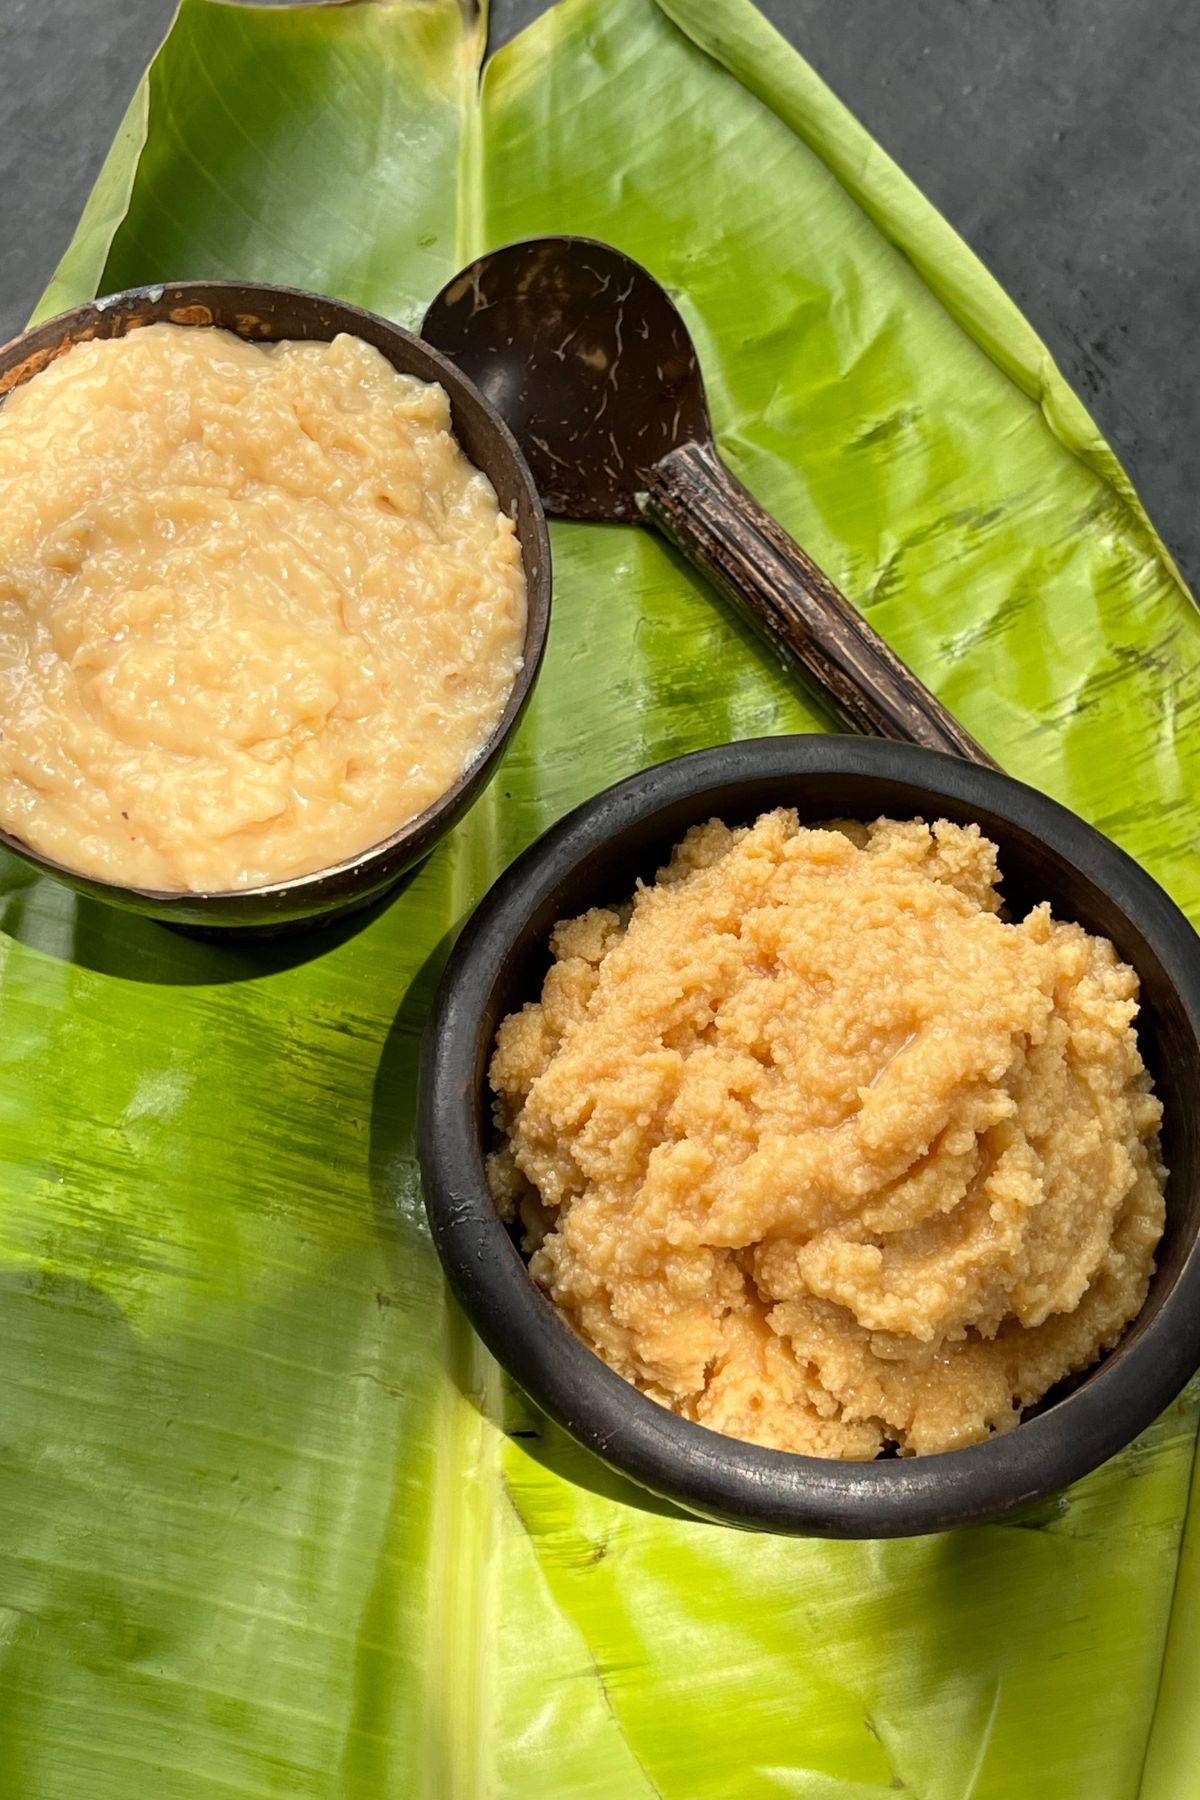
Easy Palkova Recipe (Instant Palkova in 10 minutes)
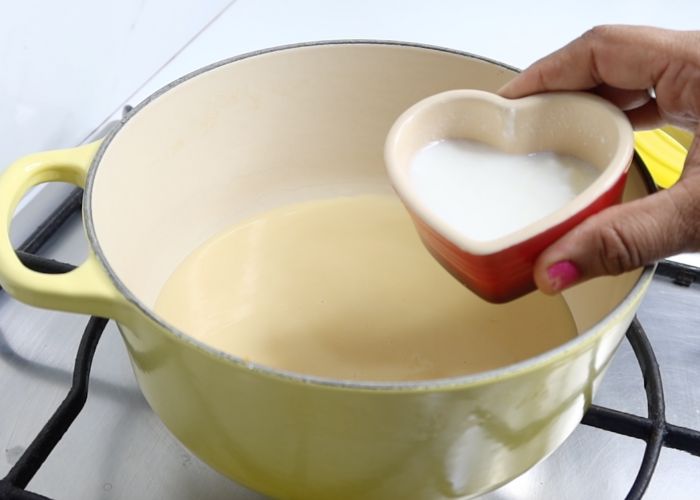
1)Take sweetened condensed milk and a heavy bottom pan.
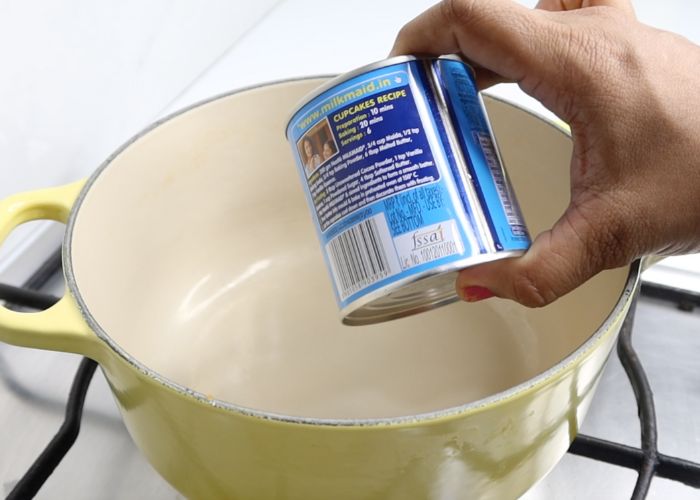
2)pour one can of condensed milk in the pan. It is around 400 ml.
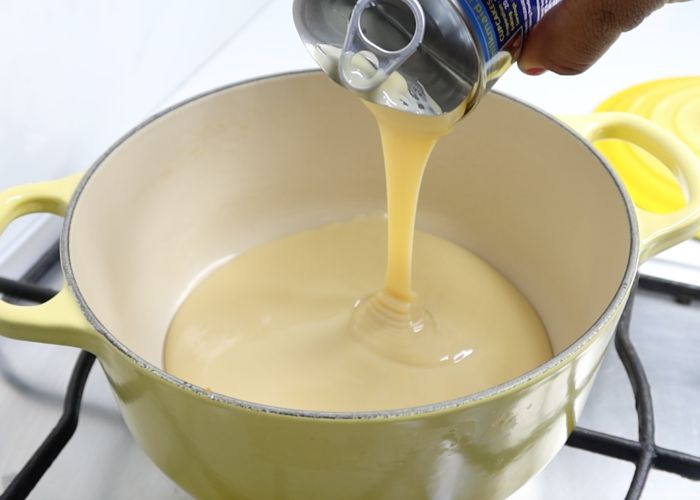
3)Add in plain yogurt.
4)Add in butter or ghee.
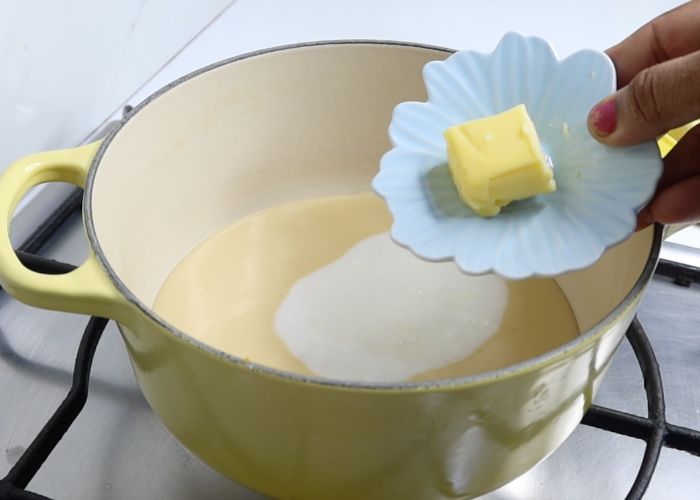
5)Mix it really well so the yogurt is completely mixed into the condensed milk.
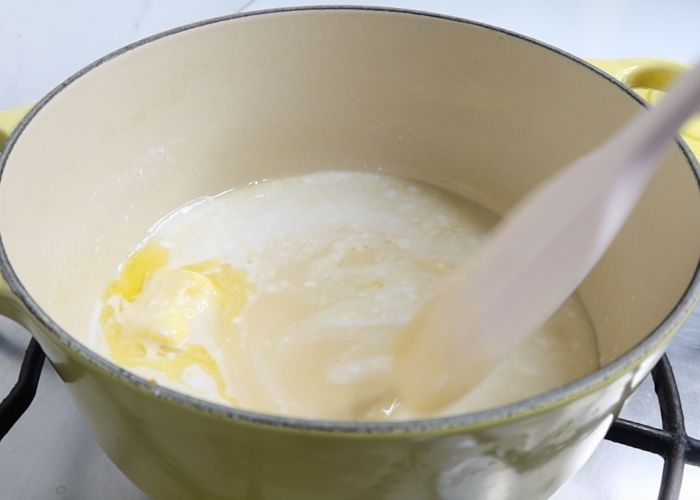
6)Place the pot on heat and cook on high heat till comes to a boil. It will look runny once the condensed milk is heated.
7)Keep cooking this. The mixture will thicken and look a little curdled and thick at this point.
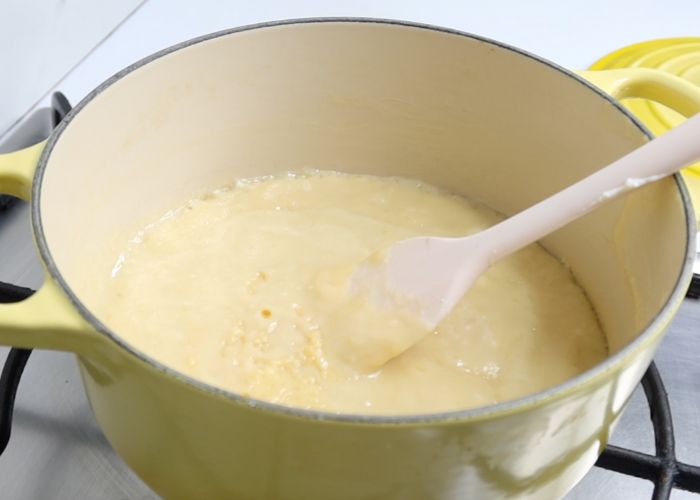
8)Keep cooking this until the mixture gets even more thick, it will take around 2 to 3 minutes.
9)After 2 to 3 mins the mixture will get thick.
10)You can turn off the heat and cover the pot with a lid and allow it to cool for 15 mins.
11)As it cools the palkova will get more thick and achieve proper consistency. Once completely cooled, you can serve this or transfer to a container.
Frequently Asked Questions (FAQ)
1)Which Milk is best for making palkova?
Use full fat milk (full cream milk). Using full fat milk yields higher quantity palkova. Buffalo milk can be used too.
2)Can we make palkova using low fat milk?
Low fat milk is not suitable for making palkova due to its lower fat content. It is not worth the effort you put into making the palkova because you will not be getting much sweet once you finish making it.
3)Is palkova and therattipal is same?
Yes both are similar. Some recipe for making therattipal uses more ghee. Some people use cane sugar (jaggery) when making therattipal which curdles the milk and helps achieving the grainy texture. I have seen people adding a tablespoon of sooji (rava) also. You can check my seempaal recipe.
4)Can I use jaggery when making palkova?
Jaggery will make the milk curdle which is infact good for palkova. But the taste and texture will be completely different when using jaggery. If you want to use jaggery, use powdered variety and also add it during the end, once the milk is completely thick.
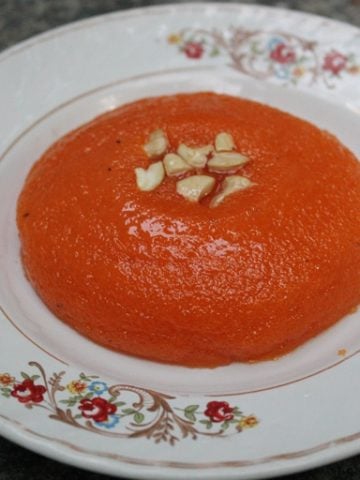
More Milk Sweet Recipes,

📖 Get Recipe
Palkova | Palkova Recipe
Ingredients
Palkova Recipe (Traditional)
- 2 litre Whole Milk
- ½ cup Sugar
- 1 tablespoon Ghee
- ½ teaspoon Cardamom Powder
Instant Palkova (under 10 minutes)
- 1 can Sweetened Condensed Milk (400 ml)
- 3 tablespoon Plain Yogurt
- 1 tablespoon Ghee or Butter
Instructions
Palkova Recipe (Traditional)
- Take a large heavy bottom pan and add milk to it. Bring this to a boil. Use a wooden spoon to scrape the sides of pan else the milk might get burnt in the bottom. Allow this to boil for around 20-30 mins on high heat. Stir this constantly to prevent it from sticking to the pan.
- Once the milk is reduced to ⅓rd of its original volume, Add sugar and give it a good mix. At this point keep mixing constantly.
- Once sugar is added. The milk will start to thicken fast. After 2 to 3 mins add in ghee little at a time and mix well. The palkova will thicken.
- Once the ghee is mixed in, The colour will change to a light golden colour.
- Add in cardamom powder and mix well. Switch off the flame and let it cool down. The palkova may look a bit runny at this point. But as it cools it will thicken more.
- Once completely cooled, you can serve this or transfer to a container.
Instant Palkova (under 10 minutes)
- Take condensed milk, yogurt and butter (or ghee) in a heavy bottom pot. Mix it really well so the yogurt is completely mixed into the condensed milk.
- Place the pot on heat and cook on high heat till comes to a boil. It will look runny once the condensed milk is heated.
- Keep cooking this. The mixture will thicken and look a little curdled and thick at this point.
- Keep cooking this until the mixture gets even more thick, it will take around 2 to 3 minutes. After 2 to 3 mins the mixture will get thick. You can turn off the heat and cover the pot with a lid and allow it to cool for 15 mins.
- As it cools the palkova will get more thick and achieve proper consistency.
- Once completely cooled, you can serve this or transfer to a container.
Video
Notes
- Use a huge pan so that the milk reduces fast.
- Always stir the milk, so that it don't get stuck and get burned.
- Add sugar in the very end so that the kova gets the right consistency.
- Every microwave is different, so keep an eye on it and always mix it at regular interval.
- As the kova cools it will thicken a lot more, So adjust the timing accordingly.
- I added 1 teaspoon of ghee. The more ghee you add the more colour you will get in the paal kova. But i recommend 1 teaspoon of ghee, because this sweet is so rich as its own.
Nutrition
Tried this Recipe
Mention @yummytummyaarthi or tag #yummytummyaarthi!If you have any questions not covered in this post and if you need help, leave me a comment or mail me @aarthi198689@gmail.com and I'll help as soon as I can.
Follow me on Instagram, Facebook, Pinterest ,Youtube and Twitter for more Yummy Tummy inspiration.


Helene Dsouza
Hi Aarthi!
Thats looks awesome and so easy to make! thanks for sharing and I wish you a happy easter!
cookingvarieties
hi aarthi, honestly i have never seen this sweet before in my area..
they look very interesting to taste.
but i think i just admire your pics, because you said it takes a very long time to cook. ha ha. have a nice day
faseela
superb recipe...yum
Sharmilee! :)
Nothing can beat the taste of palkova...looks yum
Hamaree Rasoi
Delicious and yummy looking doodh peda.
Deepa
Chef Mireille
This looks so yummy..and I LOVE the new header!
Priya
Just need a spoon to finish it,tempting paal kova..
Archana
Wow this is beautiful. My friend had given me the recipe but I have not got round to making this.
You are tempting me to make it. Delicious.
Anonymous
I am making it first time on my own, really tasty! Logamatha, Thiruthangal.
Shey divine
So simple to make ..sounds interesting
Priya Suresh
Very quick and easy breezy thiratti paal,i do this way too.
Hamaree Rasoi
Peda looks amazing. very innovative method using microwave oven. Pics are great.
Deepa
Akila
Awesome! Going to try today Aarthi:-)
Madhu
Can we make this awsome recipe on stove top or OTG.
swarna santosh
Super easy recipe 🙂
Anonymous
Looks really nice!!! But how can i do without microwave?
nagarathna keshav
Hai, aarti ,its looking yummy & very good.
I wanted one clarification that for how much digree you have set your micro wave it is high or low & mine is 800 deg is maximum.
Narmatha Jeganathan
Hey aarthi I troed this n infact it came out very well.. I enjoy trying out most of ur recipes... easy n convenient for people with busy lifestyle... keep publishing more... gr8 wrk Aarthi 🙂
Aarthi
@nagarathna keshavMine is 800 degrees.
Aarthi
@AnonymousI am not sure about that. Will share a version soon
Aarthi
@MadhuI am not sure about it, but give it a try
Sasi Rekha Reddy
thank you soo much for your recipe i tried it and it came out awesome... thank u for ur assistance
Sasi Rekha Reddy
thank u so much aarthi..for your recipe..i tried it and it came out awesome... 🙂
Kalyani
Just made this Aarti . Came out well, although had to micro a few mins more. Thanks fr the step by step pics, as always ! How r u doing ? Long time..
Anonymous
Can i add some dry fruits to it
Aarthi
@AnonymousIf you feel like adding you can..
Anonymous
There is another recipe like this but it needs sugar, butter, milk powder and ricotta cheese. It is also a microwave recipe. The pictures you posted looks just like how I make at home.
geeth
nice recipe.. no need to add sugar ah?
Aarthi
@geethNo need to add sugar, the sweetness from condensed milk is enough
SASI REKHA
Luks yummy..Can we make on stove???
Aarthi
@SASI REKHAI think you cannot.
Anonymous
Looks very tempting... Ur recipes are really interesting and the way u post with pictures help us to understand easily.. Great job Aarthi..
Anonymous
Awesome recipes Aarthi.. You are doing a great job..!! Can I add buttermilk instead of yogurt/curd..?? If yes, how much quantity should I add..??
Aarthi
@AnonymousCurd is recommended. haven't tried with buttermilk.
Renu Saravana
Aarthi...inniki seythen just yeppo...sema tasty...thank you
Vaibava
Hi aarthi thank u for sharing I have a doubt can we any other milk instead of condensed milk????
Aarthi
@Vaibavano condensed milk is the trick
Purnima Selvamurugan
I tried this recipe this morning. It came out perfect... Thanks for your post...
Yasmeen Basheer
Can this khova be used to as an ingredient in all recipes that call for khova as we cant get khova in the shops here in UK.Also making it here is very difficult.
Aarthi
@Yasmeen Basheerno this is sweetened khoya, you can use this
https://www.yummytummyaarthi.com/2015/03/instant-khoya-recipe-microwave-7-min.html
https://www.yummytummyaarthi.com/2013/10/homemade-khoya-unsweetened-kova-khoa.html
Priya
Thanks for the detailed recipe n pictures ! I tried it today , it was a huge hit in our home 😀
Anonymous
i did same as you mentioned ...it came out perfect... but, im not able to get the shape/cut into pieces .
Aarthi
@Anonymousyou cannot cut into pieces. you can just put it in a bowl and unmould it..
Anonymous
I prepared in stove top... came perfectly as u got in microwave... Thames for d recipe
Anonymous
God...you made it soo easy... 🙂
Suresh...
Anonymous
Any alternate to condensed milk ? Cn I make condensed milk at him vd milk powder o something ?
Aarthi
@Anonymousno sub for condensed milk
Anonymous
Thanks so much Aarthi. My six year old and I made this recipe and we had a great time. It was very yummy.
Anonymous
Hi,
I tried this recipe and it comes out really well.
Thanks a lot for sharing this.
Regards,
Swapnali
Anonymous
You are the real in the world.
Keep rocking.
I tried almost 100 recipes from your blog. Nothing failed.
Keep rocking.
I am sure that Maha will become a well balanced eating kid.
Fermie Praisid
Tried this and it came out really well. Thanks for the recipe Aarthi ☺
Anonymous
Hi Aarti,
I tried this reciepe and came out really good. But it is bit sweeter than what i eat, can I add anything to reduce the sweetness?
Anitha Siva
Tried and came out very well.. Thank you so much for the recipe..
Deepa Krishnan
Awesome method Aarthi.. Tried it and it cane gud
Anusha Devareddy
Can v use the borosil bowl
Aarthi
if it is microwave safe you can use
Unknown
Can this be made without microwave????
Aarthi
not sure about that
Dharshini Anandakumar
Hi Aarthi,
I tried your palkova recipe. It came out well. Adding a little coconut milk gives a store bought palkova consistency. Just, fyi.
Nandhini
Very nice