
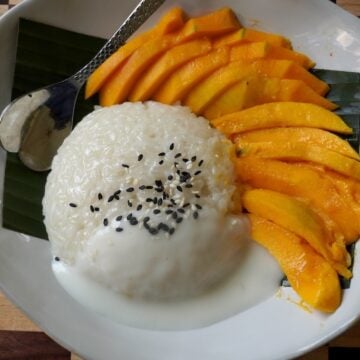
Thai sticky rice aka glutinous rice is traditionally soaked and cooked fluffy. The cooked sticky rice is then covered in a creamy coconut sauce and paired with fresh mangoes. This is a classic, traditional and staple dessert in Thailand. Thai sticky mango is also known as "Khao Niew Mamuang" in Thai.

Thai Sticky Rice with Mangoes
Easy and delicious Thai sticky rice with mangoes. This is a special dessert but taste as good as it sounds. Special Thai dessert. I have been wanting to make this dessert for a very long time. Finally i made it on this mango season and it was a great hit. The dessert was tasty and i am sure it is healthy too.
About Sticky Rice with Mangoes
Mango is the highlight of the season and this Thai dish is just as delish as can be ! If you're trying it for the first time, get ready to be blown away. Because the combination of creamy coconut milk, sticky rice and mango will make this addictive. It's sweet, salty, creamy and just pure heaven in every bite. This is a sweet Thai-Indo fusion recipe. This recipe takes inspiration from both Thailand's Iconic mango sticky rice and India's love for creamy desserts, resulting in a sweet fragrant treat for this summer.
Summer is the peak season for mangoes in India, and the sweet, juicy fruit is a perfect match for the sticky rice. As mentioned earlier, my mother used to have with regular rice and mango. It's like a Thai-Indo fusion recipe.
When summer season starts, my mom was always happy because it meant mango season ! She would buy lots of mangoes and keep them in the rice room to ripen, making the whole room smell like mango world. And she ate mangoes all the time, especially at lunch with rice. She would cut the mangoes and eat them with the rice, sucking the juice out. I thought it was a weird combination, and even though she asked me to try it, I never did.
Later, I found out that this way of eating mangoes is actually a Thai dish. Who knew ? My mom may have had Thai food influence on her! How cool is it?
Similar Recipes

FAQ
1.Can I use regular rice instead of sticky rice?
No, sticky rice ( glutinous rice ) is essential for achieving the texture of this dish. Using regular rice will differ in taste and texture.
2.What type of mango is best for this recipe ?
In Thailand, Thai Nam Dok Mai mangoes are used for sweetness and smooth texture. But using any ripe and fresh Indian mangoes also gives the same results.
3.Can I make this dessert ahead of time?
Yes, you can prepare the sticky rice and coconut sauce in advance. Just store them separately and assemble before serving to maintain freshness.
4.Is this dessert gluten-free?
Absolutely ! This recipe is naturally gluten-free, making it a great option for those with gluten sensitivity.
5.Can I freeze Thai sticky mango rice?
It is not recommended to freeze the mango rice. If it is refrigerated, thaw them before serving and top it off with some creamy coconut sauce.
Ingredients
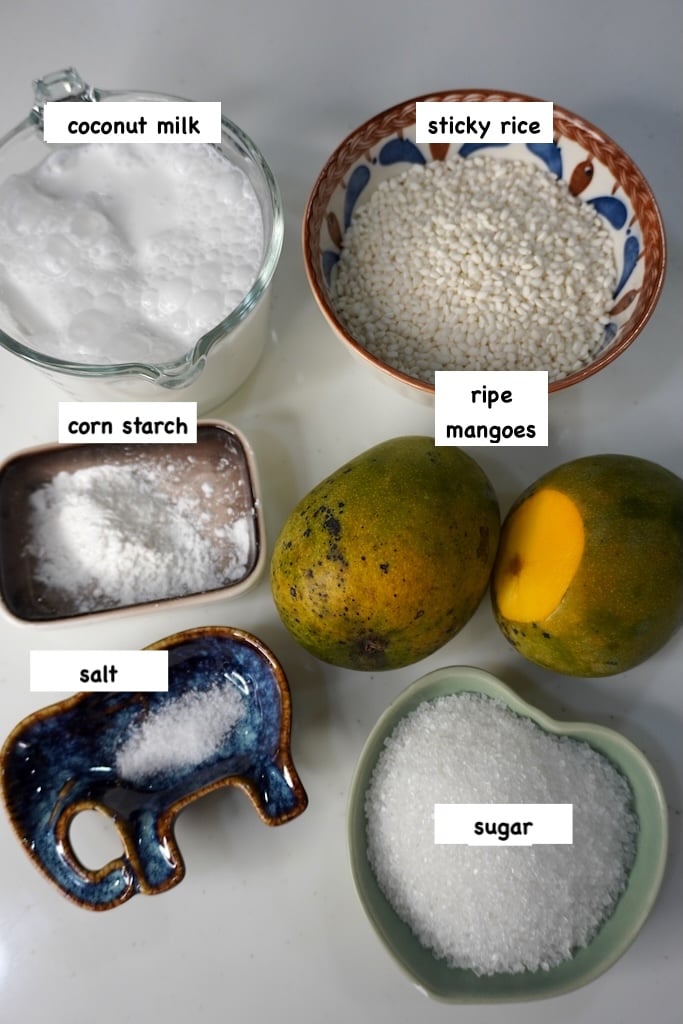
Sticky rice ( Glutinous Rice ) : The star of the dish, sticky rice is essential for achieving the chewy texture. It absorbs the coconut milk beautifully.
Coconut Milk : This creamy ingredient adds richness and a subtle sweetness. It makes the dessert truly indulgent.
Sugar : Sugar is added to enhance the sweetness of the coconut milk and complements the mango. Adjust the quantity according to your taste preference.
Salt : A pinch of salt balances the sweetness and brings out the flavour in the dish.
Ripe mangoes : Fresh, ripe mangoes are used. Their natural sweetness and juicy texture elevates the dish to the next level.
Sesame seeds : For garnish, adding toasted sesame seeds gives a delightful crunch and a pop of flavour.
Corn starch : It acts as a thickening agent of the creamy coconut milk sauce.

Expert tips
- Soaking the rice for at least 30 minutes to an hour. It ensures a sticky, chewy rice texture.
- Steam and cook the glutinous rice in low flame to prevent burning.
- To add subtle and aromatic flavour to the rice, you can add pandan leaves while cooking.
- For an enhanced coconut flavour, use thick coconut cream for the sauce.
- Use short grain glutinous rice to achieve the right texture and consistency.
- In Thailand, traditionally they use Thai Nam Dok Mak or Haden mangoes. In India, there are plenty of mango varieties available. Choose the right, fresh and juicy mangoes for a sweet and smooth texture.
Storage and serving
Thai sticky mango rice tastes best when it is served fresh. It can also be stored in an airtight container in the refrigerator. It can last for 3 days when properly sealed and stored.
Serving : For serving, thai dessert is best enjoyed fresh at room temperature. You can plate the stick rice and drizzle extra coconut sauce on top for added taste. Garnish with toasted sesame seeds for that added crunch and flavour.
Step by Step Pictures
Cooking Sticky Rice
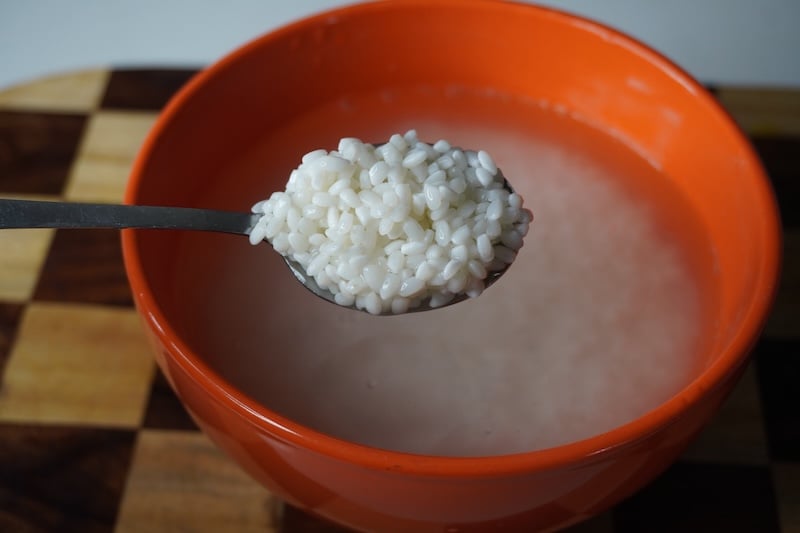
1)Wash sticky rice multiple times in water. Now cover with fresh water and allow them to soak for 8 to 10 hours. Ideally overnight.
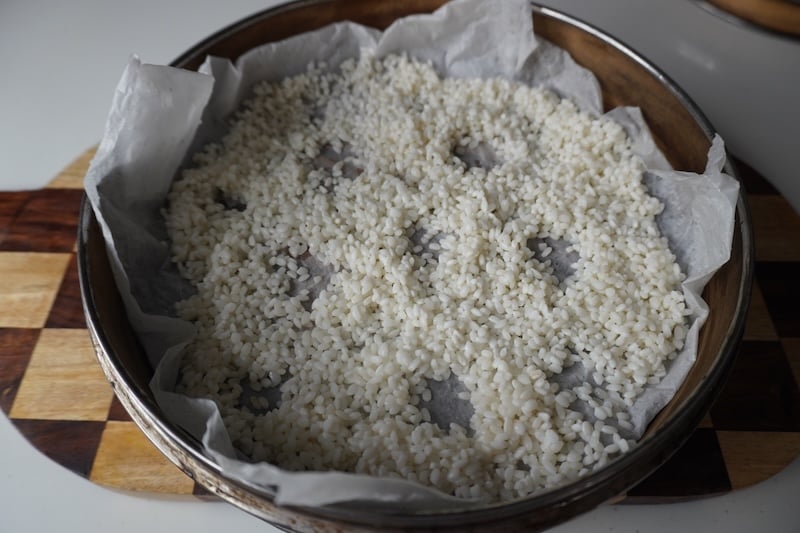
2)Strain the rice through a sieve.

3)Take a steamer basket, I used a bamboo steamer. Line with cheesecloth or parchment paper.

4) Spread the rice over the parchment evenly. Make multiple holes on the rice to ensure even steaming.
5)Place the basket over a pan of hot water. Cover and steam for 45 minutes to 1 hour.
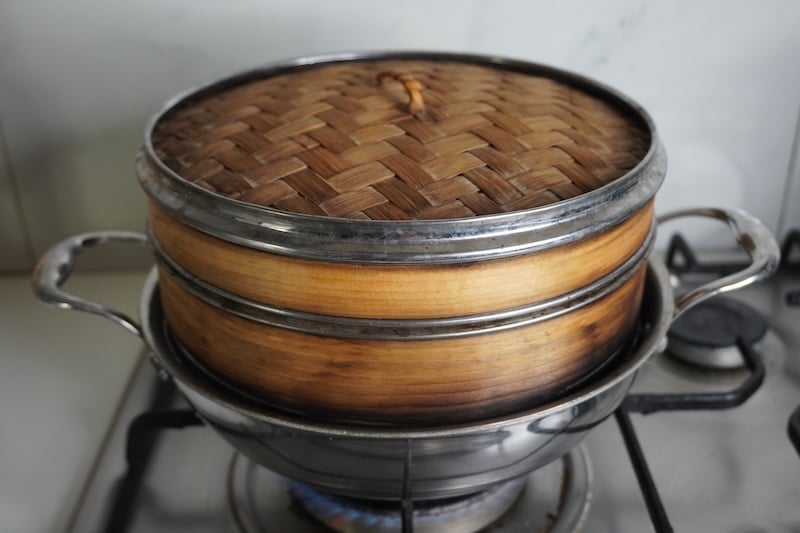
6)Make sure to flip the rice using a ladle every 10 minutes for even steaming. After 45 minutes start tasting the rice, it should be cooked, with slight chewy texture.

7)This means your rice is cooked. Remove the steamer basket carefully from the steaming pot.
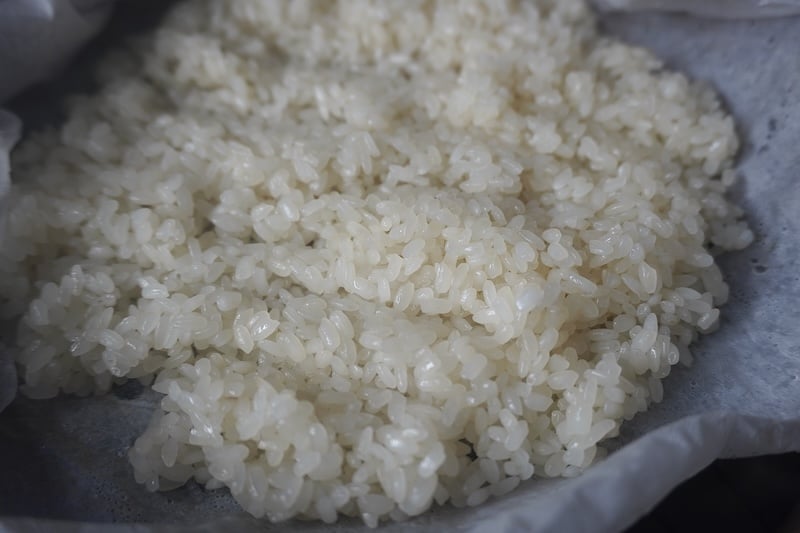
8)Take the cooked sticky rice in a bowl.
Make Coconut Sauce
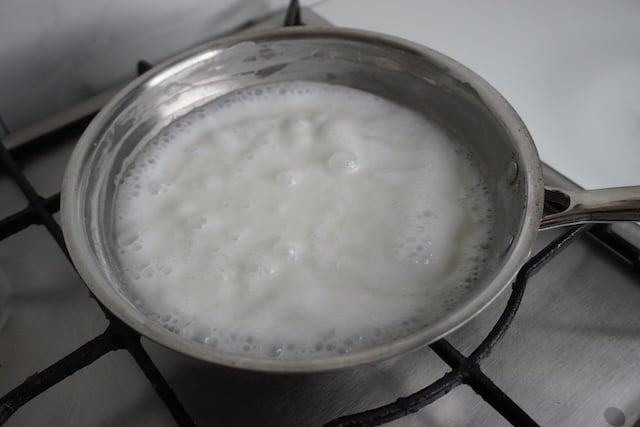
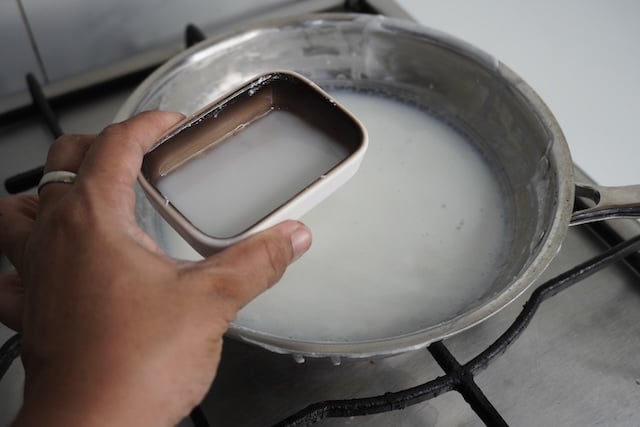
9)Take coconut milk and sugar in a pan. Cook on medium heat.
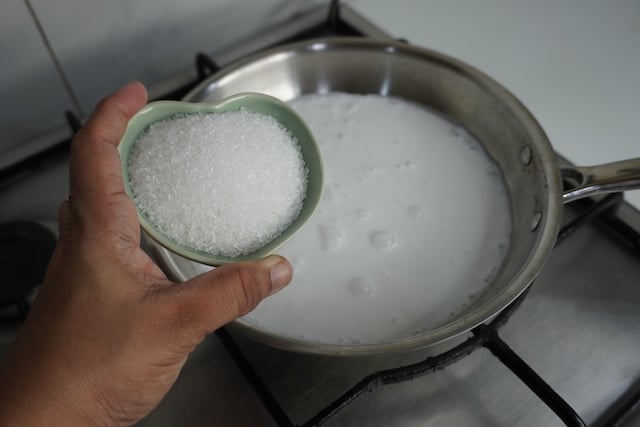
10)Add a pinch of salt.

11)Bring this to a full boil. Cook on medium heat for 2 minutes.
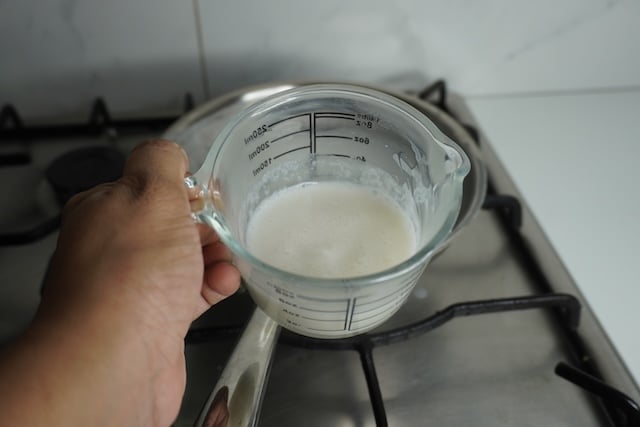
12)Now remove half of the sauce for serving on top.
13)Pour the remaining coconut sauce over the rice.
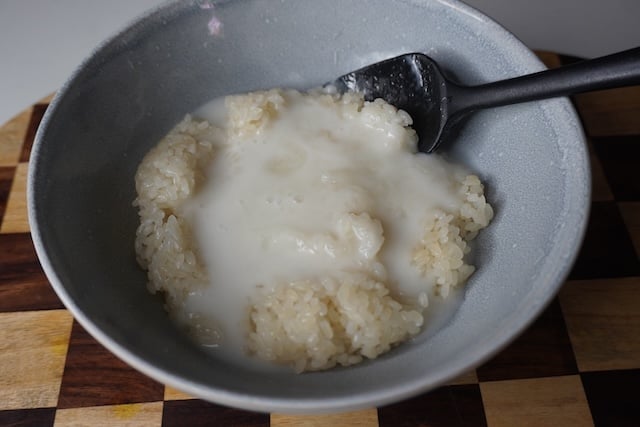
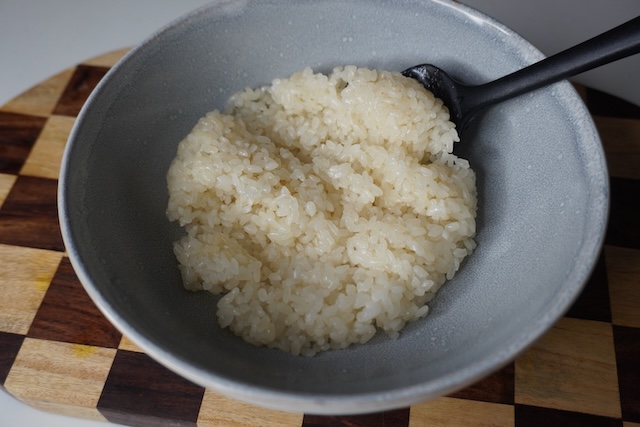
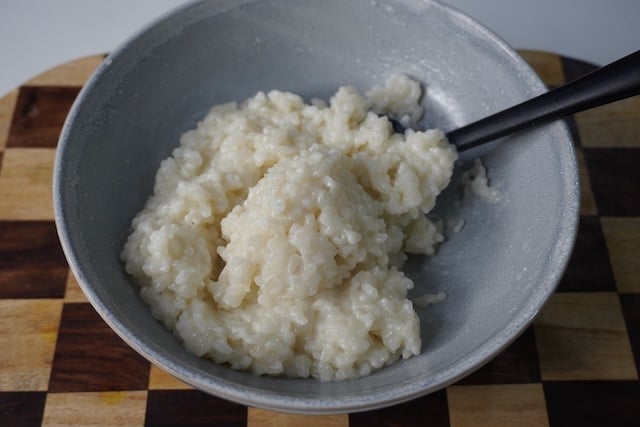
14)Mix this really well. The mixture will be slightly runny at this point. Cover this and let it rest for 30 minutes.
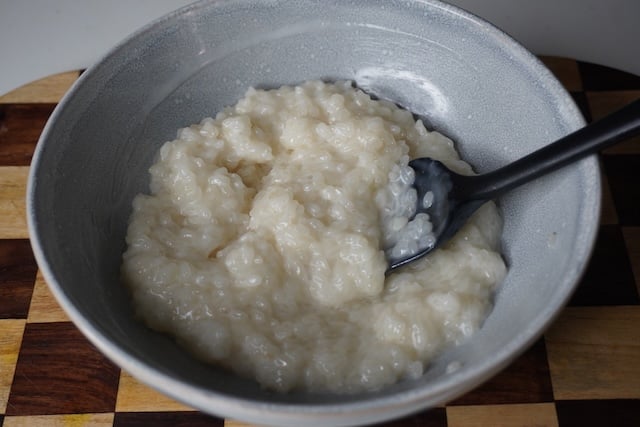
15)This is after 30 minutes. The rice must have absorbed all the coconut sauce and got thick.
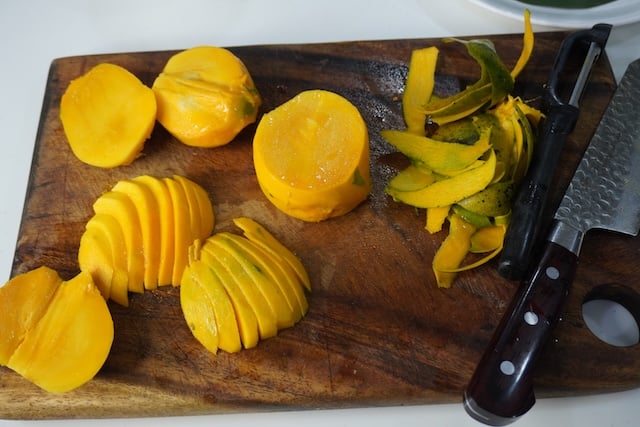
16)Take ripe sweet mangoes, peel the skin and slice them thinly. Set this aside.
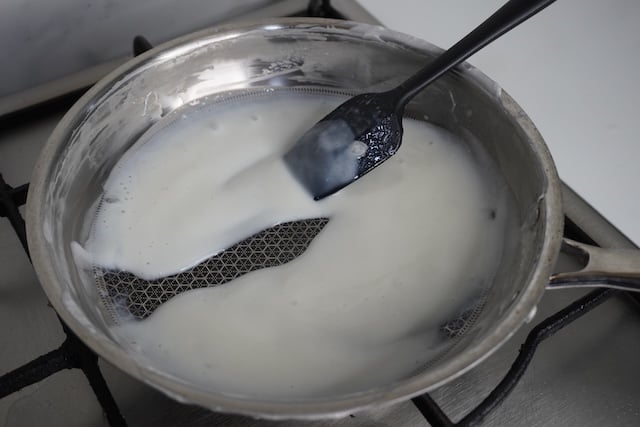
17)Now take the remaining coconut milk which we reserved earlier back into the pan. Add some cornstarch slurry and mix well.
18)Cook until it thickens. Your coconut sauce is ready.
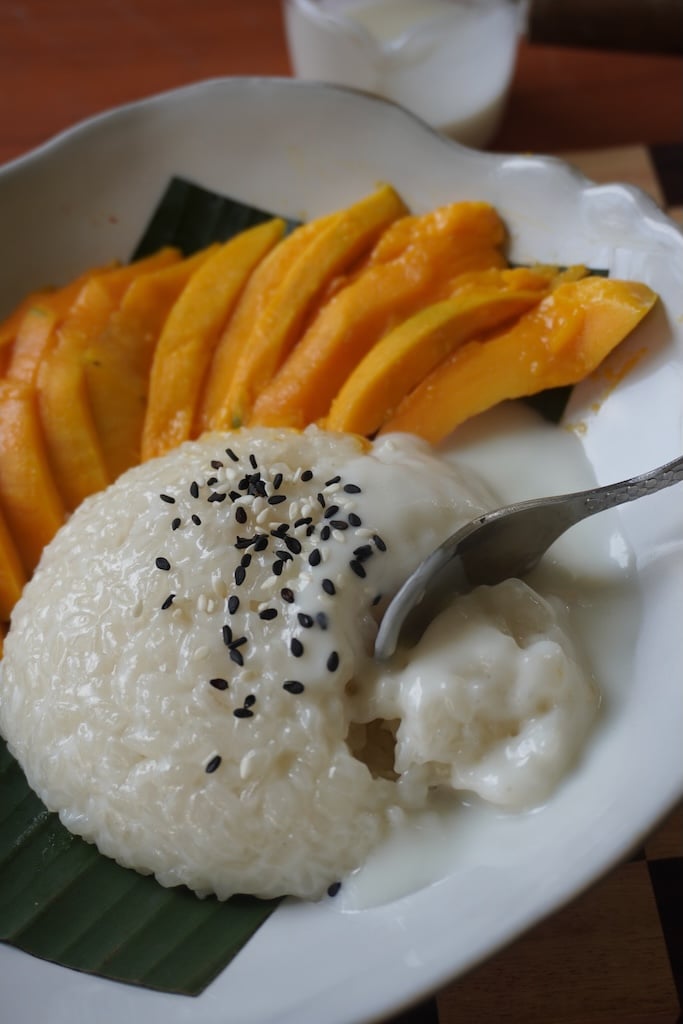
19)Take a serving place. Spoon some sticky rice in a small bowl and invert over the plate. Arrange mango slices on the side. Pour the coconut sauce on top of rice. Sprinkle with sesame seed and enjoy.
📖 Get Recipe
Thai Sticky Rice with Mangoes
Equipment
Ingredients
For Cooking Sticky Rice
- 1 cup Sticky Rice
For Serving
- 1 large Ripe Mangoes peeled & sliced thinly
- 2 teaspoon Toasted Sesame Seeds for topping
For Sauce
- 2 cups Thick Coconut Milk (500 ml)
- ½ cup Sugar or adjust
- ½ teaspoon Salt
- 1 teaspoon Corn starch
Instructions
Cooking Sticky Rice
- Wash sticky rice multiple times in water. Now cover with fresh water and allow them to soak for 8 to 10 hours. Ideally overnight.
- Strain the rice through a sieve. Take a steamer basket, I used a bamboo steamer. Line with cheesecloth or parchment paper. Spread the rice over the parchment evenly. Make multiple holes on the rice to ensure even steaming.
- Place the basket over a pan of hot water. Cover and steam for 45 minutes to 1 hour. Make sure to flip the rice using a ladle every 10 minutes for even steaming. After 45 minutes start tasting the rice, it should be cooked, with slight chewy texture. This means your rice is cooked. Remove the steamer basket carefully from the steaming pot. Take the rice in a bowl and keep covered.
Make Coconut Sauce
- Take coconut milk, sugar and salt in a pan. Bring this to a full boil. Once the coconut milk starts boiling, reduce the heat and cook for 2 minutes. Now remove ¼th of the coconut milk in a separate bowl. We will use this for serving.
- Pour the ¾ th of the coconut milk over the sticky rice and mix well. The mixture will look runny at first. Cover and let it rest 30 minutes to 1 hour. The sticky rice will thicken a lot.
- Now lets thicken the sauce. Mix 1 teaspoon cornstarch with some water. Take the reserved ¼ of the coconut milk in the same pan. Add the cornstarch slurry and cook until thicken and glossy. Your coconut sauce is ready.
Serving
- Now let's serve. Take the coconut milk sticky rice in a bowl. Invert it to a plate. Spread sliced mangoes on the side. Pour the thickened coconut milk sauce on top and sprinkle with sesame seeds. Serve.
Video

Notes
- Soaking the rice for at least 30 minutes to an hour. It ensures a sticky, chewy rice texture.
- Steam and cook the glutinous rice in low flame to prevent burning.
- To add subtle and aromatic flavour to the rice, you can add pandan leaves while cooking.
- For an enhanced coconut flavour, use thick coconut cream for the sauce.
- Use short grain glutinous rice to achieve the right texture and consistency.
Storage and serving
Thai sticky mango rice tastes best when it is served fresh. It can also be stored in an airtight container in the refrigerator. It can last for 3 days when properly sealed and stored. Serving : For serving, thai dessert is best enjoyed fresh at room temperature. You can plate the stick rice and drizzle extra coconut sauce on top for added taste. Garnish with toasted sesame seeds for that added crunch and flavour.Nutrition
Tried this Recipe
Mention @yummytummyaarthi or tag #yummytummyaarthi!If you have any questions not covered in this post and if you need help, leave me a comment or mail me @aarthi198689@gmail.com and I'll help as soon as I can.
Follow me on Instagram, Facebook,Pinterest ,Youtube for more Yummy Tummy inspiration.
IF YOU MAKE THIS RECIPE OR ANYTHING FROM YUMMY TUMMY, MAKE SURE TO POST IT AND TAG ME SO I CAN SEE ALL OF YOUR CREATIONS!! #YUMMYTUMMYAARTHI AND @YUMMYTUMMYAARTHI ON INSTAGRAM!


Leave a Reply