
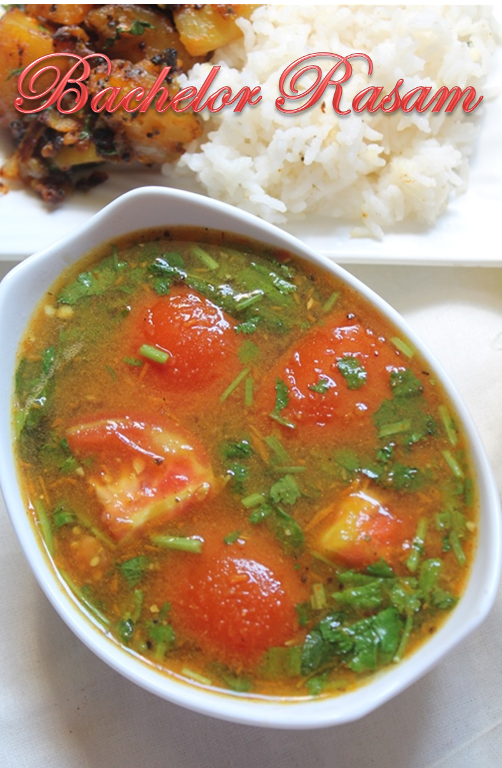
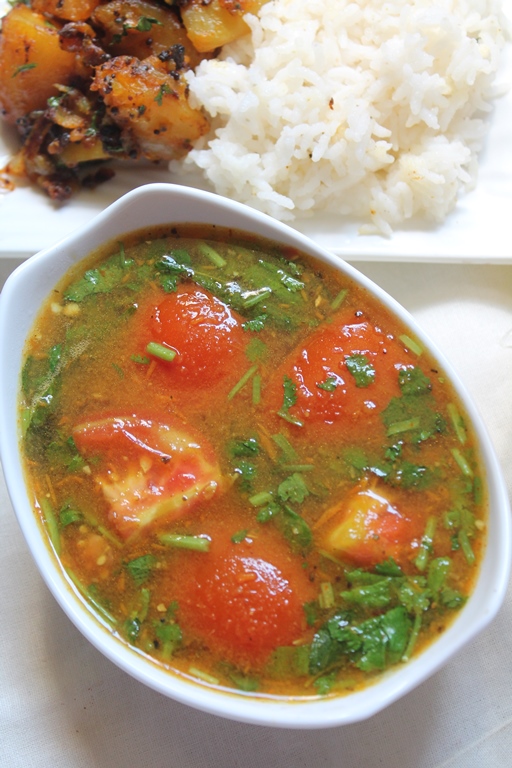
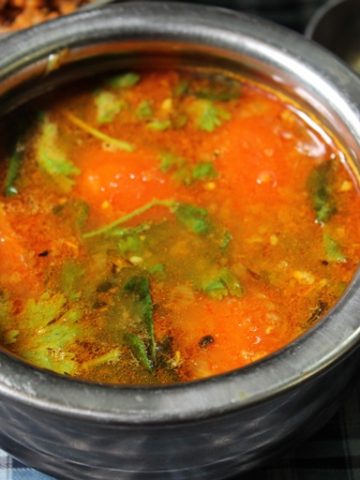
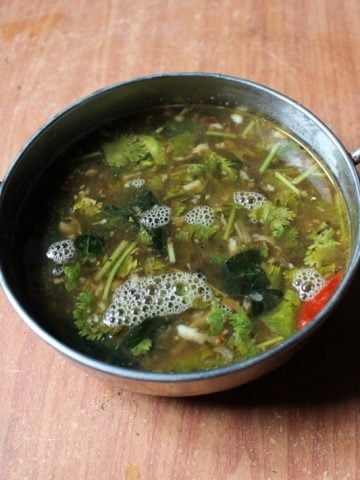
Instant Rasam is a simple, comforting South Indian dish that's perfect for those who are new to cooking or looking for a quick fix. It's warm, tangy, and spicy and goes perfectly with hot rice and some papad on the side. What makes this rasam so special is that it doesn't need any complex cooking techniques. You can literally mix everything in one pot along with the special rasam powder and boil it that's it. It's a no-fuss, one-pot rasam recipe that's ideal for bachelors, hostelers, or even when you're just tired and want something simple and homely.
Bachelor Rasam
Thanks to my perimma for giving me the best rasam powder recipe. I used that to make this delicious rasam and it turned out to be a hit. This is a one pot recipe, you can mix the rasam in the pot which you are going to boil it and keep it stove, now boil it and add coriander leaves. Thats it, delicious rasam is done.
Jump to:
About Instant Rasam
When I first moved out for college, rasam was the one thing I missed most from home. I didn't know how to make sambar, didn't want to spend too much time in the kitchen, and also didn't have a lot of ingredients with me. That's when my perimma (aunt) gave me her rasam powder recipe and that changed everything. I started making this simple rasam with just a few pantry staples. It's now my go-to comfort food on any day.
This bachelor rasam doesn't need a pressure cooker, dal, or tempering. You just soak the tamarind, crush the tomatoes and garlic, add the special rasam powder and boil. It takes under 10 minutes from start to finish. It's perfect when you're under time pressure or don't want to wash too many dishes. Despite being so simple, it tastes incredibly satisfying with hot rice and a crispy papad.
Over time, this rasam became a part of my routine. It also helped me learn how flavors come together, the tang from tamarind, the spice from chillies, the depth from garlic, and the warmth of rasam powder. Even now, after years of cooking more complex meals, I still come back to this rasam on days when I want something nostalgic, quick, and soul-warming.
Similar Recipes
Why This Recipe Works
This recipe is a complete lifesaver, especially for anyone who's just starting out in the kitchen. It uses very basic ingredients that most of us already have at home tamarind pulp, tomatoes, garlic, green chillies, and a simple rasam powder.
Why I Like This Recipe - It's something I turn to when I'm homesick, when I'm feeling lazy, or just when I want something simple and warm. It doesn't need much effort, but it still feels like a proper meal, especially when I pair it with hot rice and a crispy papad on the side. There's something very nostalgic about this rasam too. It reminds me of the simple lunches at my childhood home. My perimma was the one who shared her rasam powder recipe with me, and ever since, this version has been a favourite.It's also become a recipe I love to share with others. Whenever a friend asks for something easy to start with, this is always the first dish I recommend.
There's no need to boil dal, no pressure cooker, and absolutely no tempering. That makes it perfect for those days when you're tired or just not in the mood to do too much or for students and bachelors who may not have all the kitchen tools. It's just one pot, throw everything in, let it boil, and you're done. What also makes this recipe work is how flexible it is.
Like your rasam a bit spicier? Add another green chilli. Want it more tangy? A little more tamarind will do. Plus, the cooking time is so short , you can finish making this rasam in under 10 minutes.
Ingredients
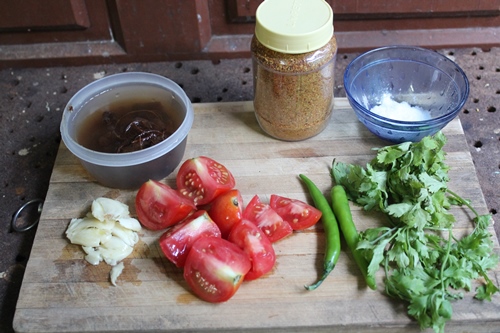
Tamarind pulp (2 tbsp): This is the base of your rasam's tangy flavor. You can soak tamarind in warm water and squeeze out the pulp, or if you're in a hurry, just use ready-made tamarind paste and mix it with water.
Tomatoes (1 large, cubed): Tomatoes give a fresh, slightly sweet tang and a bit of body to the rasam. Mashing them roughly by hand adds a rustic feel and helps them break down better while boiling.
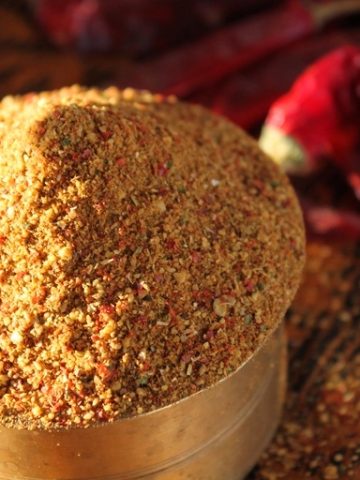
Rasam Powder (2 teaspoon or to taste): This is where all the magic lies. It gives the rasam its depth, spice, and warmth. I usually go for homemade rasam powder from my perimma's recipe, but any good quality store-bought one works too.
Garlic (4 cloves, crushed): Crushed garlic gives a bold aroma and adds depth to the rasam. I personally love the small bites of soft garlic that come in each spoon - super comforting!
Green Chillies (2, slit): These bring the heat. If you like it milder, you can reduce it to one or even skip it. But just two slit chillies give a nice warmth without being overwhelming.
Coriander Leaves (a handful, finely chopped): Always add them right at the end, after turning off the stove. They bring a fresh, herby note that really lifts the rasam.
Water (as needed): You can make the rasam thin like soup or slightly thicker depending on your preference. I usually go for about 2 to 2.5 cups of water with this recipe, enough for 2-3 servings along with rice.

Hacks
Short on time? Use ready-made tamarind paste instead of soaking tamarind. Just mix about 2 tablespoons with a little warm water and you're good to go. It cuts down prep time and still tastes great.
Make life easier with rasam powder: If you're making rasam often (which I do), then prepare or buy a good rasam powder in advance and store it in an airtight jar. It stays fresh for weeks and makes rasam-making a breeze on busy days.
Want to make it more filling? Add a small portion of cooked dal (toor dal or moong dal). It turns the rasam a bit more hearty and adds a soft texture too. Great when you want a fuller meal without making a separate dal.
Extra flavor boost? A dash of crushed black pepper or a small piece of ginger can be added if you have a cold or want that little spice kick.
Instant Rasam (Step by Step)
|
| Take all your ingredients |
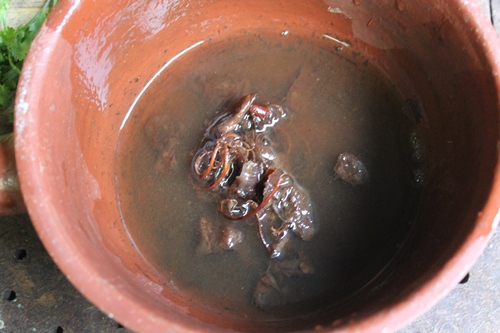 |
| Take tamarind in a pan along with some water, soak it for 5 mins |
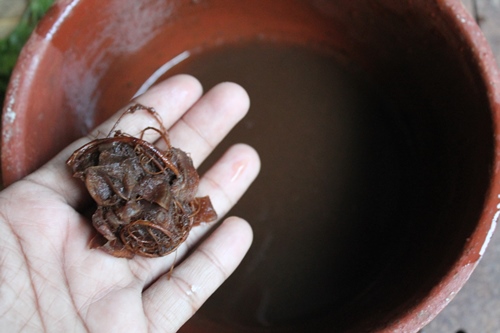 |
| squeeze the pulp out |
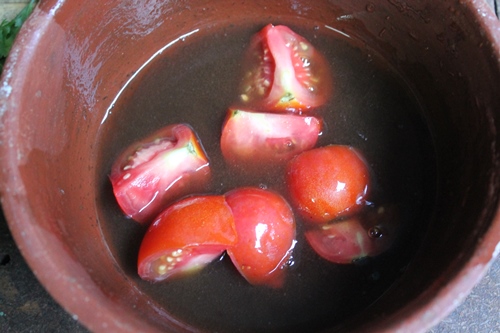 |
| add in tomatoes |
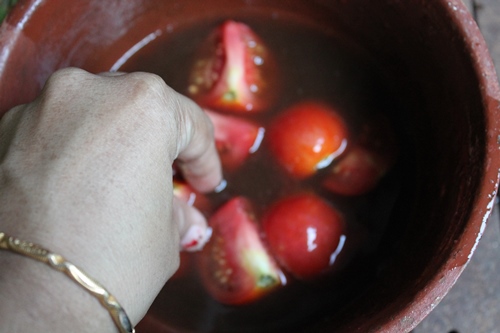 |
| use your hands to mash it lightly |
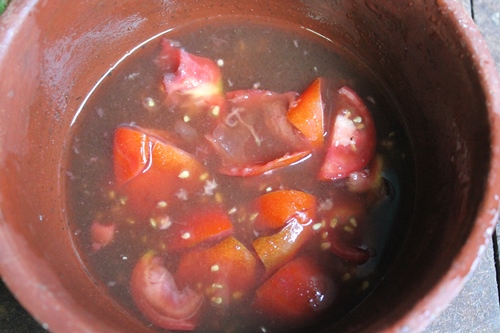 |
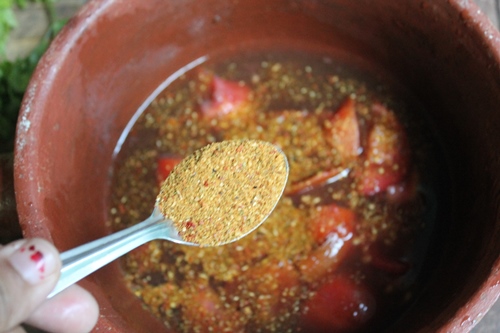 |
| add in rasam powder (RECIPE HERE) |
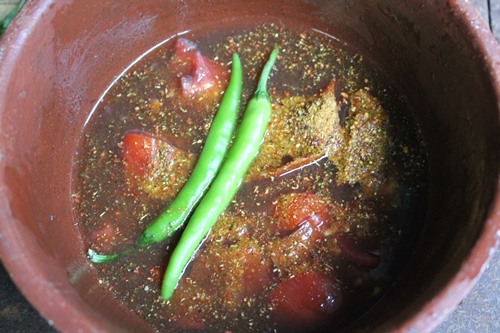 |
| slit green chillies |
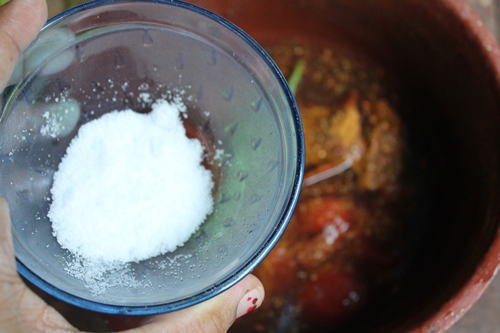 |
| add in salt |
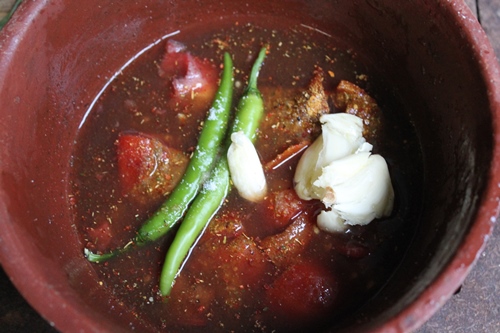 |
| and add in crushed garlic |
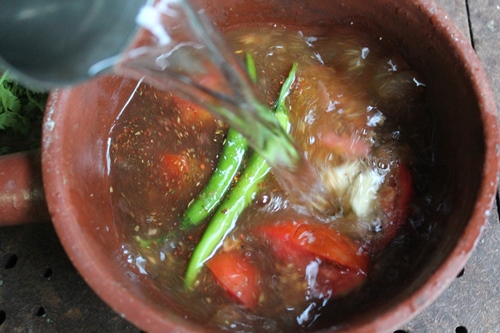 |
| pour in water |
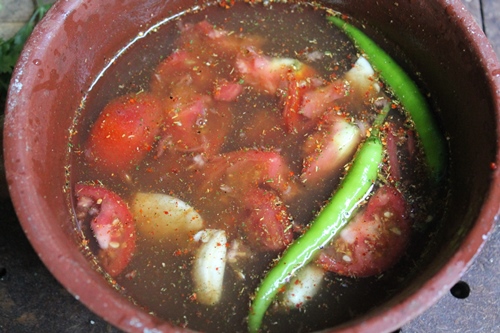 |
| mix well |
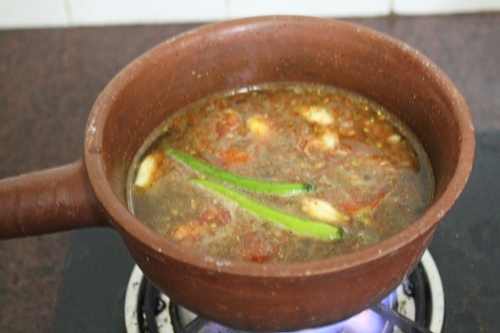 |
| Put the entire pan on heat |
 |
| bring it to boil |
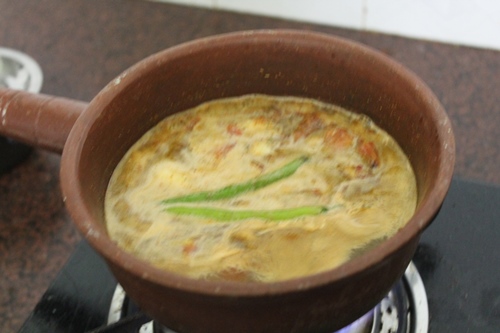 |
| now it has started to boil |
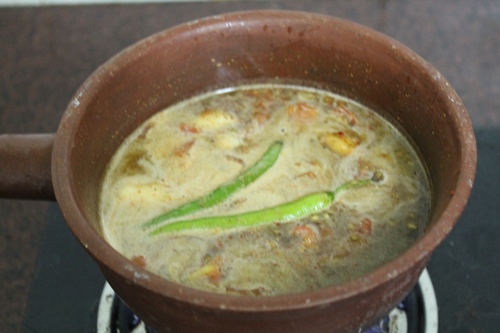
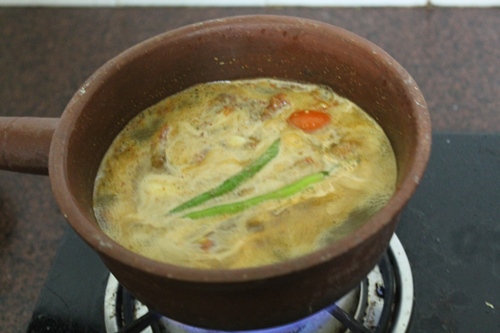 |
| once it reaches a good boil |
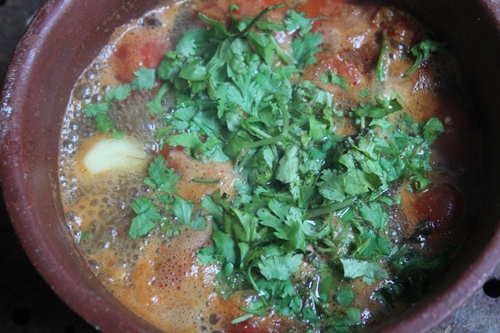 |
| add in coriander leaves |
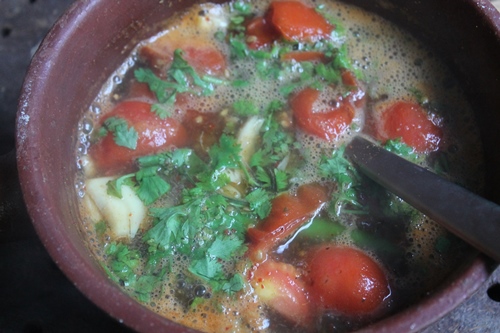 |
| mix well |
|
| serve |
Expert Tips
1)Always Add Coriander at the End
It's tempting to throw in all the ingredients together and let them boil, but coriander is one ingredient that should be added only at the very end. When you boil it, it tends to lose its fresh, green aroma. So, once the rasam is done and you've turned off the heat, sprinkle the chopped coriander and let it sit covered for a minute. This way, the freshness stays in and gives the rasam a nice lift.
2)Don't Over-Boil the Rasam
Rasam is not something that needs to bubble away for a long time. One good rolling boil is more than enough to bring out all the flavors. If you keep boiling it for too long, the taste may become flat, and some of the fresh notes from the spices and garlic might get lost. So, once it boils well, turn off the flame and you're good to go.
Serving Suggestions
I usually serve this rasam hot with plain steamed rice and a spoon of ghee on top. On the side, I like having papad, pickle, or just a quick stir-fried veggie. It's simple, but really satisfying especially after a long day or when you're feeling under the weather. You can also sip it as a soup, especially when you have a cold or sore throat. It's light, warm, and soothing.
Storage Tips
If you have leftovers, you can store them in the fridge for up to 2 days. Just reheat gently on the stove when you want to use it again. Try not to boil it again and again, just heat until warm to keep the flavor fresh.
FAQ
1. Can I make this rasam without rasam powder?
Yes, absolutely! If you don't have ready-made rasam powder at home, don't worry. You can make a quick version by mixing 1⁄2 teaspoon cumin powder, 1⁄2 teaspoon crushed black pepper, A small pinch of red chilli powder. This simple mix brings the same basic warmth and spice that rasam needs. It's not exactly the same, but it still tastes lovely and gets the job done when you're in a pinch.
2. Can I add dal to this rasam?
Yes, and it's actually a great way to make the rasam a little thicker and more filling. Just add 2 to 3 spoons of cooked toor dal or moong dal while making the rasam. It blends in nicely and adds a soft, creamy feel to the rasam, especially helpful if you're having it as a meal with rice. Plus, it gives you a little extra protein too!
3. Is it okay to skip garlic?
Totally. Garlic adds a lot of flavor and aroma to the rasam, but if you're avoiding it for religious reasons or personal preference, you can leave it out. That said, if you're okay with using garlic, I highly recommend keeping it. Those little bits of softened garlic add such a comforting, earthy taste that makes the rasam extra special.
Variations
Lemon Rasam - This is a lighter, fresher version. Just skip both tamarind and tomatoes. Instead just Boil water with green chillies, crushed pepper, cumin, and rasam powder. After switching off the heat, squeeze in the juice of half a lemon (or to taste). It's perfect when you want something light or have a sore throat. Refreshing and soothing!
Pepper Rasam - Need something spicier or warming during a cold? Try pepper rasam. Add a generous amount of freshly crushed black pepper. Throw in a few curry leaves for that classic South Indian flavor. This one is bold and comforting, especially when you're feeling under the weather.
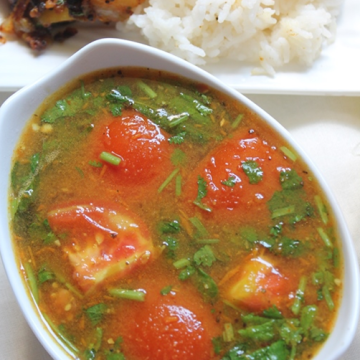
Tomato Rasam - If you love the flavor of tomatoes, you'll enjoy this. Use 2-3 juicy, ripe tomatoes and skip the tamarind entirely. Crush the tomatoes by hand and follow the usual steps. The result is a gentler, sweeter rasam with a fresh tomato taste.
Dal Rasam - For a slightly heavier version, add 2-3 tablespoons of soft, cooked toor dal while preparing the rasam. It gives the rasam a thicker texture and makes it more filling - great when you want a simple, satisfying one-pot meal with rice.
More Rasam Recipes to Try

📖 Get Recipe
Instant Rasam Recipe (Bachelor Rasam)
Equipment
Ingredients
- 4 cloves Garlic crushed
- 2 tablespoon Tamarind Pulp
- 1 cubed Tomato
- 2 teaspoon Rasam powder
- 2 slit Green Chillies
- Salt to taste
- ¼ cup Coriander Leaves finely chopped
- 2½ cups Water as needed
Instructions
- Take tamarind pulp in a pan, add in water and tomatoes. Use your hands to crush it lightly.
- Now add in all the ingredients except coriander leaves.
- Bring it to boil and once it starts to boil, add in coriander leaves. Mix well and serve.
Nutrition
Tried this Recipe
Mention @yummytummyaarthi or tag #yummytummyaarthi!If you have any questions not covered in this post and if you need help, leave me a comment or mail me @aarthi198689@gmail.com and I'll help as soon as I can.
Follow me on Instagram, Facebook,Pinterest ,Youtube and Twitter for more Yummy Tummy inspiration.


Anonymous
Thanks Aarti for d recipe...will try out today itself
Anonymous
Aarthi, No Tadka no oil?
Vasantha
Aarthi
@Anonymousno need oil.
vasu
thanks for the recipe. rasam was yummy
Hameeda
So will this 2 tsp of rasam powder sufficient for 1 cup puli Thani .i.e.250 ml...?
Aarthi
yes it will be. you can taste and add more.
Vinayak
Thanks. Very nice recipe. Rassam is very tasty.