
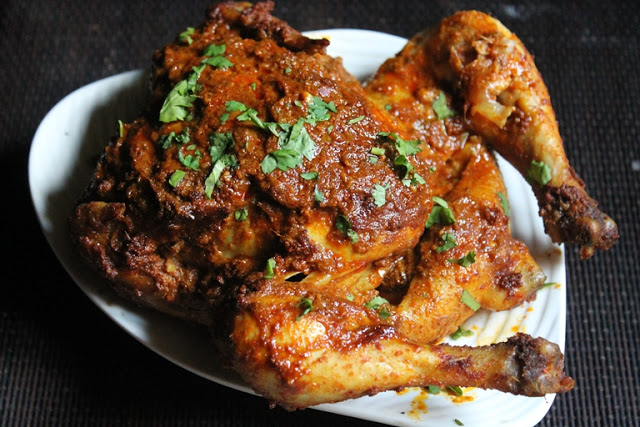
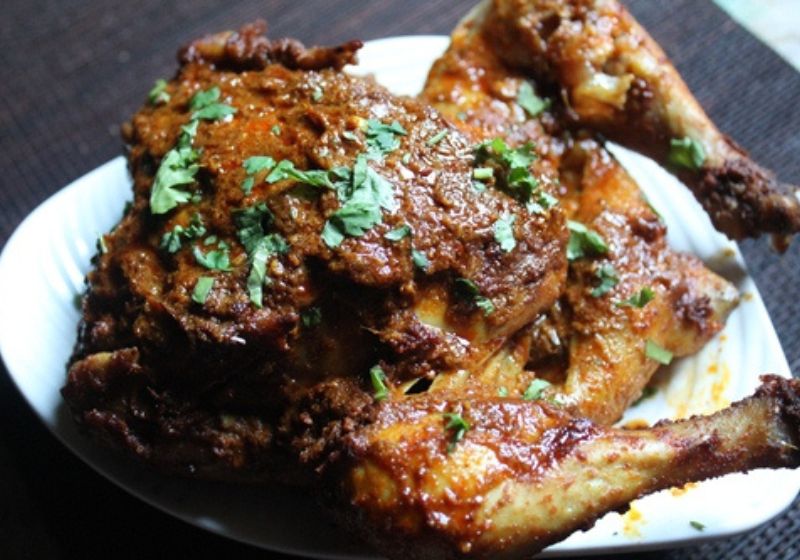
Roast chicken, Sunday roast gets a place in every household. This Indian style roast chicken taste delicious as well as it is easy to make. This is a family favorite just like my grilled chicken, kuboos and barbeque chicken.
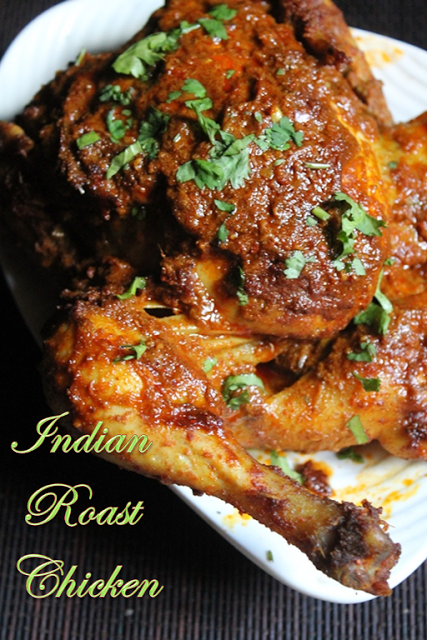
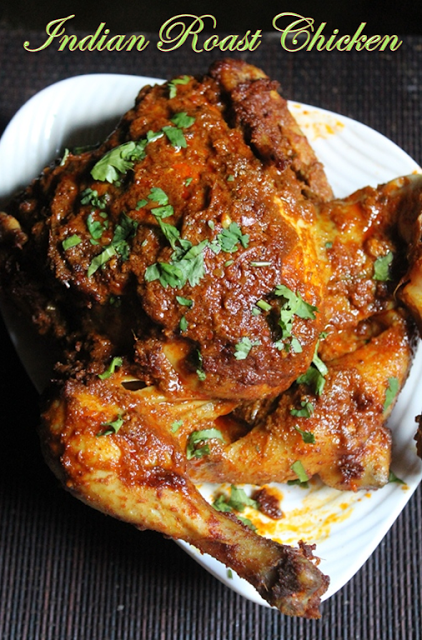
Indian Roast Chicken
One evening I was out of ideas for dinner. I was suddenly craving for a chicken dinner. I remembered that its been a while since I roasted a whole chicken.
Jump to:
So decided to make a spicy Indian version of roast chicken chicken. I asked hubby to get a whole chicken with skin on because I wanted my roast chicken to have a crispy skin.
About Indian Roast Chicken
Even though, many Indian roast chicken recipe calls for chicken without skin mainly tandoori chicken. I decided to make a simple spicy version of roast chicken which doesn't has curd and other tenderizing stuffs.
The skin is what protects the chicken from drying out. So I made this chicken with skin and it was definitely worth the effort. The chicken was so moist and just came right off the bone. It was one juicy, spicy roast chicken chicken.
Believe it or not, me and hubby finished the whole chicken by ourselves. We just had this with some garlic sauce and pita bread. You will love my charcoal chicken and Grilled Whole Chicken with Herbs.
Similar Recipes
The struggle is real, making whole chicken can be indimating for many. Not anymore, I am sharing the simple yet super flavourful chicken roast recipe. This one is made with Indian spices, ginger, garlic which will be treat to your taste buds.
My First tip is to use chicken with skin on, so your chicken stays moist and juicy even after baking for hours. The breast doesn't dry out when using chicken with skin on.
Next tip is to baste your chicken often with its own juices. This prevents the chicken getting dry and stays super moist.
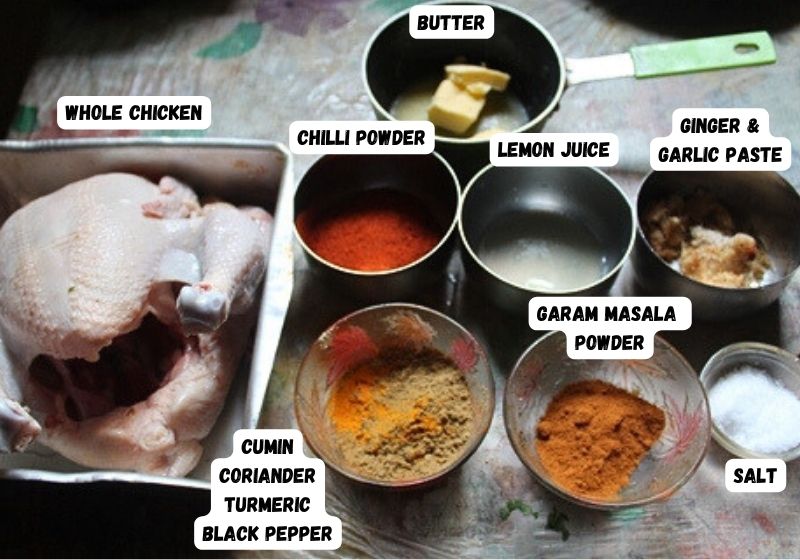
Indian Roast Chicken Ingredients
- Whole Chicken - I used a small bird just over a kilo in weight (it is approximately 1.25 kg). Make sure the chicken has skins-on to protect the meat from drying out. Using large bird might take longer time to cook which will result in a drier meat.
- Spice Mix - Since this is Indian flavoured chicken. I used a combo of kashmiri chilli powder, cumin powder, coriander powder, turmeric powder and garam masala powder. These combo of spice adds a punch.
- Butter - take a good amount of butter, melt it down and use for the marination.
- Ginger & Garlic - fresh ginger and garlic is ground into paste and used in the marination. I like to use ginger garlic paste, because chopped ginger and garlic might get burnt.
- Lemon - adding freshly squeezed lemon juice adds a zing to the marination which in fact keeps them moist and tasty.
- Salt - make sure you season the bird generously with salt which adds to the flavour.
Step by Step Pictures
Marination (Masala) for Chicken
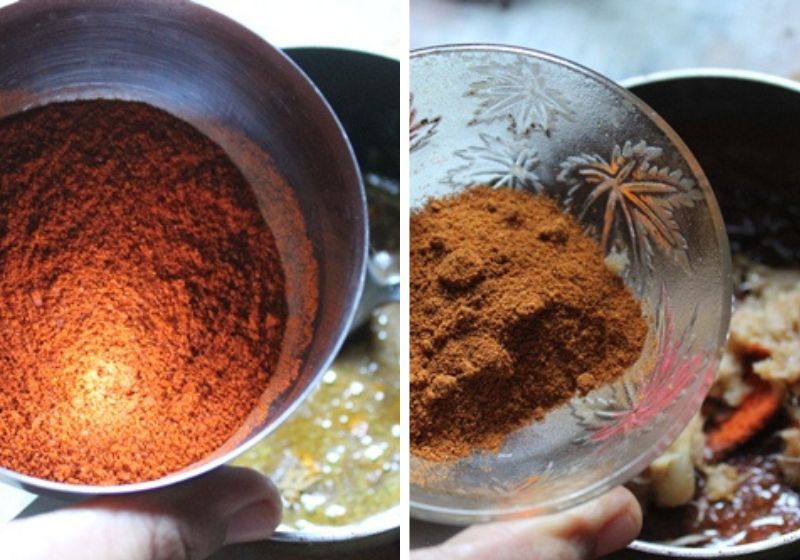
1)Take butter in a sauce pan and melt it gently. Add in coriander powder, cumin powder, turmeric and black pepper powder.

2)Add in kashmiri chilli powder and garam masala powder.
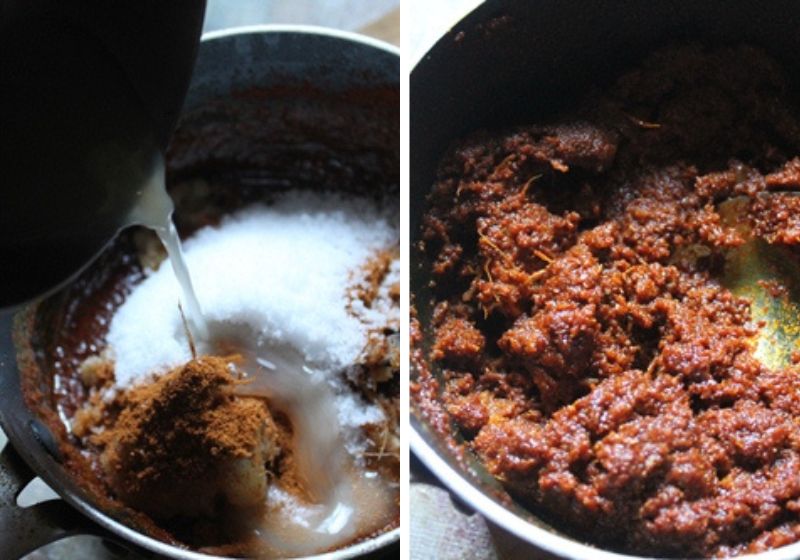
3)Add in ginger garlic paste and salt.
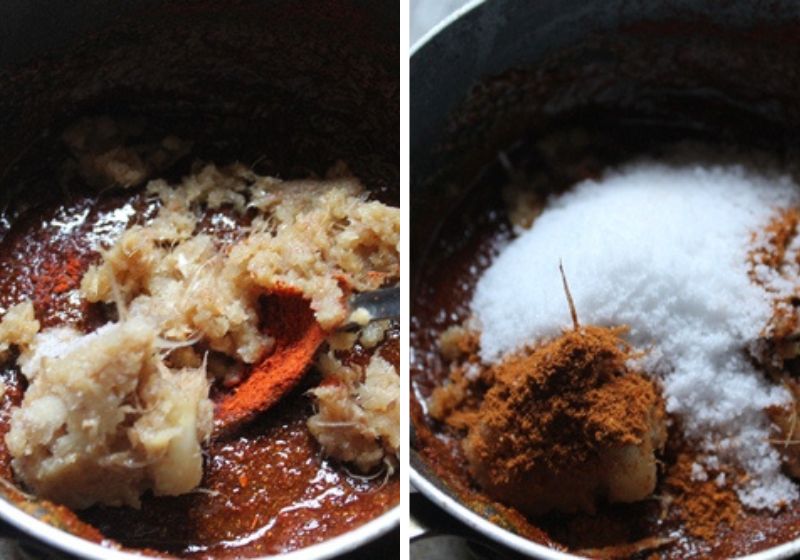
4)Finally add in the lemon juice and mix well. Your masala or marination is ready to use.
Preparing the chicken for Roasting
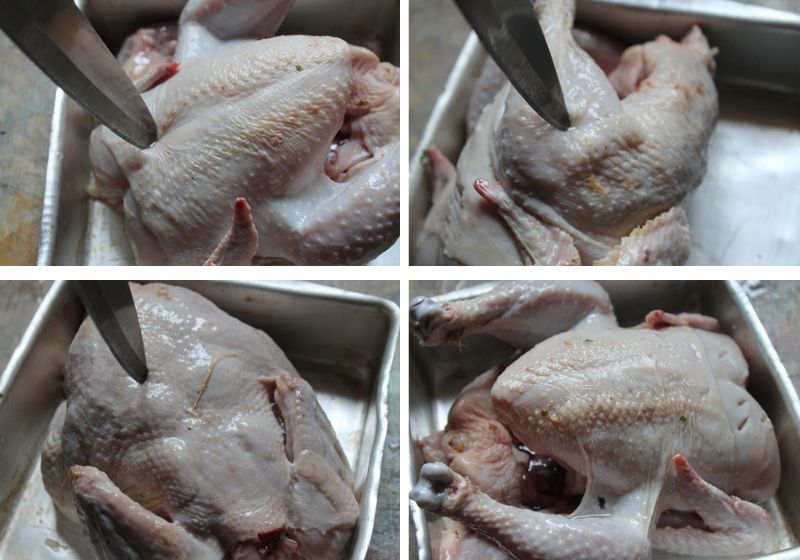
5)When you are using the whole bird. Make sure the chicken is cleaned completely and patted dry using some paper towel. This allows the marination to stick to the chicken.
Take the whole chicken and use a knife to pierce holes all over the chicken. This allows the marinate to penetrate deep into the chicken. Make sure you don't tear the chicken skins.
Use a knife or fork to poke lots of holes all over the chicken.
Marinating the chicken
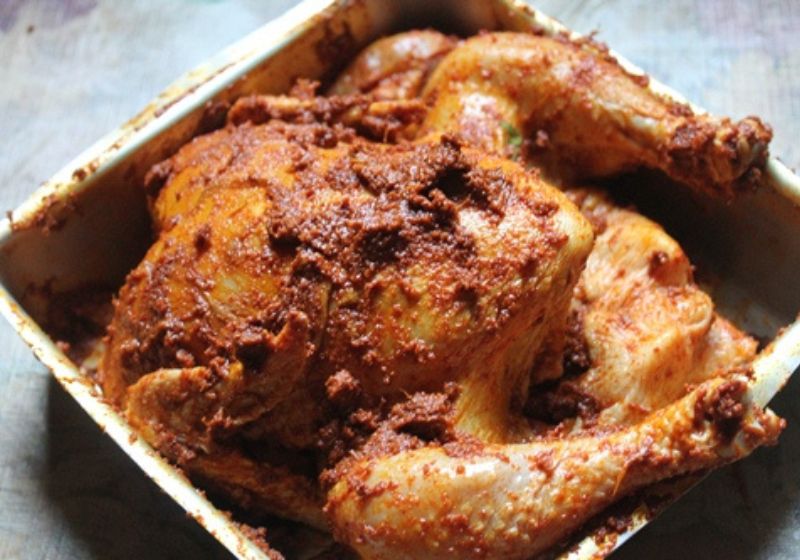
6)Take the marination which we prepared earlier. Apply it all over the chicken. I like to use my hands and spread it under the skins, inside the cavity and all over the chicken.
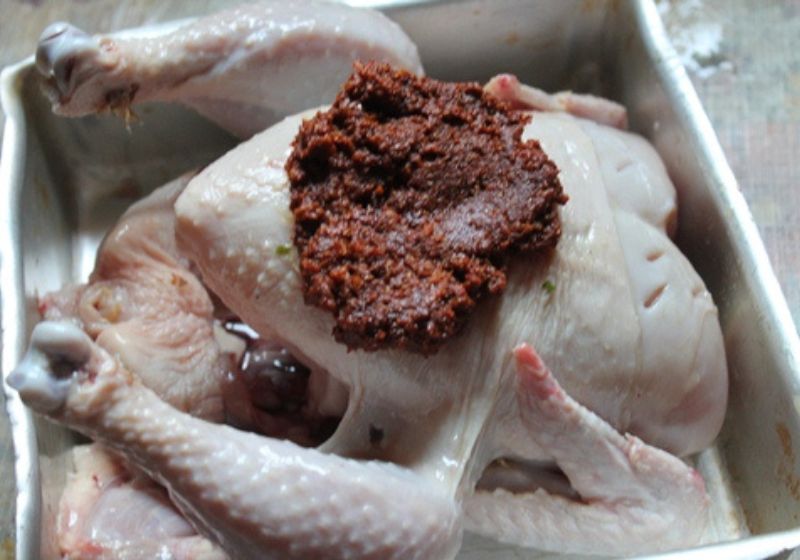
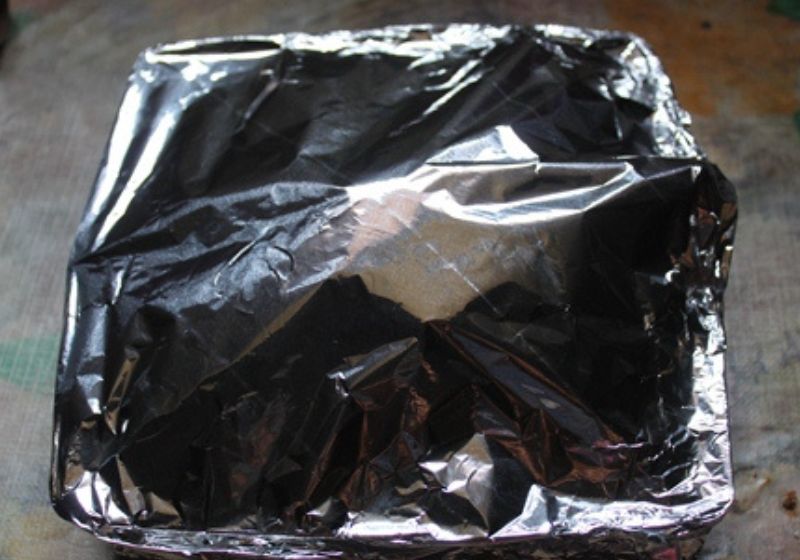
7)You can let the chicken marinate for 30 minutes to 1 hour. Sometimes I cover the tray with aluminium foil and leave the chicken to marinate overnight. But it is okay to bake the chicken immediately also.
If you are planning to marinate the chicken longer in fridge. Make sure you take the chicken out of fridge 30 mins or 1 hour before baking.
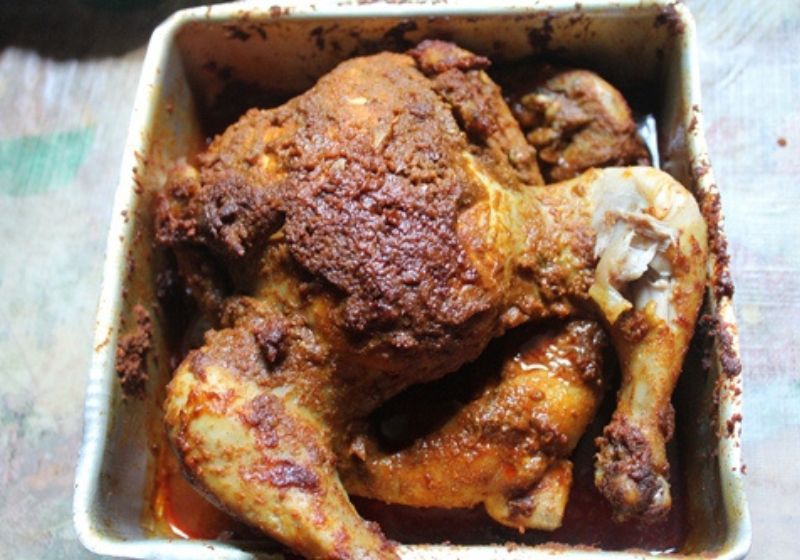
Roasting Chicken
8)Cover the whole tray of chicken with aluminium foil. Place the chicken in oven and bake for 45 mins.
Basting the Chicken
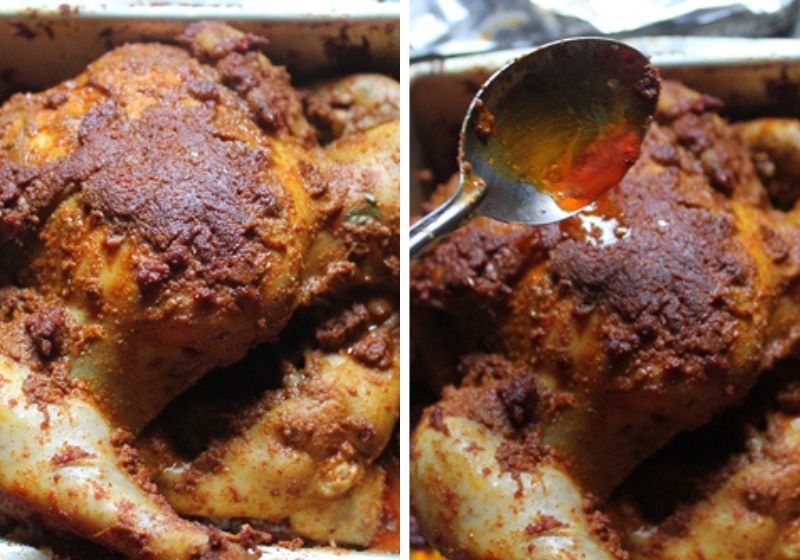
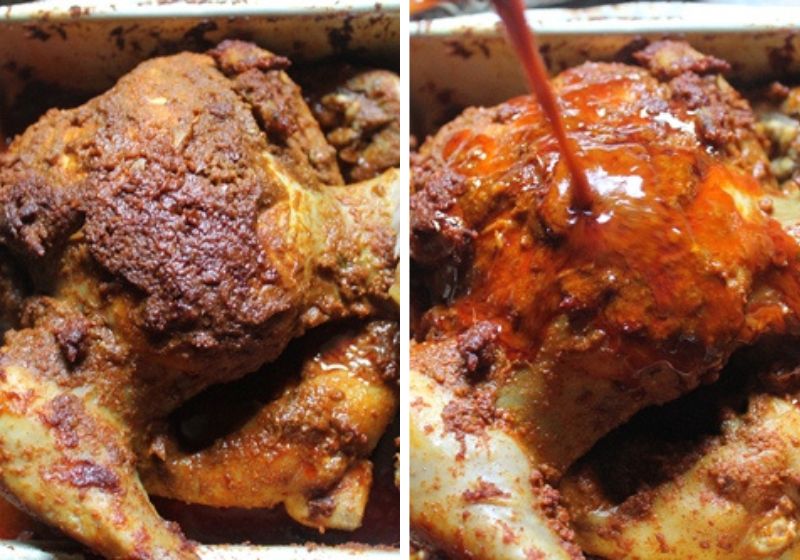
9)Remove the chicken from oven and use a ladle to remove the juices from the tray and pour (baste) over the chicken.
Cover with foil again and pop into the oven and bake for another 45 mins.
10)Now remove the chicken from oven, increase the heat of the oven to 220 degree C.
Remove the foil from the tray, spoon the juice collected in the tray over the chicken and bake for another 35 to 40 mins, spoon the juices over the chicken every 10 mins.
Serving Roast Chicken
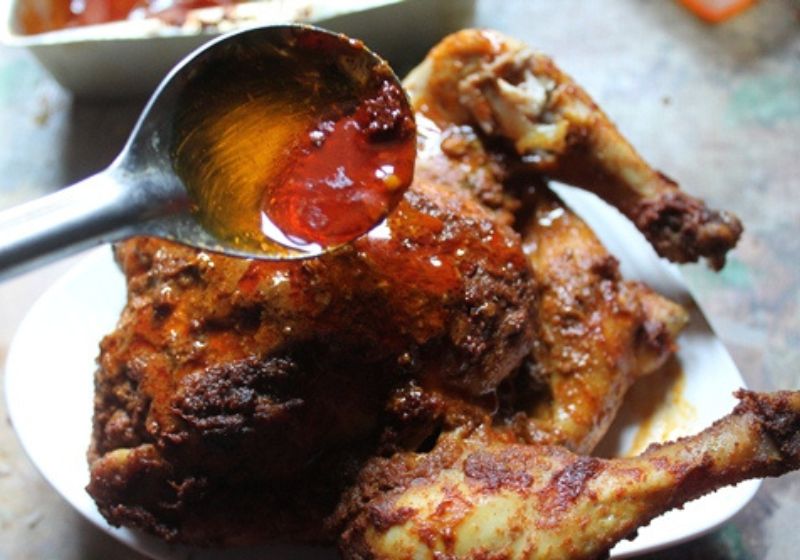
11) Remove the chicken from oven and let it rest for 15 to 30 mins. If you have any juices in the tray just spoon it over the chicken. This will keep the chicken moist.
12)Remove the chicken to a serving platter.
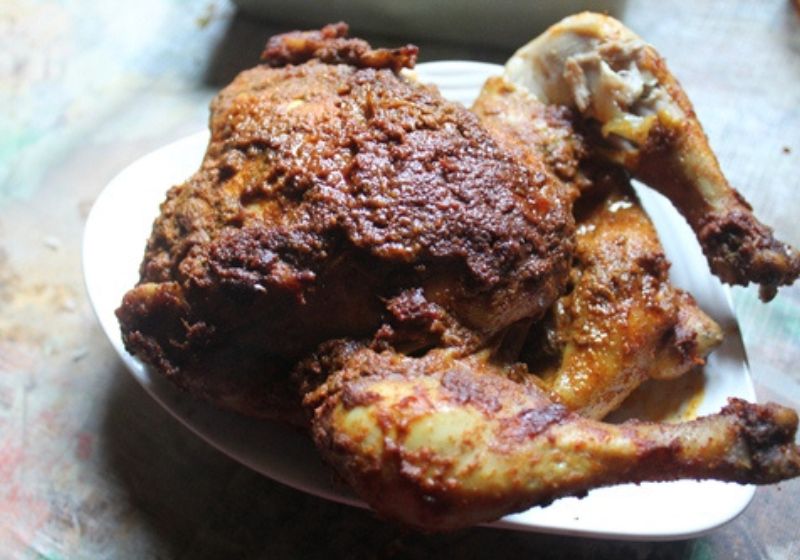
13)Drizzle any leftover pan juices that are collected in the tray over the chicken which will keep the chicken moist.
14)Sprinkle chopped coriander leaves over the chicken and serve.
Expert Tips for Juicy Chicken
Room temperature for baking - If you are allowing the chicken to rest in fridge. Make sure you take the chicken out of fridge 30 mins or 1 hour before baking. This ensures even baking and moist chicken.
Covering with foil - Cover the tray with foil and bake for 45 minutes which will make sure the chicken stays moist and gets cooked. In the last 30 minutes you can remove the foil and bake.
Basting Chicken - Using a ladle or spoon to remove the pan juices from the tray and pouring over the chicken ensure the chicken stays moist. Keep basting chicken every 10 to 15 mins. This step is essential for moist juicy chicken.
Resting the chicken - Once you remove the chicken from oven and let it rest for 15 to 30 mins before carving. This will make sure the juices from the chicken can settle into the chicken meat which makes them juicy. If you try to cut it immediately, the juices may run out everywhere.
Keep the chicken warm - once the chicken is carved ensure you cover them with foil to make them moist. This step will prevent the chicken getting dry.
📖 Get Recipe

Indian Style Whole Chicken Roast | Roast Chicken Recipe
Equipment
Ingredients
- 1 Whole Chicken with Skins on around 1.25 kg
- 2 tbsp Coriander leaves for garnishing
For Marination
- ½ cup Butter melted
- 1 tablespoon Coriander Powder
- 1 teaspoon Turmeric Powder
- 2 teaspoon Cumin Powder
- 2 tablespoon Kashmiri Chilli Powder
- 1 tablespoon Garam Masala Powder
- 2 teaspoon Black Pepper Powder
- 2 tablespoon Ginger Garlic Paste
- 3 tablespoon Lemon Juice
- Salt to taste
Instructions
- Take chicken in a baking pan and use a kinfe to poke holes all through the chicken. Set aside till use.
- Take butter in a sauce pan and melt it down. Now add all the ingredients into it and mix well.
- Now spoon the marination over the chicken and massage really well. Spoon marination into the cavity as well. Put the chicken in fridge and let it marinate for 2 hours, you can leave to marinate overnight as well.
- Take the chicken out of fridge 30 mins or 1 hour before baking. Meanwhile preheat oven to 180 degree C.
- Cover the tray with foil and pop the chicken in oven and bake for 45 mins. Now remove it and spoon some of the juices from the tray and cover with foil again and pop into the oven and bake for another 45 mins.
- Now remove the chicken from oven, increase the heat of the oven to 220 degree C. Remove the foil from the tray, spoon the juice collected in the tray over the chicken and bake for another 35 to 40 mins, spoon the juices over the chicken every 10 mins.
- Remove the chicken from oven and let it rest for 15 to 30 mins. If you have any juices in the tray just spoon it over the chicken. This will keep the chicken moist.
- Sprinkle over some coriander leaves and serve.
Notes
How to Get Juicy Chicken
- Take the chicken out of fridge 30 mins or 1 hour before baking.
- Cover the tray with foil and pop the chicken in oven and bake.
- Keep basting chicken every 10 to 15 mins.
- Once Remove the chicken from oven and let it rest for 15 to 30 mins.
- Carve the chicken and keep it covered for moist chicken.


Anonymous
mouth watering.....
Shaan Fathima
Hi aarthi. It looks yummy. Can we cook this in rotisserie? If so how long we should cook and in wat temp?
Anonymous
Can we cook this marianted chicken in pressure cooker or a big pan. please tell me how to cook it
Bonny
awesome Aarthi...in microwave ishould use the convection / microwave or grill mode?
mode
Rukshana Abdeen
I was looking for a cordless baked chicken recipe and came across this.Tried this today and we loved it. The chicken was sooo tender and full of flavour. The only thing was I would like it a bit more sour, otherwise it's a fail proof recipe. Saving this !!!
Shaan Fathima
Hi aarthi. It looks so yummy and I would like to make this recipe in rotisserie mode. So please let me know how to make it in rotisserie.
Aarthi
@Shaan Fathimanot sure about rotisserie cooking, will try it out and share here
Aarthi
@Anonymousnot sure about cooking this in pressure cooker as well
Aarthi
@Bonnyuse convection mode
George Poonnoose
How do I cook this in an microwave oven. Dont have the traditional one. Whats the temp used? Kindly help. Regards.
George Poonnoose
How do I cook this in an microwave oven. Dont have the traditional one. Whats the temp used? Kindly help. Regards.
Aarthi
@George Poonnooseif u have convection mode, you can make this. Else you cannot.
Anonymous
Why is skin used here... Can we do it without skin?
Aarthi
@Anonymousyes u can skip the skin part
Shalini S
Tried this recipe today, came out very well. Thanks for the recipe aarthi.
Shalini S
Tried this recipe today, came out very well. Thanks for the recipe aarthi.
Shalini S
Tried this recipe today, came out very well. Thanks for the recipe aarthi.
plasterer bristol
This sounds lovely. Going to give this a go. thanks for sharing this recipe.
Simon
Jayanthi
hi, aarthi.... awesome receipe .. i'll try it same on tomorrow ...Bcz, sunday.. but, i have 1doubt.. which juice we use over the chicken.
Aarthi
@Jayanthithe juice which comes from the chicken on the pan
experience
Hi aarthi.ur recipes are so Gud.everytime I used to see ur site for cooking:)I love ur cooking method and u r clearly explaining the method to cook.the pictorial concept also so nice to easily get understand .awesome aarthi!!!:)all the best aarthi:)
MrKang
How much salt do you use?
MrKang
This was AMAZING. Thank you so much. My husband has been trying to make Indian dishes for years and this one tasted fantastic. Thank you for sharing your wisdom with us.
Unknown
I have tried several roasted chicken recipes, and while I love making roasted chicken, they always tasted very bland to me. Your recipe is absolutely delicious and I'm so happy that I have found your blog! I'm going to enjoy readying through your recipes. Thank you so much for sharing!
Anonymous
This is urgent! My chicken is in the OTG with the 'bake' mode selected. In the bake mode, only the two heating elements at the bottom are active. The ones on the top are off. Is this alright or do I have to change the mode on my OTG to 'toast' or 'broil'?
Aarthi
You should have both heating element from top and bottom should be on. so adjust it accordingly.
Divya
i also have same doubt - as per Aarthi both the rods on means its Roast setting. Which mode you tried and what was the result? plsss dvise, i wanna try this
Richa
Omg. You are so talented.
Anika
I made this for Thanksgiving last year and it was a big hit! I'm making it again this year for Christmas. Fantastic recipe! Thanks Aarthi <3
Meetali
was looking for a good recipe online and happened to read this one. Tried it out..and the chicken came out super delicious. super moist and falling off the bone. Thank you.
Sheela S
Made this roast for Christmas, absolutely delicious. No Leftovers
Lily
This recipe is a real hit with my family. I am making this over and over again. Thank you!
Paul
Absoultely banging - a big hit with everyone