
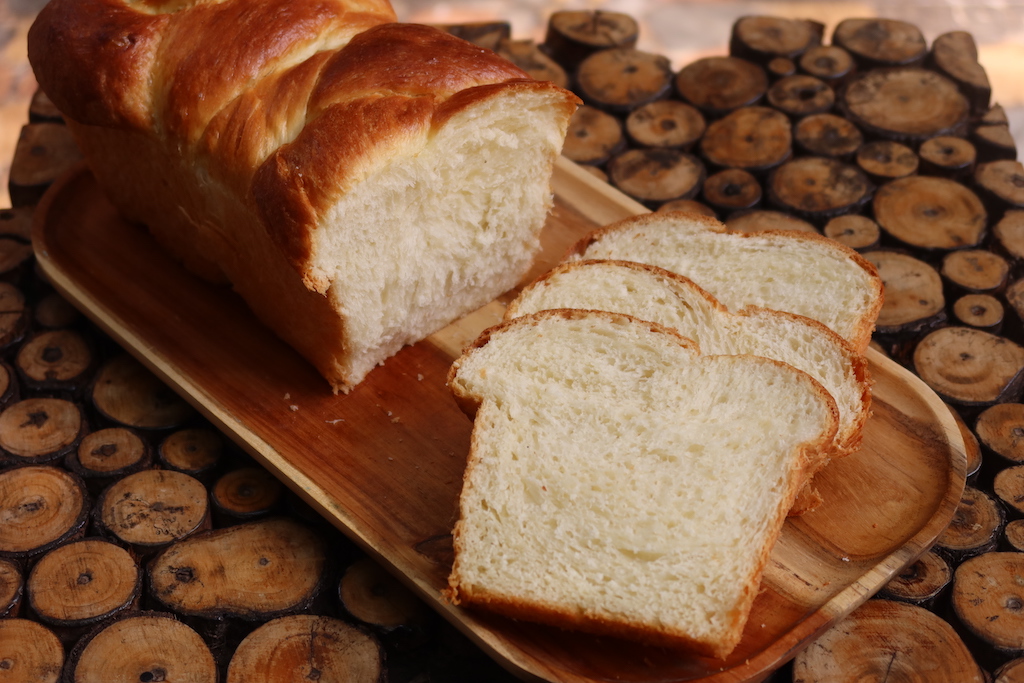
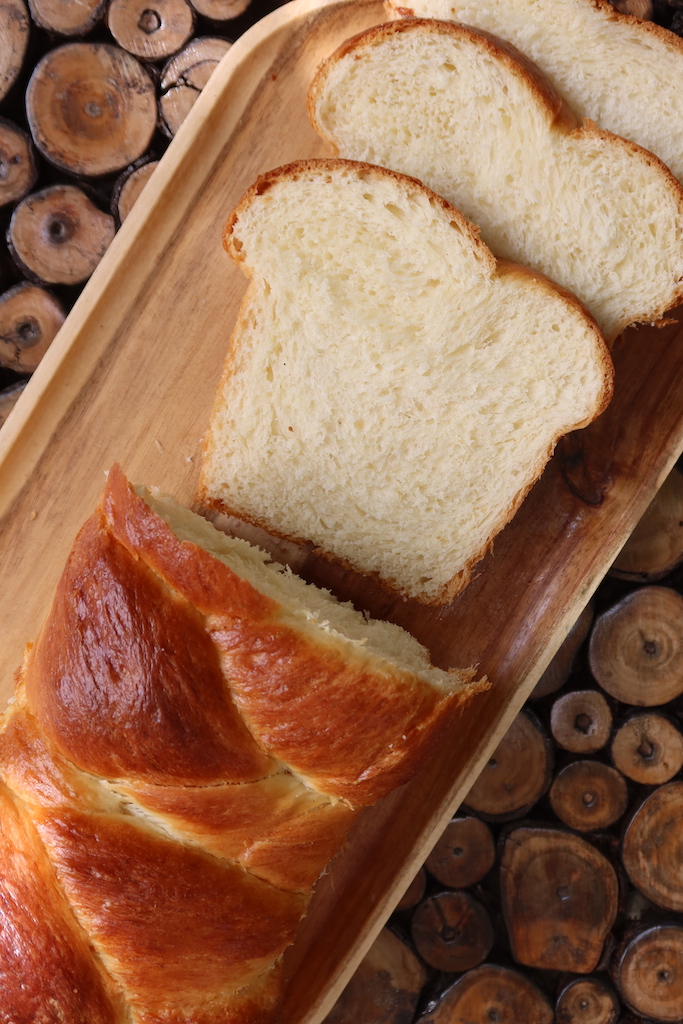
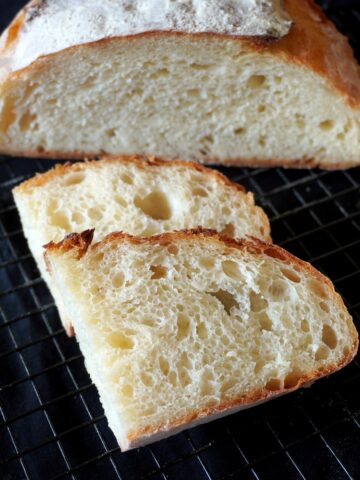
Brioche is a Popular French Bread which is enriched with high amount of butter and eggs. This recipe for homemade brioche bread is easy and straight forward made with flour, yeast, sugar, butter, milk and eggs. This soft, rich, fluffy buttery brioche bread is super easy to make and make the best ever french toast and bread pudding. Learn how to make the best brioche bread with step by step pictures and video.
Brioche Bread
My kids love french toast for breakfast and brioche bread is my bread of choice. I have been making brioche bread at home because it is so easy to make and the bread turns out perfect every time. Even though I love baking a lot, I enjoy handling the bread dough because it gives so much satisfaction.
Jump to:
Unlike my other bread recipes, this brioche bread is enriched with eggs and butter which makes it more delicious.
About Brioche Bread
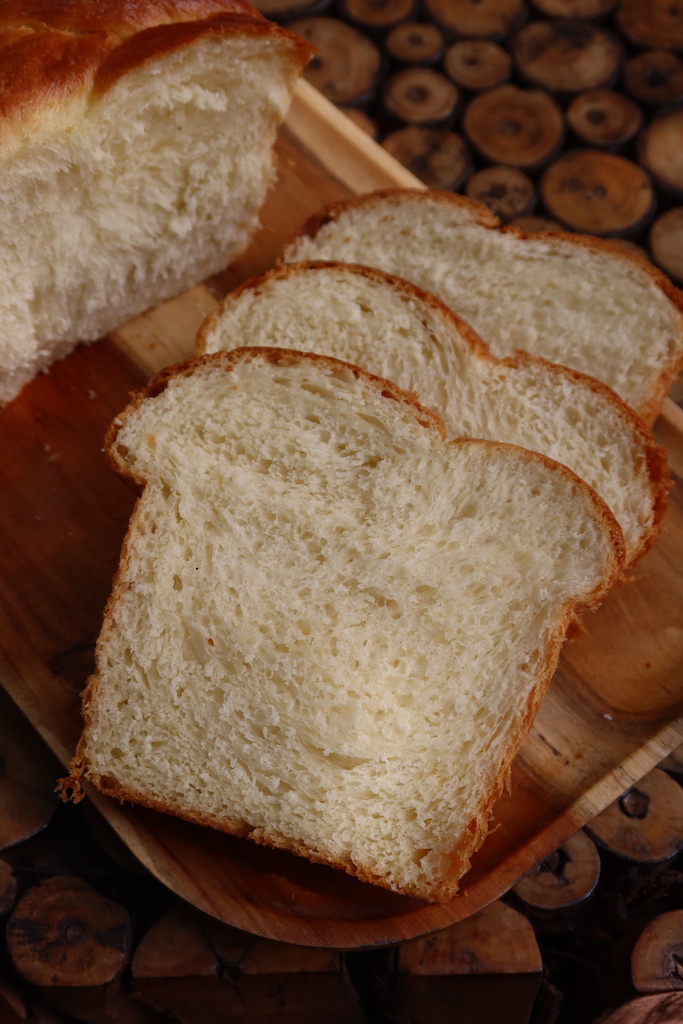
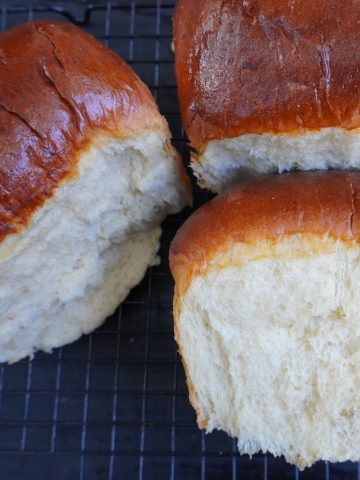
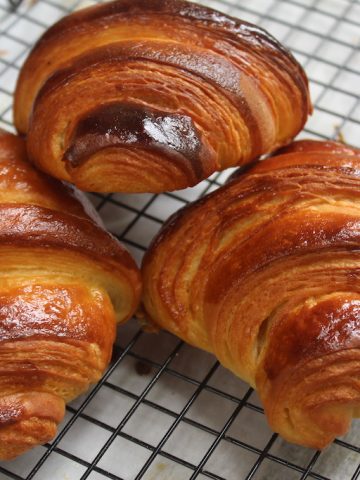
Brioche is a bread of French origin and whose high egg and butter content gives it a rich and tender crumb similar to croissant, Danish pastries, brioche buns and sweet buns. Unlike our regular bread, this has high amount of egg and butter which gives a lovely yellow tint to the bread also makes it super rich and buttery. You can use the dough for sweet or savoury pastries.
Brioche bread is made with plain flour, sugar, yeast, milk, butter and eggs. The recipe for bread is very easy to follow and can be made under 2 hours from start to finish. Making enriched bread dough like brioche requires more time to knead so it is best to use stand mixer for kneading the dough. But if you don't have a stand mixer, you can knead the dough using hands, it will take double the time. But still worth the efforts.
I enjoy brioche bread simple toasted with some jam or peanut butter. You can make delicious french toast or bread pudding using this.
What is an Enriched Dough?
Dough made with high amount of butter, eggs or oil is called as enriched dough. Unlike bread doughs that consist of flour, milk, water, yeast and salt, enriched dough includes more fats like butter or oil, sugar, eggs and milk.
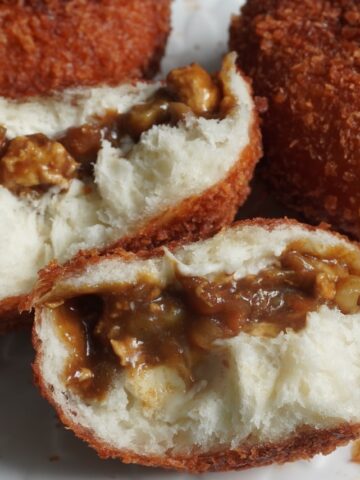
Bread made with enriched dough turns out to be softer and richer. Some of the popular bread recipes that uses enriched dough is brioche, hot cross buns, cinnamon rolls. These baked goods has longer shelf life than other bread. Check out my Brioche Buns too.
Similar Recipes
Watch Brioche Bread Video

Brioche Bread Ingredients
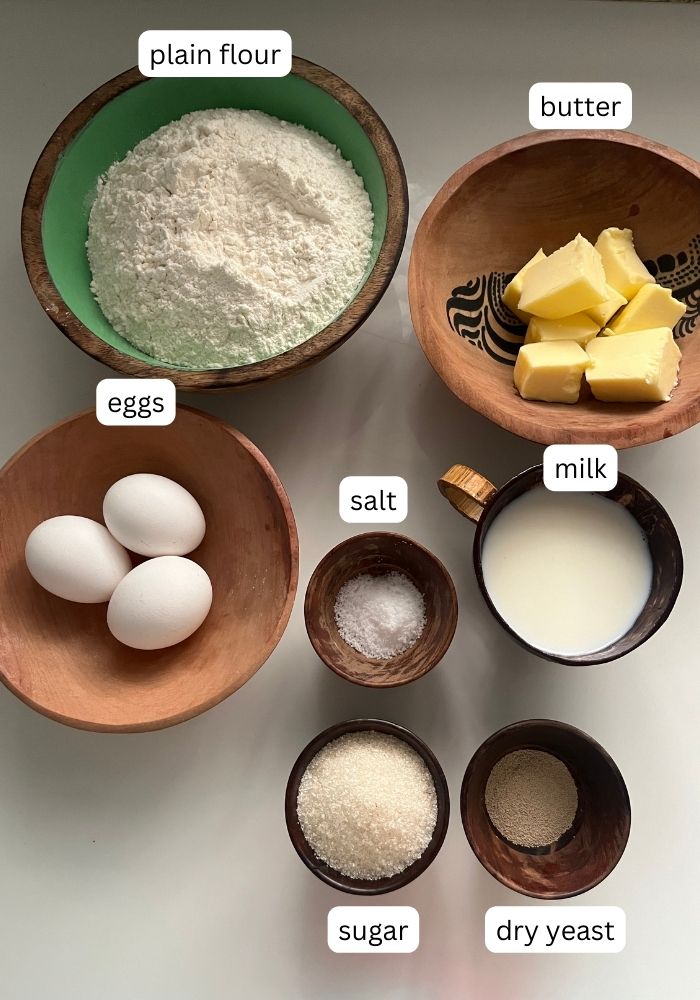
Plain Flour - I used good quality all purpose flour for making brioche bread. But you get best results, if you can get your hands on bread flour.
Dry Yeast - make sure you activate dry yeast in warm milk with sugar before hand of making the dough.
Eggs - enriched dough uses more eggs which makes the bread more tender and rich flavour and soft pillow like texture. Eggs gives a lovely yellow tint to the bread also makes it super rich.
Milk - use full fat milk, the fat from the milk helps strengthen the gluten strands which in turn helps with the structure of the bread.
Sugar - Depending on your preference you can add more or less sugar.
Butter - be generous with the butter, it adds richness and soft buttery flavour to the bread. It helps extend the shelf life of the brioche.
Salt - for flavourful bread, don't skip on salt.
Why this Brioche Bread is the Best!
This is a tried and tested brioche bread recipe. I have made this multiple times so it is fail proof.
The recipe is simple, easy to follow and no extra steps required.
Making, shaping and baking brioche bread is easy and fast. Expert tips shared in the recipe.
Detailed step by step pictures along with video shared for making brioche bread.
How to Make Brioche (8 Easy Steps)
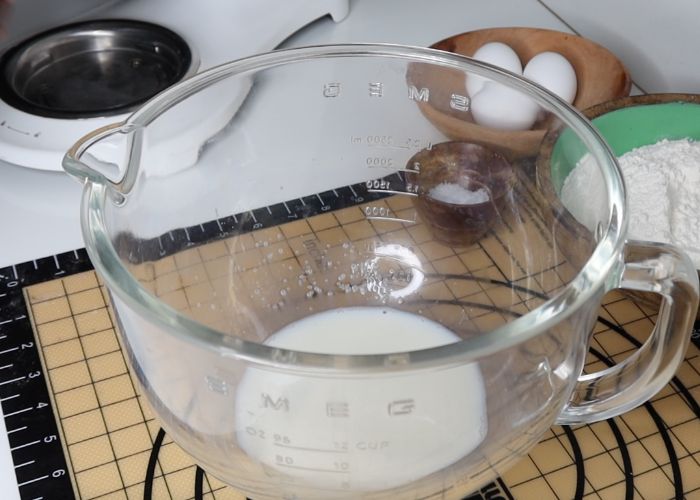
The Yeast Mix: Mix together milk with sugar and yeast in the stand mixer bowl and allow to activate the yeast.
The Dough: Making the dough in a stand mixer is best. Add all ingredients to the stand mixer. Use dough hook attachment in the mixer and mix till it comes together.
Butter Makes Better: add a good amount of soft butter when the dough is mixing. This butter makes the bread so rich and buttery.
Proofing of the Dough: Leave the dough to rise in a warm spot for 1 to 2 hours till it is doubled in size.
Braiding Brioche - Divide the dough into three equal portions. Roll it smooth ball like, then roll it into a long rope, now start braiding the bread as shown in the image.
Final Proof: Place the braided bread in a buttered loaf pan. Leave to rise for 45 mins to 1 hour.
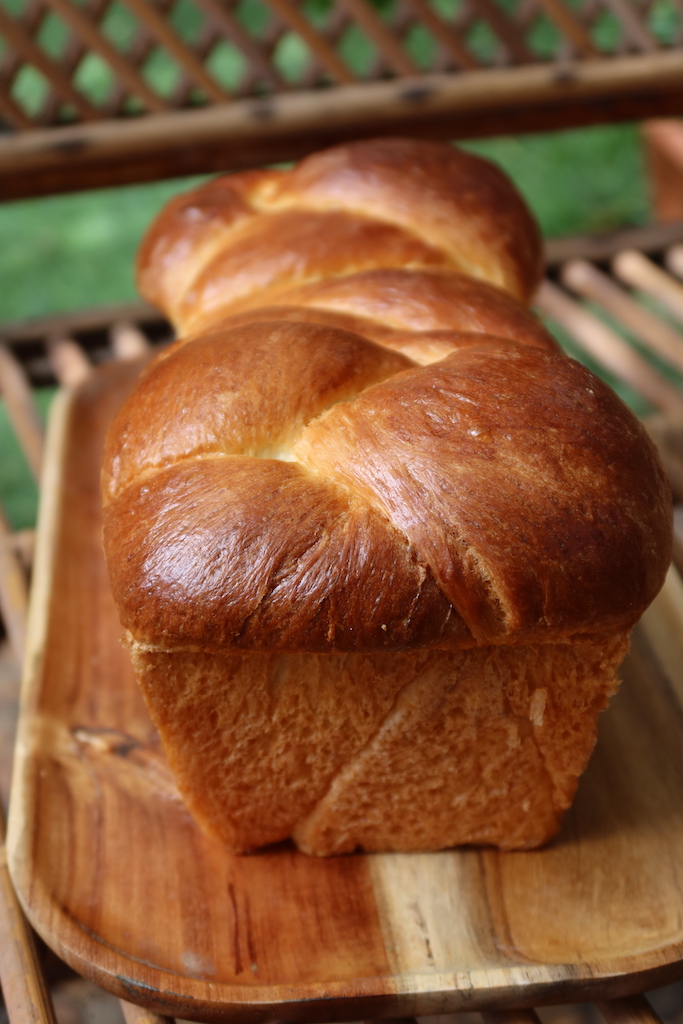
Egg Washing: Egg wash is must for getting the golden shiny colour on top.
Baking Bread - bake the brioche bread till it is cooked and golden. If you find the bread getting too dark in colour while baking, tent the bread with foil and continue baking till done. Remove from oven, cool completely before slicing and serving.
All About Yeast
One of the questions which I often get is Why my bread is not rising. Why my dough is not doubling up. Why my bread is dense. The Answer for all the questions above depends on your yeast. Activating yeast properly is very important.
How to Activate Yeast?
- Take warm water in a bowl. Use Luke warm water. Dip your finger in the water and it should be very warm. Just like a warm bath water.
- Sprinkle little sweetness like sugar, honey. Because yeast loves warm and sweet environment.
- Now sprinkle yeast over it. I use dry yeast.
- Leave aside for 5 mins to activate. The yeast mix should be bubbly and foamy. This means yeast is activated.
Why My Yeast doesn't looks foamy?
There may be three reason, why your yeast didn't activate.
- You must have added yeast to too hot water so the yeast has died.
- You have used cold water so yeast didn't activated.
- Yeast is expired. Always store yeast in freezer in an air right container.
Shaping Brioche Bread (Braiding & Portioned)
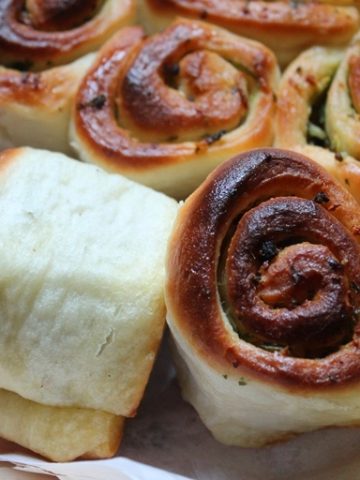
Brioche dough is enriched with lots of dairy, butter and eggs. So the dough can easily collapse on its if didn't shape properly. There are two ways you can bake a loaf of brioche bread. You can braid the loaf and place it inside the pan and bake or divide the dough into multiple portion and bake in a loaf pan. This way the bread doesn't collapse when baking.
I have shared step by step images of the braiding tutorial in the blog post below. But if you are shaping it into portion. You might need to divide it into equal balls and shape it into small ball. Arrange in a baking tray, let it rise and bake.
Tips from an Expert Bread Baker
About Yeast - Always use fresh batch yeast. I use dry yeast and start by activating the yeast. If your yeast doesn't look foamy, don't proceed with the recipe. Ensure you use warm milk so the yeast gets the right environment to activate.
Have faith - as you add in the butter, you will see your dough looks too shaggy and sticky. Don't be tempted to add more flour, let the mixer do its thing and let it knead. The dough will be sticky to start with, as you keep on kneading the dough it becomes more elastic, soft and manageable. Enriched Doughs is used for brioche or challah often require more kneading time. High amount of butter, sugar, dairy and eggs can delay the gluten formation so additional kneading is necessary to develop enough gluten structure.
Windowpane Test - Window pane test is very important to check whether the gluten development in dough is formed. This helps in getting the texture of the bread. Take a small ball of the dough and stretch it into a square. Keep on stretching until it becomes a thin film in the middle without breaking. The dough must be thin enough to pass light through it. If it is obtained without any tear, then your dough is properly kneaded.
Too much colour on bread - If you find the brioche looking too dark half way through the baking, make sure to tent it with some aluminium foil loosely so the top doesn't burn before the bread is cooked inside.
Baking Time & Cooling bread- Don't over bake the bread, else it will turn hard and burnt looking. Let the bread cool completely before slicing
How to Make Brioche Bread (Stepwise Pictures)
Activating Yeast
1)Enriched Doughs is used for brioche requires more kneading time. High amount of butter, sugar, dairy and eggs can delay the gluten formation so additional kneading is necessary to develop enough gluten structure. So it is best to use a stand mixer for kneading the dough. However you can knead dough using hands, but it will be very sticky. So you have to be patience to handle the sticky dough and continue kneading until the right consistency is achieved.
I am making this bread in a stand mixer. Now to the stand mixer bowl add in warm milk. Make sure the milk is at the right temperature to activate yeast. Ideal temperature to activate yeast is at 100°-110°F.
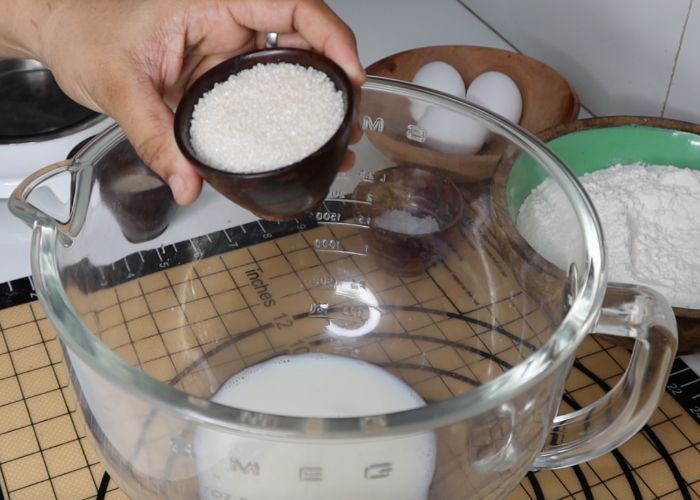
2)Yeast needs some kind of sweetener to thrive. Here I am using sugar, you can use honey as well.
3)Now to the sugary liquid, add in the yeast. I am using dry yeast. Sprinkle yeast over the warm milk and allow it to sit for 5 minutes.
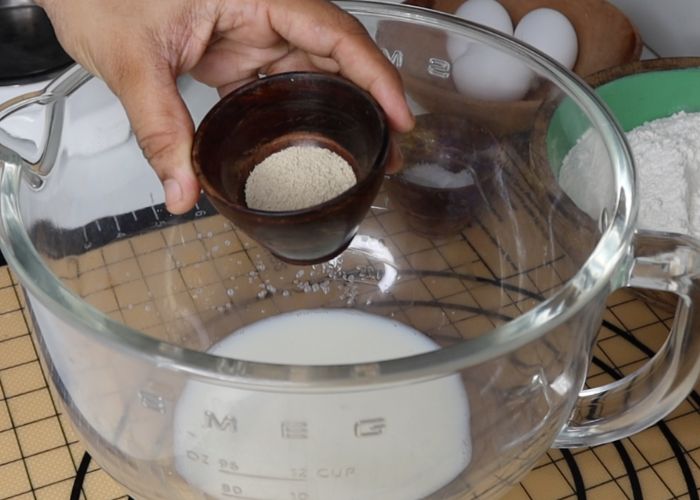
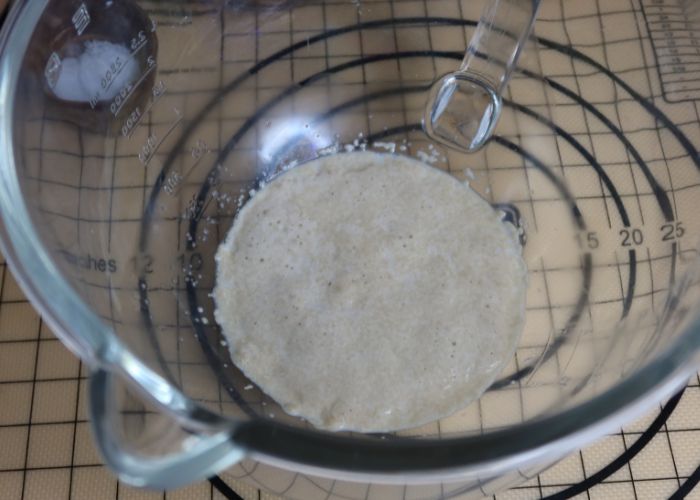
4)Now you can see the yeast has activated and looks foamy and bubbly. Now the yeast is activated.
Mix Eggs
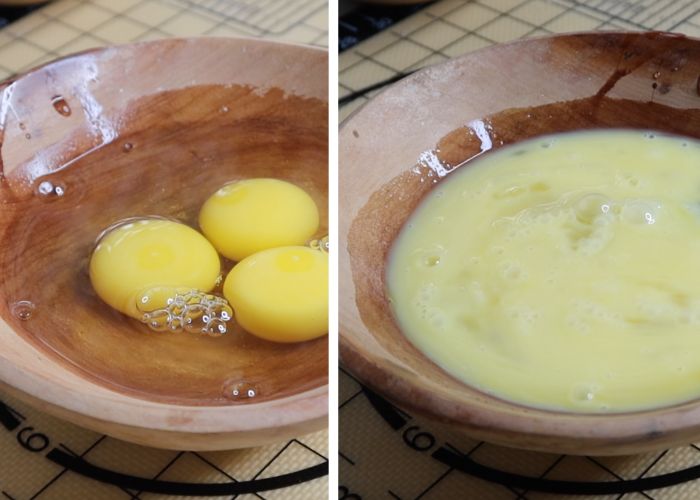
5)For making brioche bread, you need more eggs than usual. Crack open three eggs in a bowl and use a fork to gently combine it till mixed well.
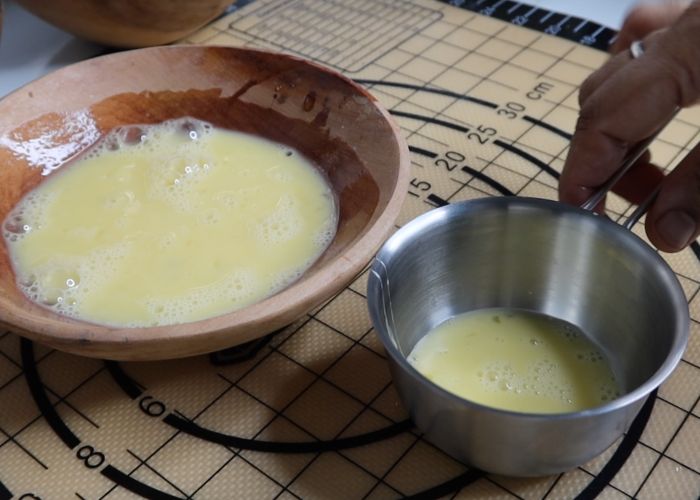
6)Remove 2 tablespoon of the egg mixture in a separate bowl for egg washing. We will be using this in the end to egg wash the bread. Mix 2 tablespoon of milk into the 2 tablespoon of egg and mix well. Keep this somewhere cold covered.
Adding all Ingredients
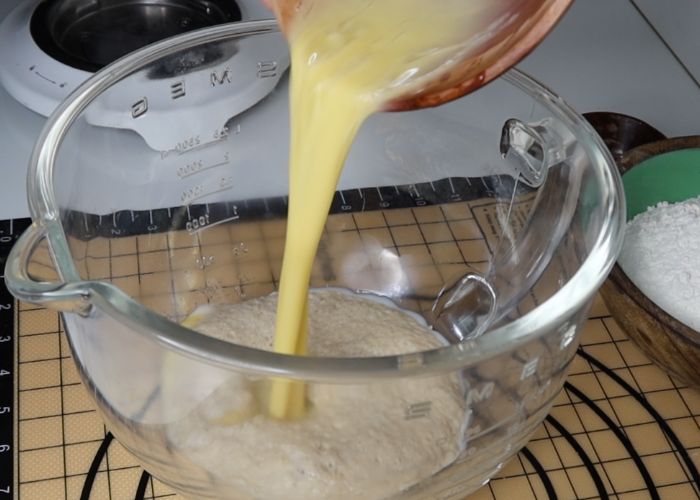
7)Now add in eggs into the yeast mixture.
8)Add in the plain flour. If you can get your hands on bread flour, you can use that. Since bread flour is great for making breads.
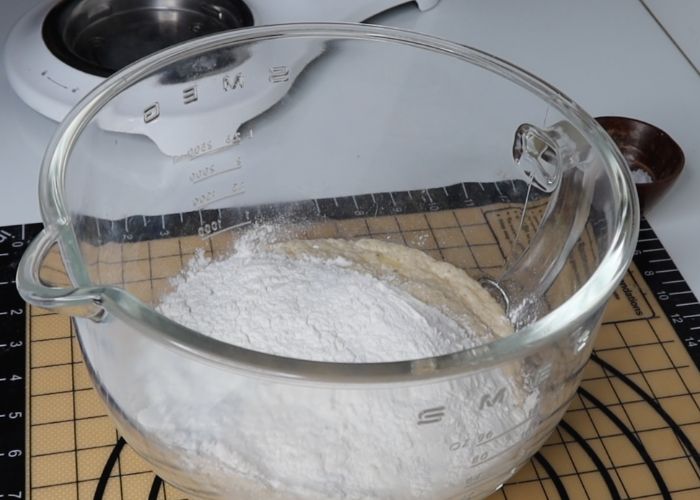
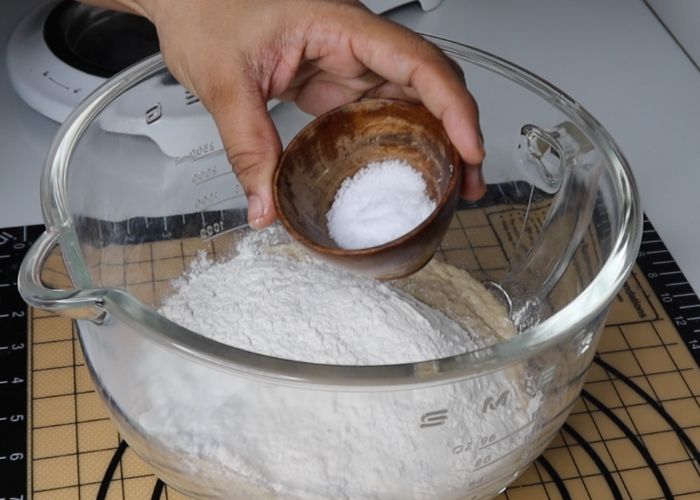
9)Add salt to taste.
Initial Kneading
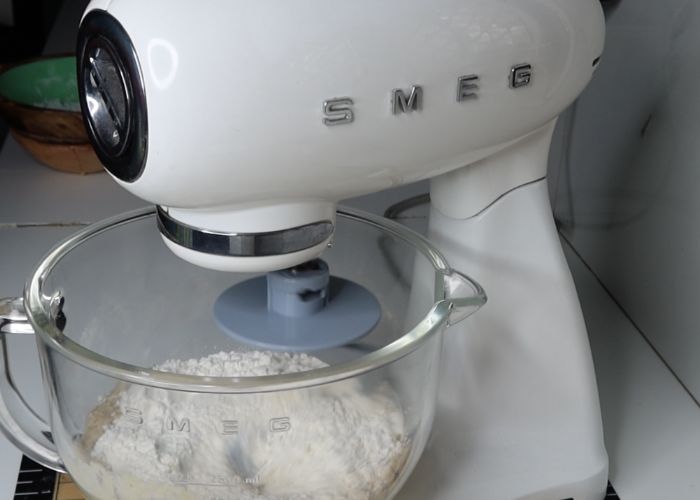
10)Place the bowl on a stand mixer along with dough hook and start kneading. Start with a low speed and gradually increase the speed. Let the dough knead for 2 to 3 minutes.
11)After 2 to 3 minutes of kneading. This is how the dough looks like. The flour will be hydrated with the milk and eggs. It should resemble a mass like texture.
Adding butter
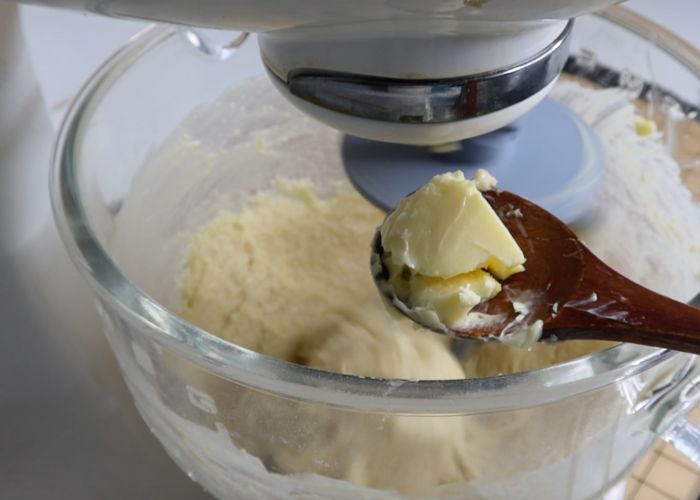
12)Now with the stand mixer running on low speed. Start adding in butter, add tablespoon of butter at a time. Add butter into the dough and continue kneading.
Pro Tip: The butter has to be pre-measured for accuracy. Also the butter should be soft at room temperature so it incorporates more easily.
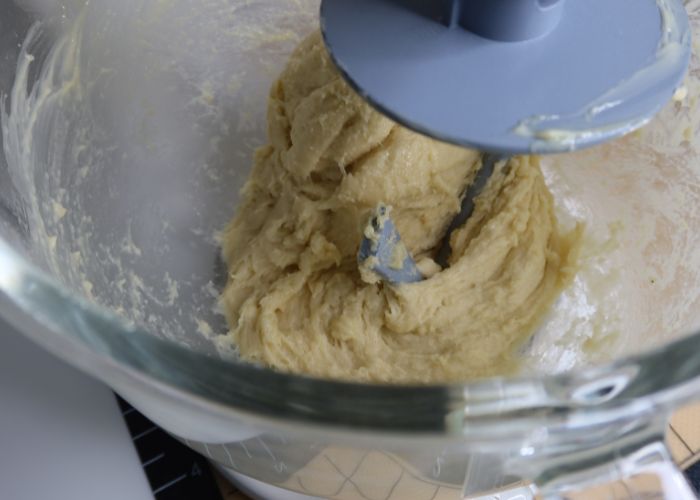
13)Let the dough continue kneading on low speed. the butter will slowly start to mix into the dough.
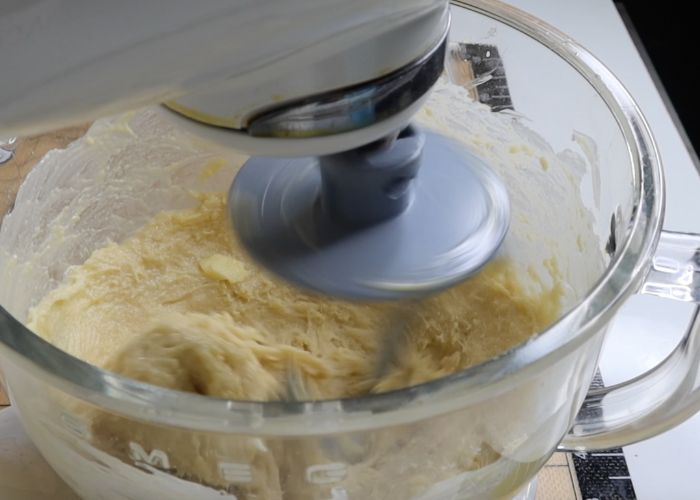
14)Now I have added all the butter into the dough. Make sure you stop the mixer every 5 minutes and scrape the sides of the bowl so everything is mixed evenly.
This is how the dough looks after all the butter has incorporated. It will look shaggy and sticky.

Kneading of Brioche Dough
15)Now you have to continue kneading the bread dough for at least 15 to 20 minutes.As you keep on kneading the dough, the texture changes from shaggy to smooth and elastic.
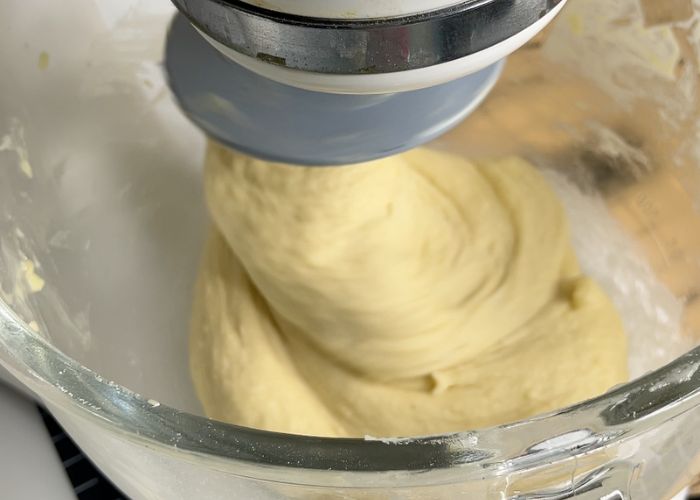
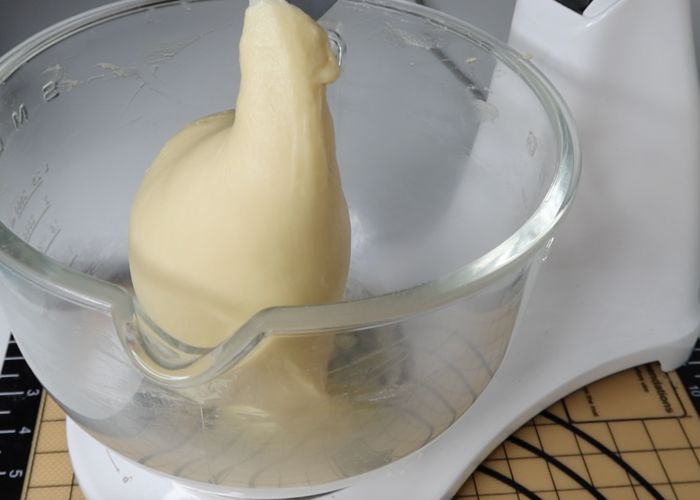
16)At one point the dough will start to cling to the dough hook in one solid mass. It will look more elastic and soft.
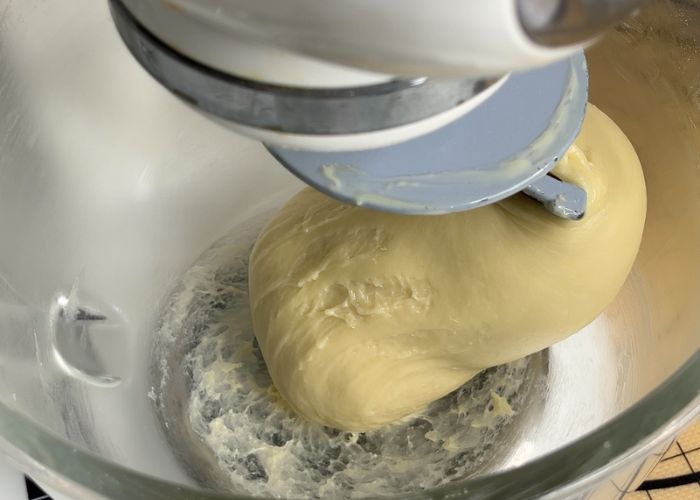
17)Look at the texture of the brioche dough. It is more soft, even and smooth.
Windowpane Test
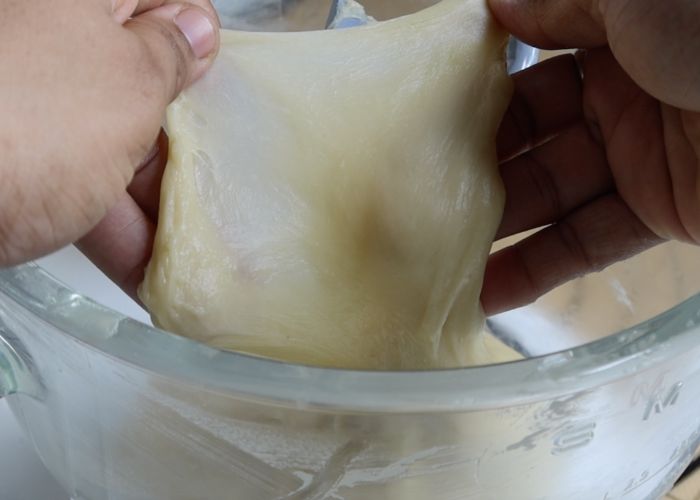
18)Now let's check for window pane test. Window pane test is very important to check whether the gluten development in dough is formed. This helps in getting the texture of the bread. Take a small ball of the dough and stretch it into a square. Keep on stretching until it becomes a thin film in the middle without breaking. The dough must be thin enough to pass light through it. If it is obtained without any tear, then your dough is properly kneaded.
Here you can see the dough is streching without any tears. So windowpane test passed!
Pre-shaping & First Proofing
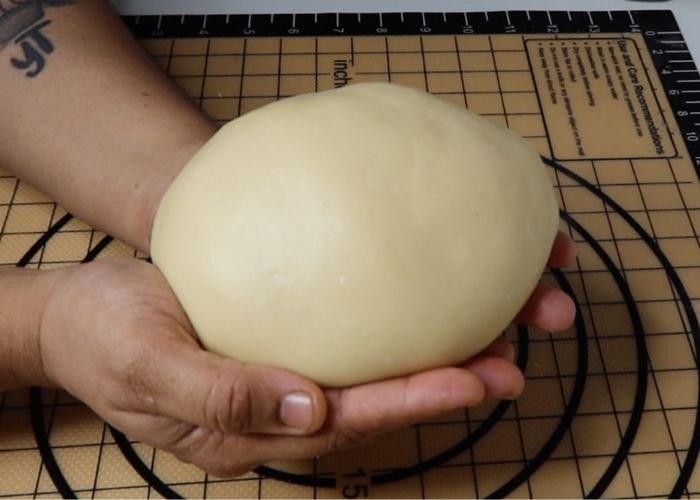
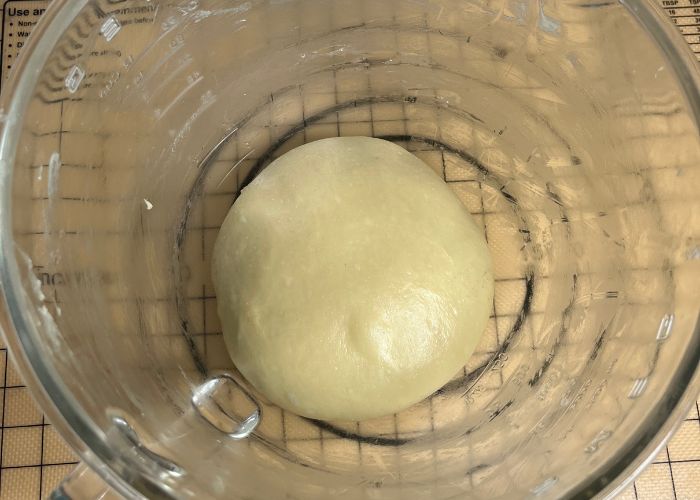
19)Remove the dough to a work surface and shape into a smooth ball like. The dough will be very easy to handle.
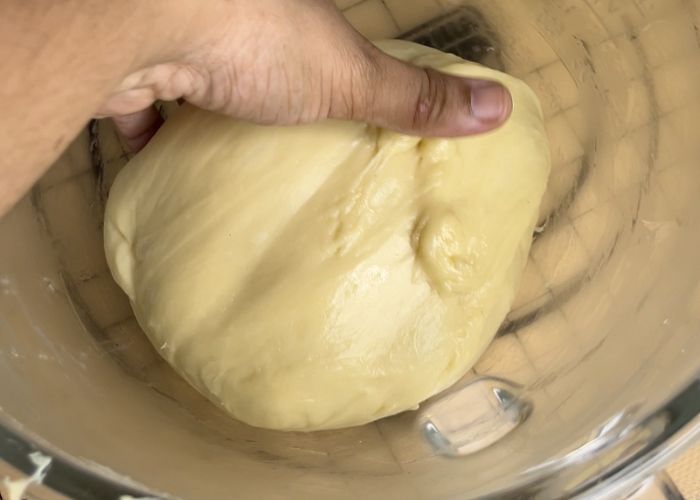
20)Smooth and soft brioche dough.
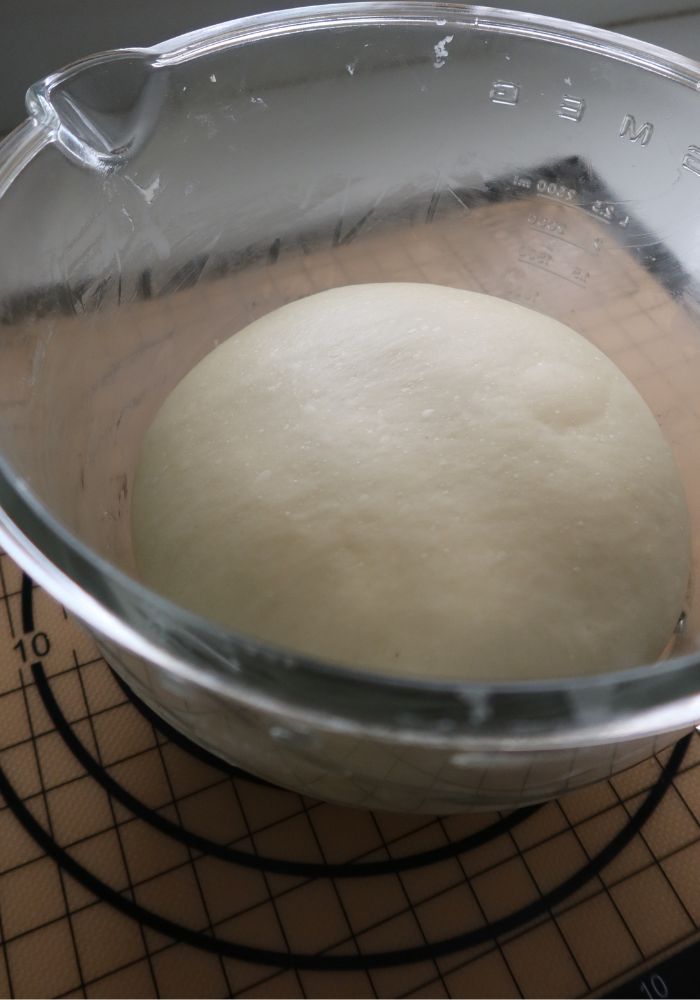
21)Place the shaped dough back into the stand mixer bowl. Cover with a cloth and allow it to rest and rise for 1 to 2 hours till the dough is doubled in volume.
22)Now after 1 to 2 hours the dough has risen more than double in volume.
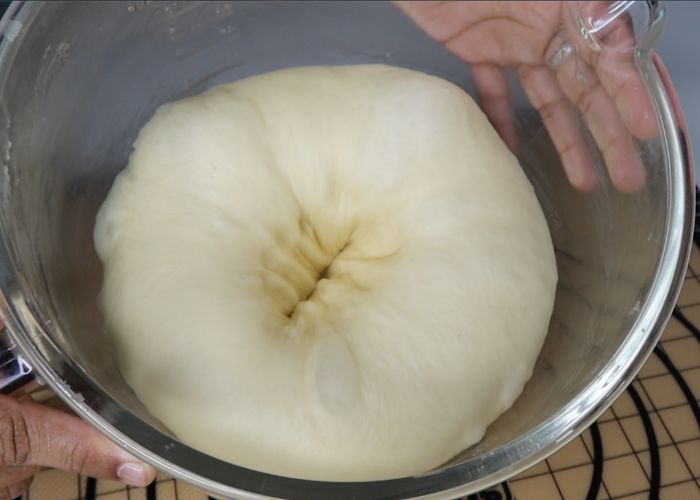
Dividing Dough
23)Remove the dough on a work surface. Flatten it gently.

24)Roll the dough into a log like.
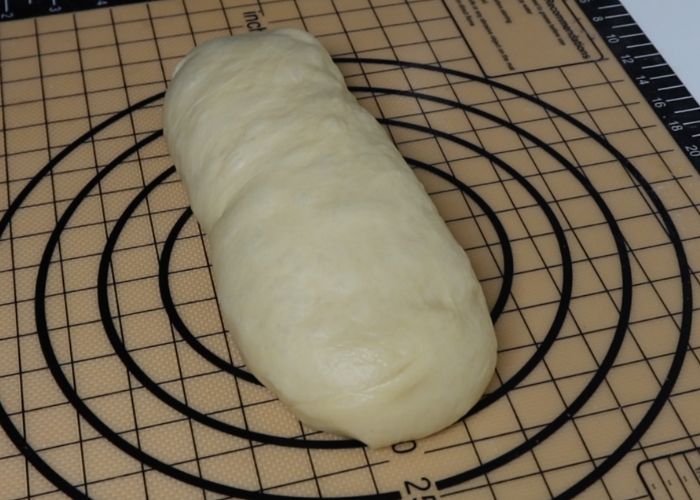
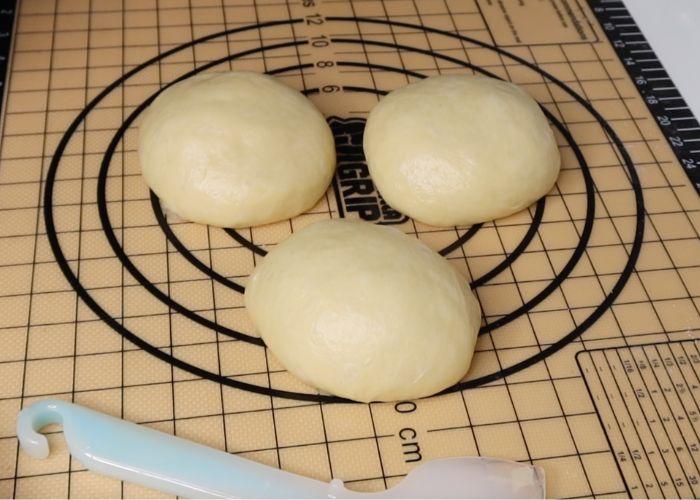
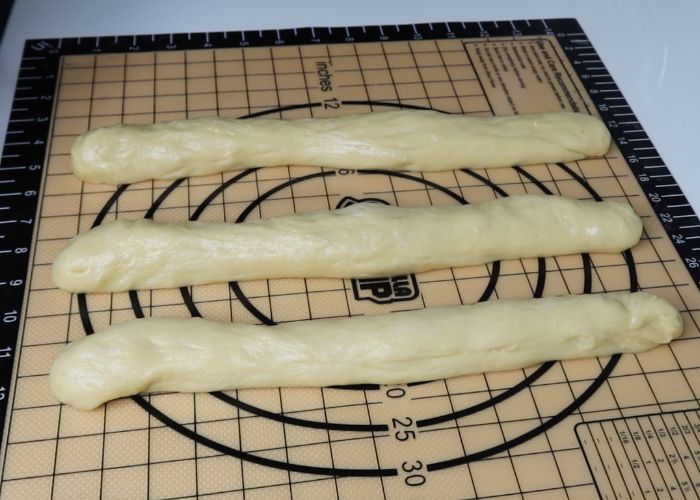
25)Divide the dough into three equal portions. Shape each portion into a smooth ball.
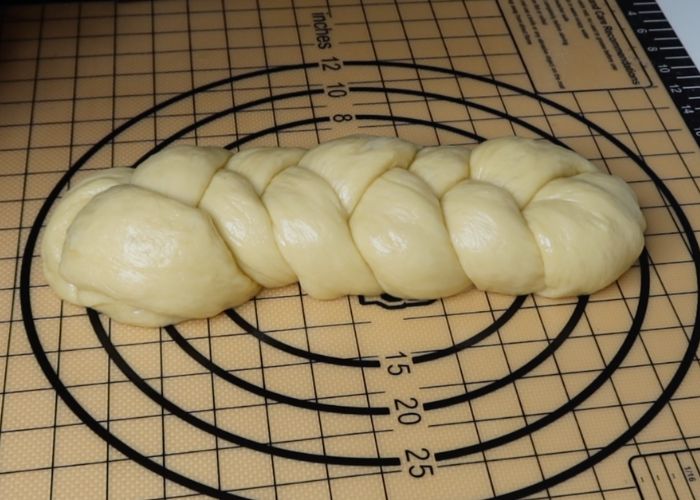
Braiding Brioche
26)Take each portion of the dough, roll it into a rope like.
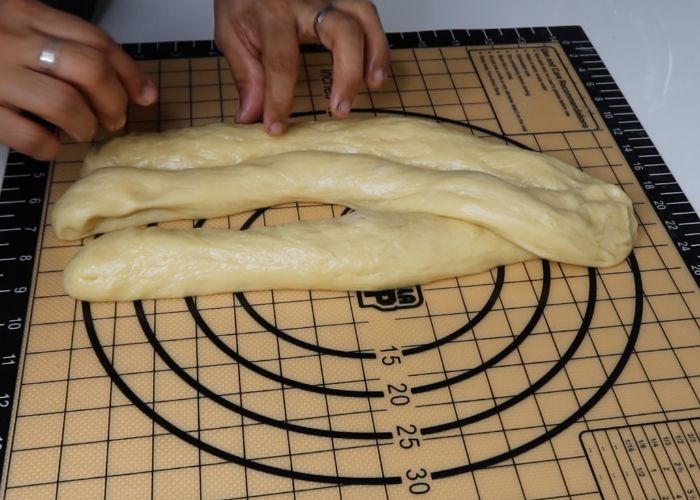
26)Now bring the top ends together and stick it like this.

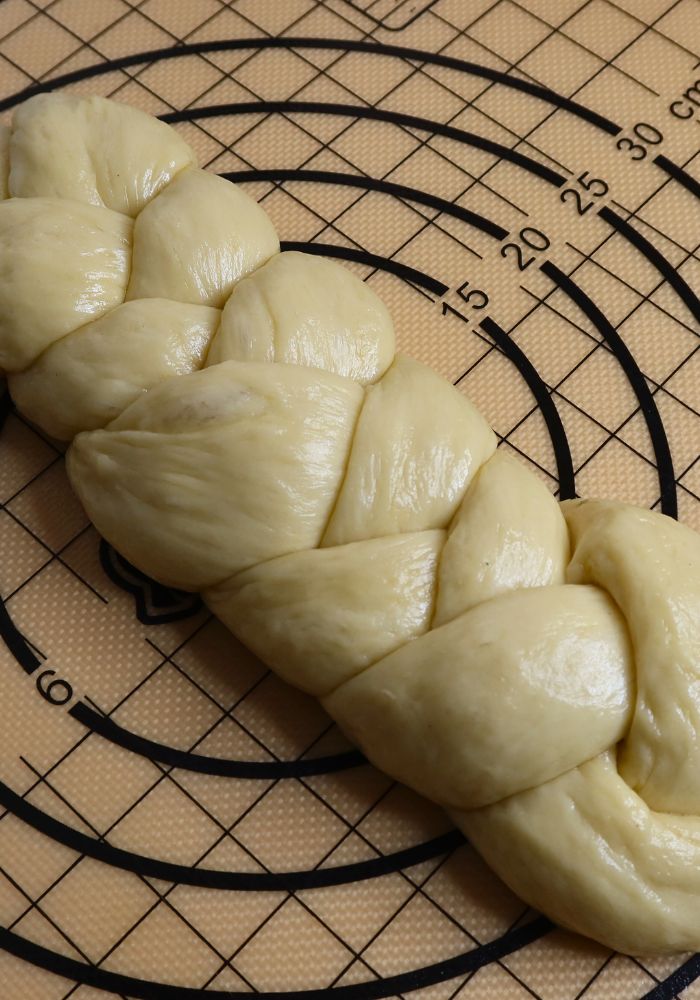
27)Now start braiding as you do normal.
28)As you keep braiding make sure the braids are tightly braided.
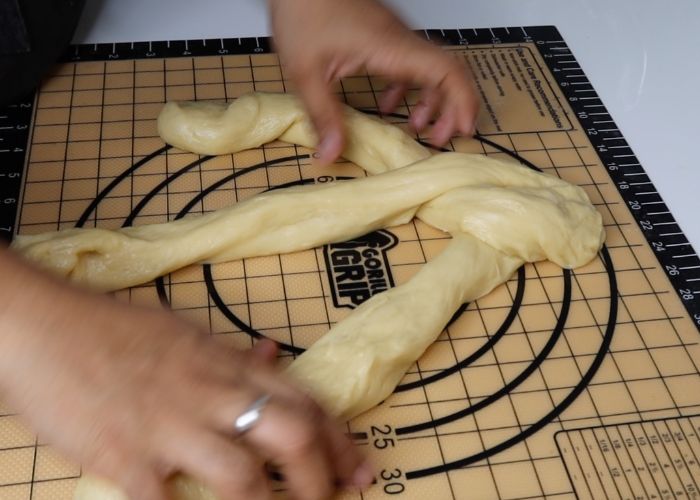
29)keep doing this as shown.
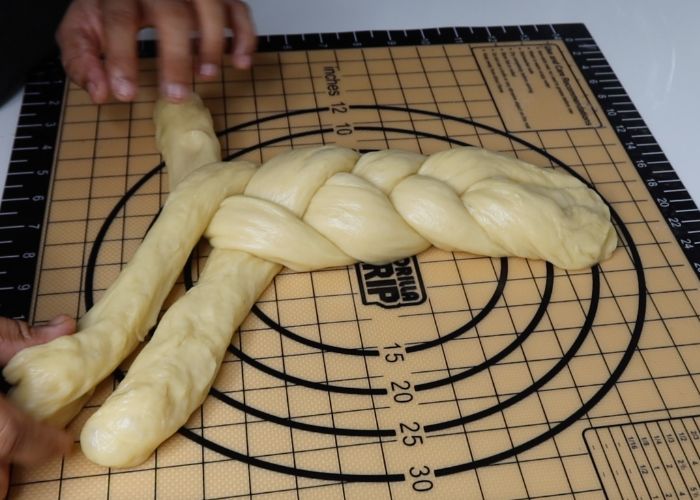
30)Once you come to the end, tuck the end underneath and shape it into a smooth braid by rolling it back and forth.
Second Proofing
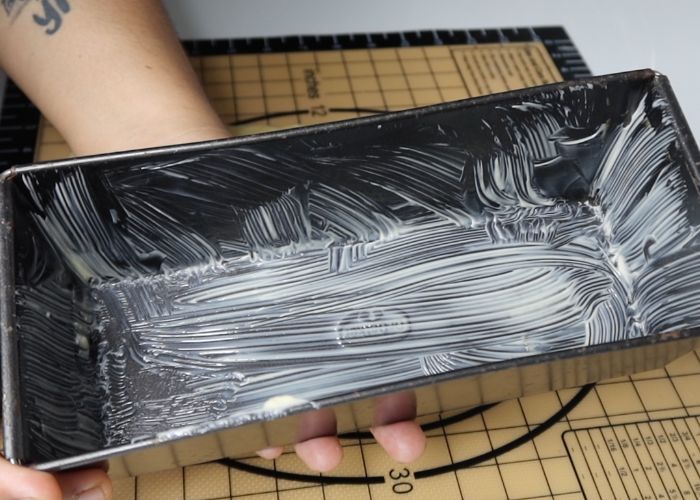
31)Grease a 8x4 inch loaf pan generously with butter and set aside.
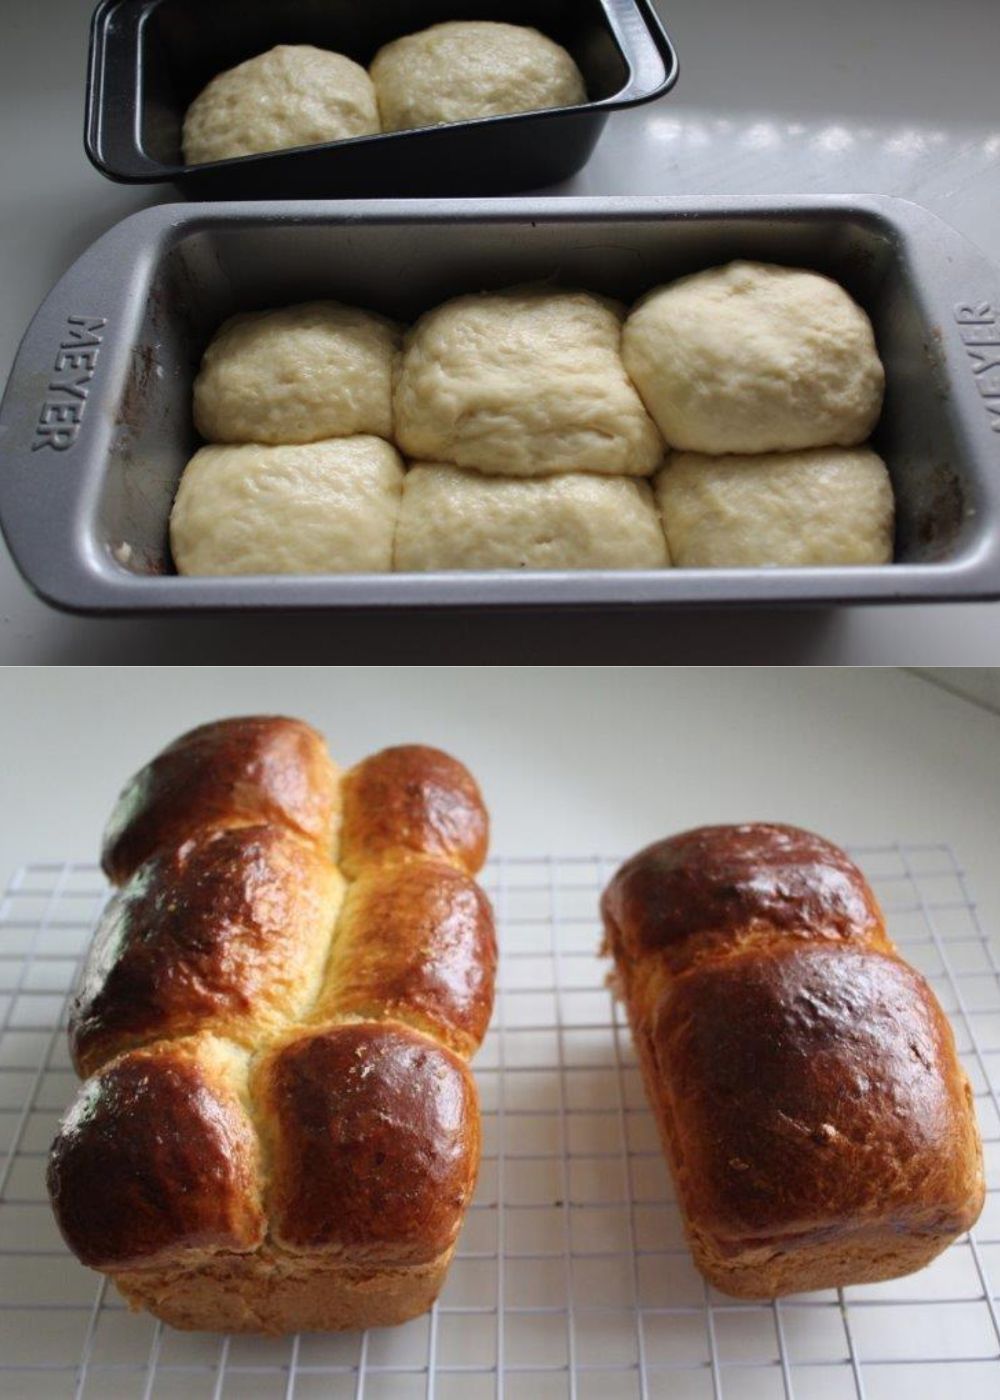
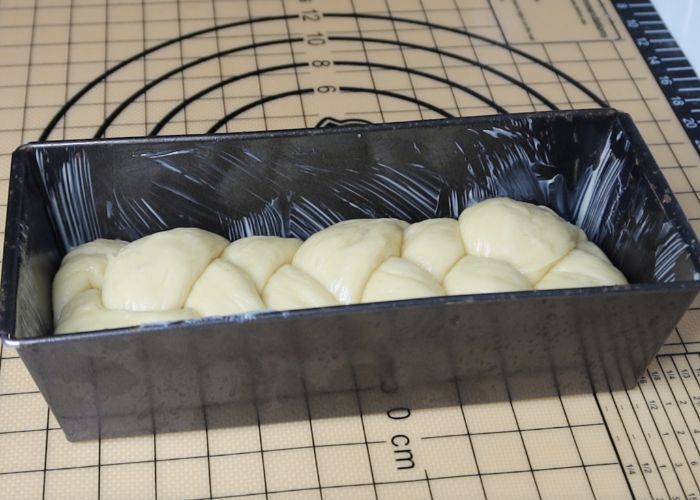
32)Place the braided brioche loaf into the pan. Cover the loaf pan with a kitchen towel and allow it to rise for 45 minutes to 1 hour.
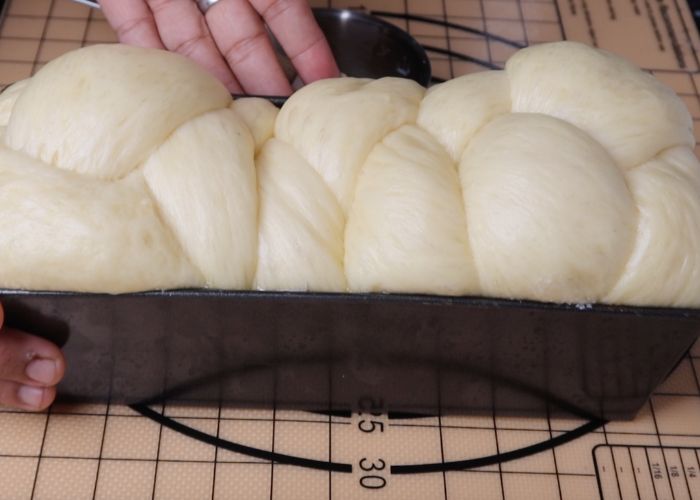
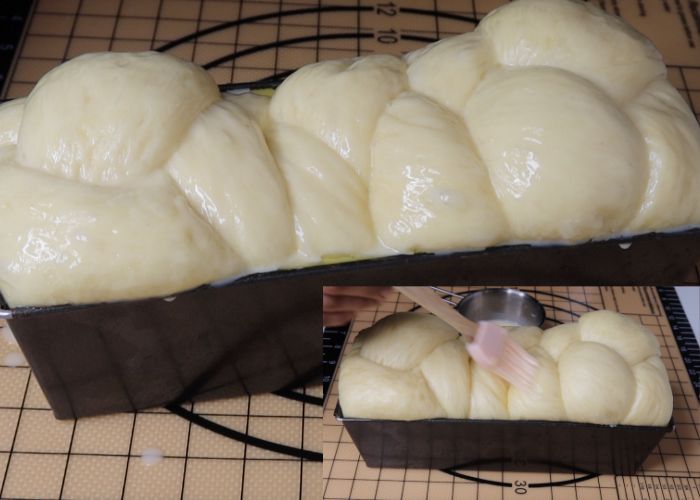
33)Now the loaf has risen almost more than double in volume.
Egg washing
34)Remember the egg wash which we prepared earlier. Brush the egg wash generously over the bread dough using a pastry brush.
Baking bread
35)During the last 10 minutes of proofing, make sure you preheat oven to 190 degree C | 375 Degree F. Once the oven is hot, place the loaf pan into the oven and bake for 35 minutes.
Pro Tip: If you find the brioche looking too dark half way through the baking, make sure to tent it with some aluminium foil loosely so the top doesn't burn before the bread is cooked inside.
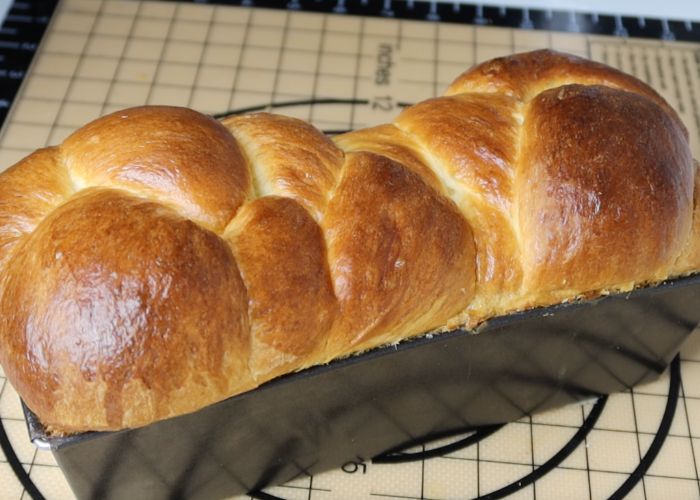
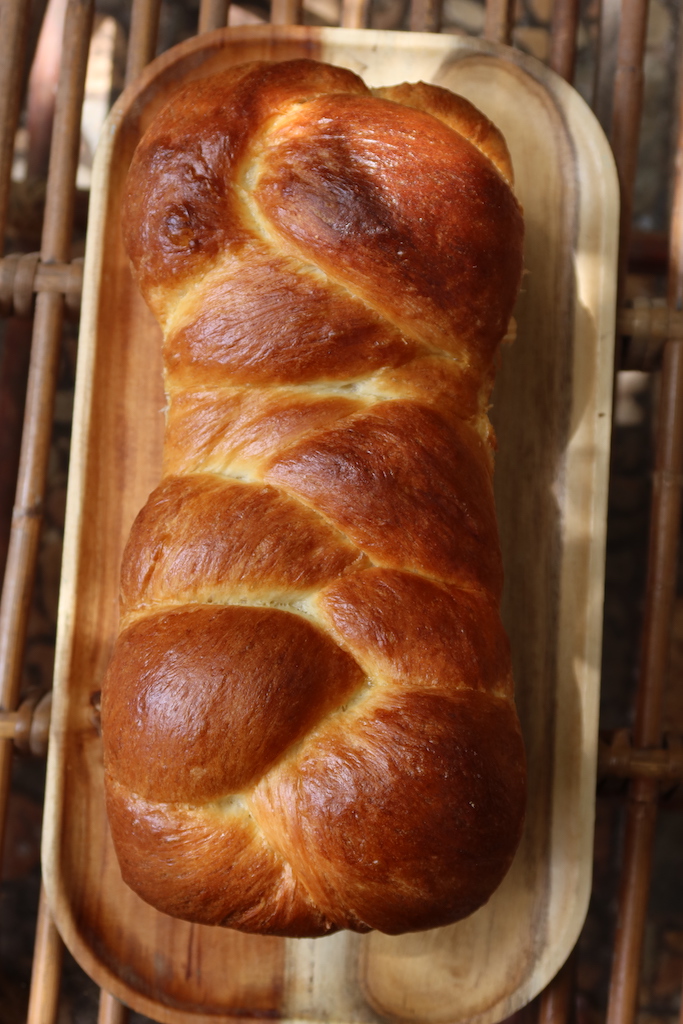
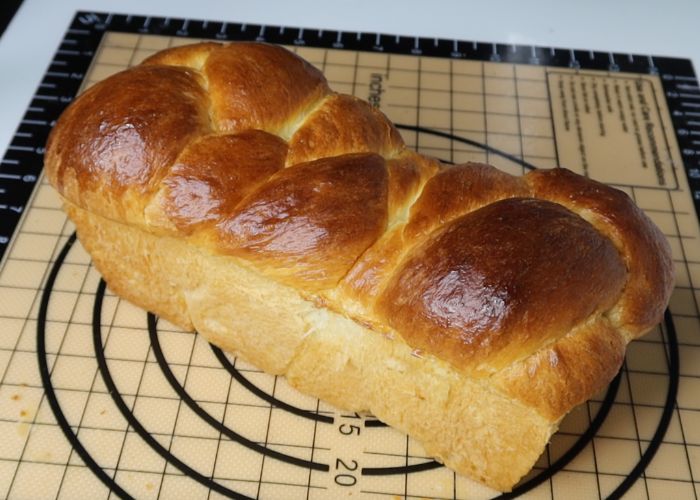
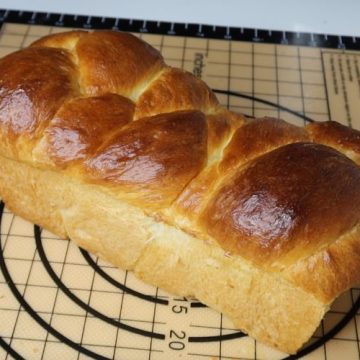
36)Once the bread is baked, remove it from oven and allow it to cool in the loaf pan for 20 minutes before unmoulding from the pan. Now allow the brioche to cool completely before slicing.
Expert Tips
- The dough will be sticky to start with, as you keep on kneading the dough it becomes more elastic, soft and manageable.
- Checking window pane test is very important for perfect texture. After kneading for few minutes, take a small portion of dough and stretch it with your fingers. The dough should stretch without tearing. And you will be able to see light through the stretched dough. This is your windowpane test.
- Don't let the bread rise too much in the loaf pan, else it may collapse when baking.
- Store the dough in a warm place when rising for fast action. I usually keep them inside my oven with oven lights turned on.
Storage
- Brioche bread can be stored at room temp for 3 to 4 days.
- Store the bread in fridge upto 10 days.
Recipe Suggestions
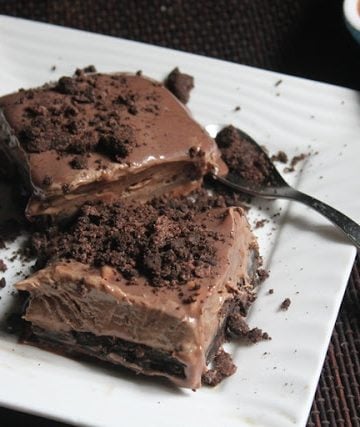
Brioche bread can be used to make best ever french toast and bread pudding for its rich taste.
FAQ
1)Can I make brioche bread without stand mixer?
Brioche dough has high amount of butter and eggs which makes them sticky and hard to work with. So stand mixer is highly recommended. However you can knead dough using hands, but it will be very sticky. So you have to be patience to handle the sticky dough and continue kneading until the right consistency is achieved.
2)Why brioche dough has to be kneaded longer?
Enriched Doughs is used for brioche or challah often require more kneading time. High amount of butter, sugar, dairy and eggs can delay the gluten formation so additional kneading is necessary to develop enough gluten structure.
3)How to Activate Yeast?
One of the questions which I often get is Why my bread is not rising. Why my dough is not doubling up. Why my bread is dense.
- Take warm water in a bowl. Use Luke warm water. Dip your finger in the water and it should be very warm. Just like a warm bath water.
- Sprinkle little sweetness like sugar, honey. Because yeast loves warm and sweet environment.
- Now sprinkle yeast over it. I use dry yeast.
- Leave aside for 5 mins to activate. The yeast mix should be bubbly and foamy. This means yeast is activated.
4)Why My Yeast Doesn't looks foamy?
There may be three reason, why your yeast didn't activate.
- You must have added yeast to too hot water so the yeast has died.
- You have used cold water so yeast didn't activated.
- Yeast is expired. Always store yeast in freezer in an air right container.
More Bread Baking Recipes to try
📖 Get Recipe
Brioche | Brioche Recipe | Brioche Bread Recipe
Equipment
Ingredients
- 3 cups All Purpose Flour 360 grams
- 100 ml Warm Milk
- 1½ teaspoon Dry Yeast
- 4 tablespoon Sugar
- 2 teaspoon Salt
- 3 large Eggs
- 120 grams Butter
Instructions
- In your stand mixer bowl, add in warm milk, sugar and yeast. Let the yeast sit for 5 minutes to activate. While the yeast activates, mix 3 eggs using a fork. Now remove 2 tablespoon of the whisked egg into a separate bowl for egg washing. Add 2 tablespoon of milk into the 2 tablespoon of egg and mix well. Set aside for later.
- Now the yeast must be activated. It should look foamy to look. Now add in the whisked 3 eggs, plain flour, salt into the stand mixer bow. Place the bowl in the stand mixer, use dough hook for mixing. Now start your mixer and start kneading the dough. Let the dough knead till the flour is hydrated with the milk and eggs.
- At this point start adding in the soft butter little at a time while you keep on kneading. Let the dough knead on low speed till all the butter is incorporated. The dough will look like a shaggy dough once the butter is mixed in. Now increase the speed of the mixer slightly and knead the dough. Make sure to stop the mixer in between and scrape the bowl of the stand mixer. Continue kneading the dough for at least 15 to 20 minutes. By this time the dough will look glossy, smooth, shiny and soft.
- Now let's check for window pane test. Window pane test is very important to check whether the gluten development in dough is formed. This helps in getting the texture of the bread. Take a small ball of the dough and stretch it into a square. Keep on stretching until it becomes a thin film in the middle without breaking. The dough must be thin enough to pass light through it. If it is obtained without any tear, then your dough is properly kneaded.
- Remove the dough to a work surface and shape into a smooth ball like. The dough will be very easy to handle. Place the shaped dough back into the stand mixer bowl. Cover with a cloth and allow it to rest and rise for 1 to 2 hours till the dough is doubled in volume. Now after 1 to 2 hours the dough has risen more than double in volume.
- Remove the dough on a work surface. Flatten it gently. Roll the dough into a log like. Divide the dough into three equal portions. Shape each portion into a smooth ball.
- Take each portion of the dough, roll it into a rope like. Now bring the top ends together and stick it together. Start braiding the bread. Once you come to the end, tuck the end underneath and shape it into a smooth braid by rolling it back and forth.
- Grease a 8x4 inch loaf pan generously with butter and set aside. Place the braided brioche loaf into the pan. Cover the loaf pan with a kitchen towel and allow it to rise for 45 minutes to 1 hour. Now the loaf has risen almost more than double in volume. Remember the egg wash which we prepared earlier. Brush the egg wash generously over the bread dough using a pastry brush.
- During the last 10 minutes of proofing, make sure you preheat oven to 190 degree C | 375 Degree F. Once the oven is hot, place the loaf pan into the oven and bake for 35 minutes. If you find the brioche looking too dark half way through the baking, make sure to tent it with some aluminium foil loosely so the top doesn't burn before the bread is cooked inside.
- Once the bread is baked, remove it from oven and allow it to cool in the loaf pan for 20 minutes before unmoulding from the pan. Now allow the brioche to cool completely before slicing.
Video
Notes
- The dough will be sticky to start with, as you keep on kneading the dough it becomes more elastic, soft and manageable.
- Checking window pane test is very important for perfect texture. After kneading for few minutes, take a small portion of dough and stretch it with your fingers. The dough should stretch without tearing. And you will be able to see light through the stretched dough. This is your windowpane test.
- Don't let the bread rise too much in the loaf pan, else it may collapse when baking.
- Store the dough in a warm place when rising for fast action. I usually keep them inside my oven with oven lights turned on.
- Brioche bread can be stored at room temp for 3 to 4 days.
- Store the bread in fridge upto 10 days.
Nutrition
Tried this Recipe
Mention @yummytummyaarthi or tag #yummytummyaarthi!If you have any questions not covered in this post and if you need help, leave me a comment or mail me @aarthi198689@gmail.com and I'll help as soon as I can.
Follow me on Instagram, Facebook,Pinterest ,Youtube for more Yummy Tummy inspiration.
IF YOU MAKE THIS RECIPE OR ANYTHING FROM YUMMY TUMMY, MAKE SURE TO POST IT AND TAG ME SO I CAN SEE ALL OF YOUR CREATIONS!! #YUMMYTUMMYAARTHI AND @YUMMYTUMMYAARTHI ON INSTAGRAM!


Rodney Bradshaw
Can this recipe be mixed in a bread machine. Then put into loaf pans?
Aarthi
yes i think you can.
Linda Lubben
Dough is extremely hard to handle.
Aarthi
Thats why we are keeping the dough in fridge. For easy working.
Nancy
No machines. Can do with just hands?
Aarthi
yes use a wooden spoon and bowl
Shalu
Wonderful bread. How can i half this recipe.
Poornima
Hi Aarthi. Tried out today. Came out perfect. My first successful bread recipe. Thank you so much for detailed explanation 🙂 I did chicken bread pizza for kids 🙂