
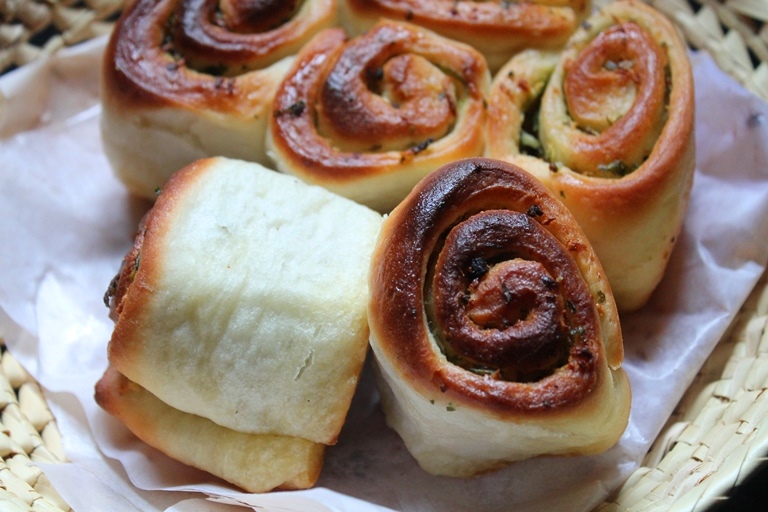
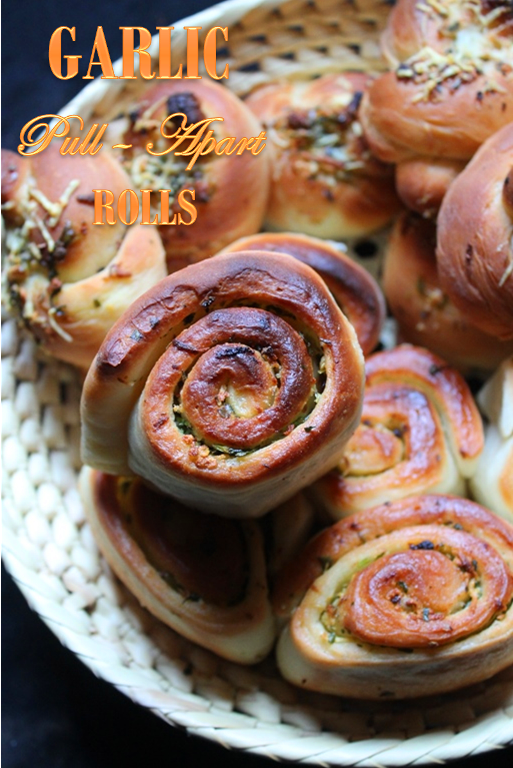
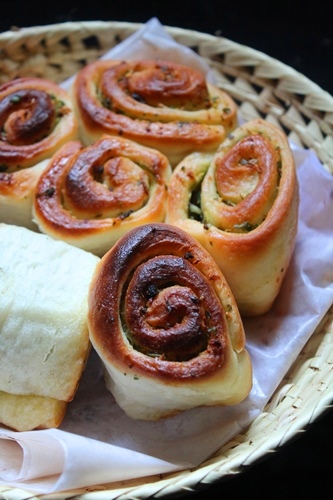
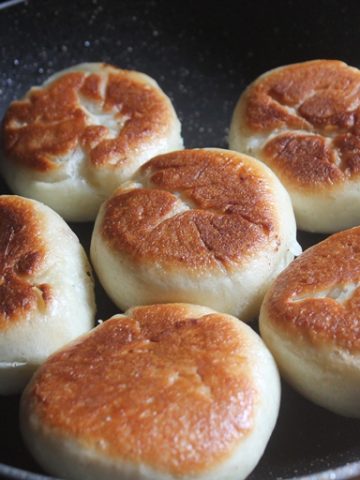
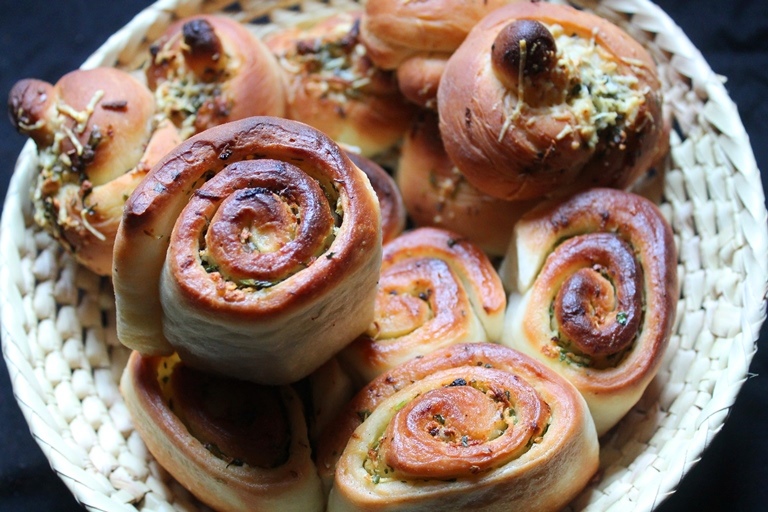
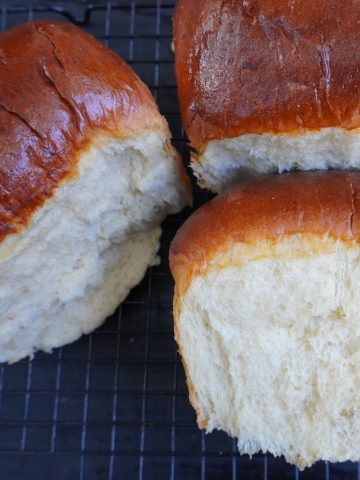
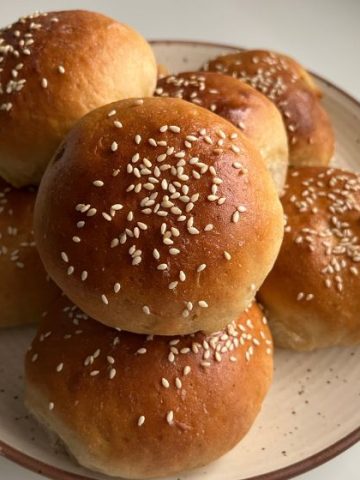
Easy garlic pull-apart rolls is also known as garlic rolls or garlic butter rolls similar to my garlic cheese pull-apart buns. This buttery garlic bread rolls are easy to make and taste delicious. The dough is spread with herbed garlic butter and baked. These rolls stick together creating a buttery pull-apart experience once baked. Learn how to make garlic rolls with stepwise pictures and video.
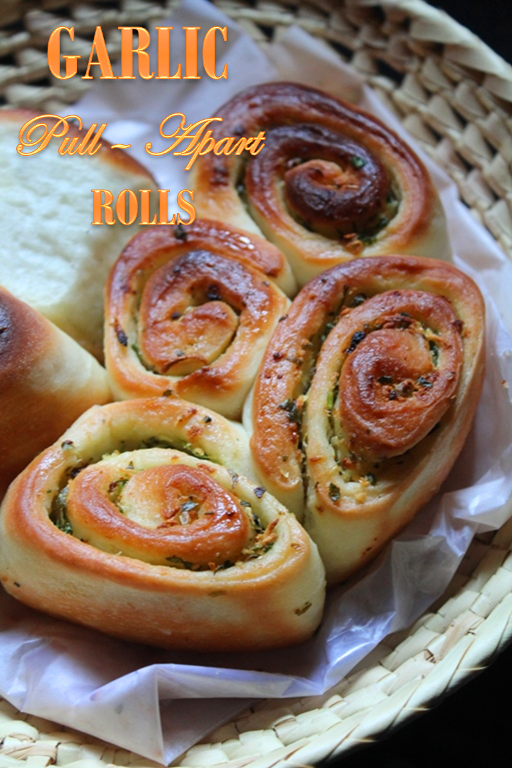
Garlic Pull-Apart Rolls Recipe
I love garlic in anything.. Especially garlic bread is one of my favorite...If you love garlic this one is for you. Try to add lots of garlic in this dish, don't be shy to add more garlic in this. The amount of garlic you add makes this dish unique. I made this last week and it was over that day itself. The roll was so soft and buttery. It just melts in your mouth.
Jump to:
The garlic flavour just wafts through your house and makes it so yummy. I made a big batch of dough and made garlic knots, garlic cheese pull apart buns as well. Will share them soon.
About Garlic Pull-Apart Rolls
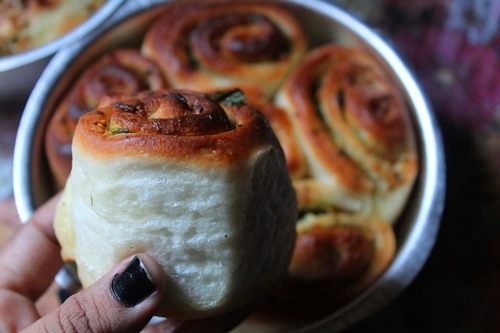
Garlic pull-apart rolls is also known as pull-apart rolls or garlic rolls. This is a popular dinner roll recipe that is enriched with garlic herb butter which makes it irresistable. The bread dough is super soft, light and fluffy while making the inside so buttery.
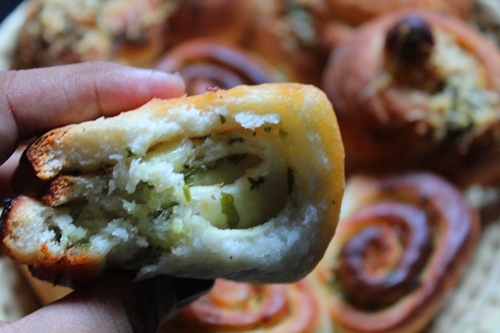
The dough is basic pizza dough, you can use store bought pizza dough as well. And the butter can be flavoured with garlic, herbs, dried seasonings. You can use grated parmesan or any cheese in the filling too. You can customize it as per your taste.
I have also made few other variations to the recipe, including using pesto, red harissa, roasted red pepper pesto along with the butter.
Similar Recipes
Garlic Rolls Ingredients
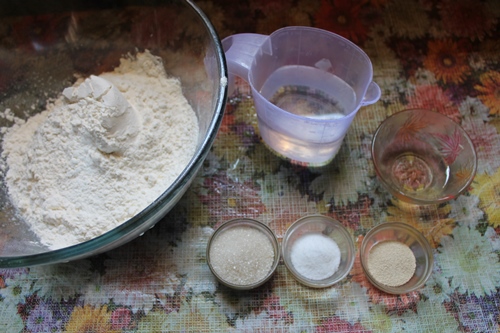
Garlic bread rolls has the simple dough and the garlic butter spread. The bread dough is very similar to a pizza dough. These are the ingredients which you might need.
All Purpose Flour - I used plain flour for making the dough. You can use whole wheat flour for healthier alternative. But it will affect the texture a bit. Still the taste will be great.
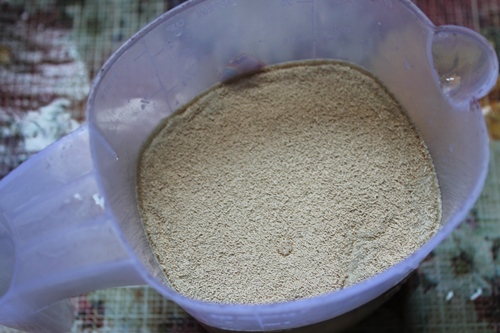
Dry Yeast - yeast helps with the activation of the dough and makes it puffy.
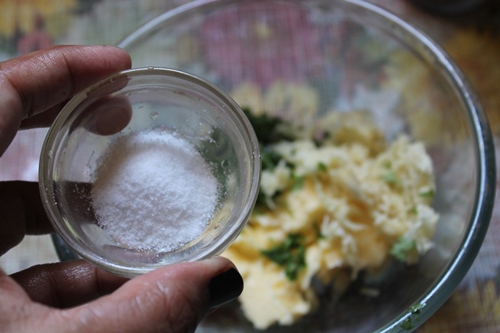
Salt & Sugar - enhance the taste of the bread and also makes it puffy and soft.
Oil - I used olive oil in the bread dough. You can use melted butter.
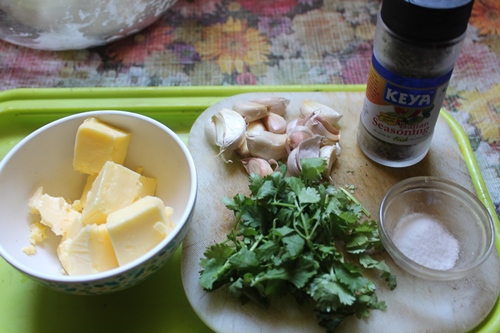
Ingredients for Making Garlic Butter
Butter - generous amount of butter is used in the filling. You can use salted or unsalted as you prefer. If you are using salted butter, be cautious when adding salt.
Garlic - Be generous with the garlic used in the bread. Some recipes uses garlic powder, But I always prefer to use fresh garlic for the intense garlic flavour.
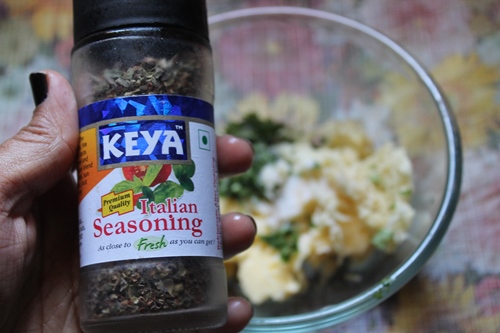
Italian Seasoning & Herbs - you can use either Italian seasoning or use a combination of your favorite herbs. Along with the dried herbs, I use fresh coriander leaves too.
Garlic Rolls Preparation
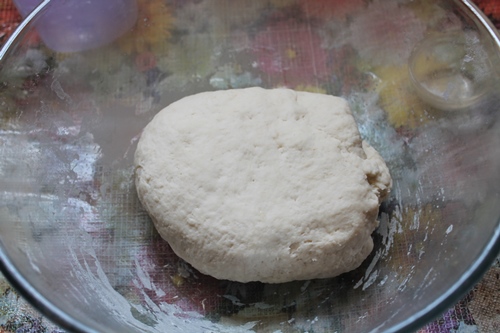
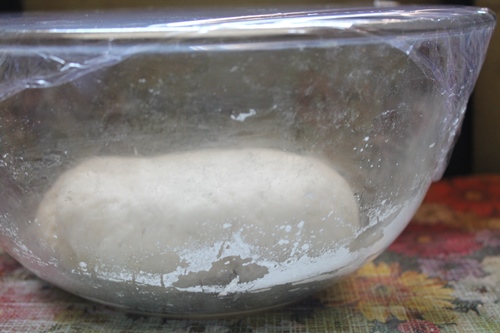
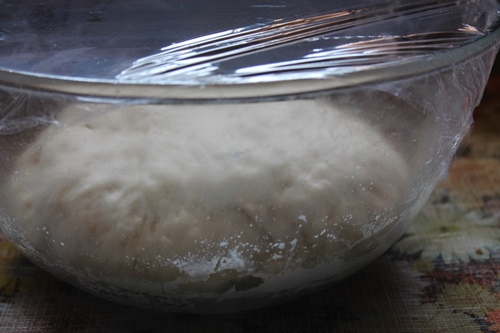
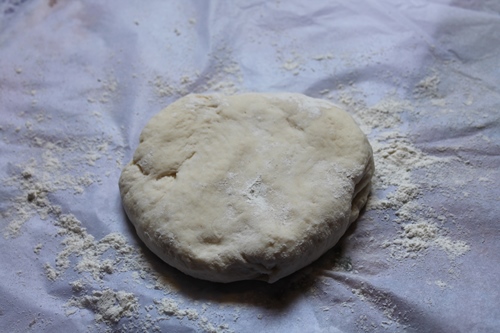
Making Dough - Mix yeast and sugar with warm water and set this aside for 5 mins.let it foam up. Take flour, salt, oil in a bowl and mix well. Pour yeast mix into the flour and mix well to a dough. Cover it with plastic wrap or damp cloth and set this aside for 1 hour till it is doubled in size.
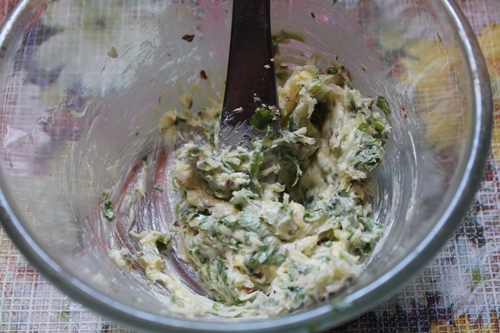
Making Garlic Spread - Mix all the ingredients for garlic spread together till it form a smooth paste.
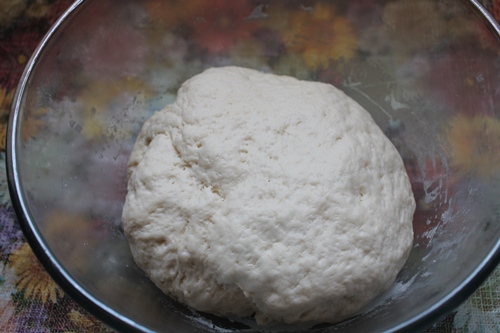
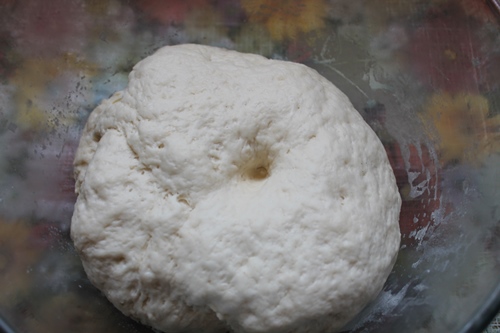
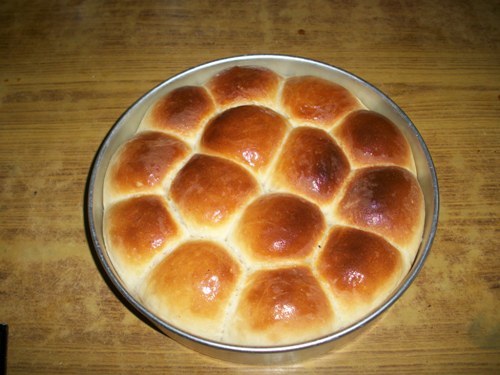
Shaping Rolls - Take the dough out of the bowl and knead it for 5 min. Roll the dough into a rough rectangle and spread the garlic spread over it. Now roll this into log. Cut into equal portion. Arrange this in a buttered baking pan leaving little space between each of them. Now cover it with a damp cloth and let it rise for 45 min.
Baking - In the last 10 mins or rising, preheat oven to 200 degree C.Now place this in the preheated oven and bake for 20 to 30 mins. Take it out and apply some butter over the top,so that it looks glossy and shiny. Serve hot or warm with a cup of tea.
Check this Garlic Cheese Pulls Apart Buns Recipe
How to Make Garlic Pull-Apart Rolls (Stepwise Pictures)
|
| Take all your ingredients |
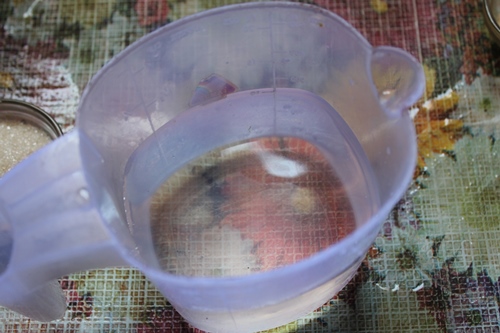 |
| Take warm water in a jug |
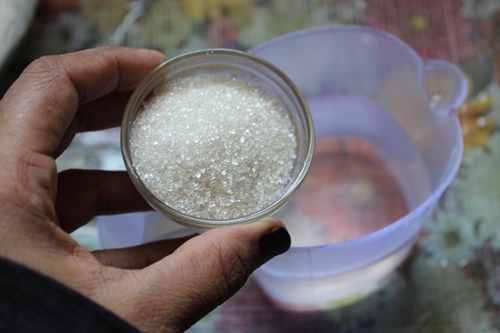 |
| Add in sugar |
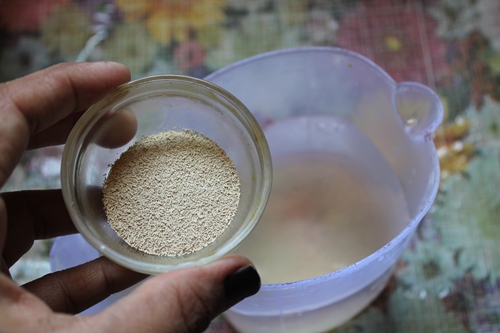 |
| sprinkle some yeast |
 |
 |
| mix well and leave it aside for 5 mins |
 |
| Now yeast is activated |
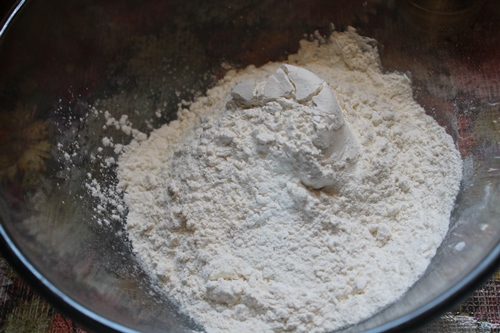 |
| Take flour in a bowl |
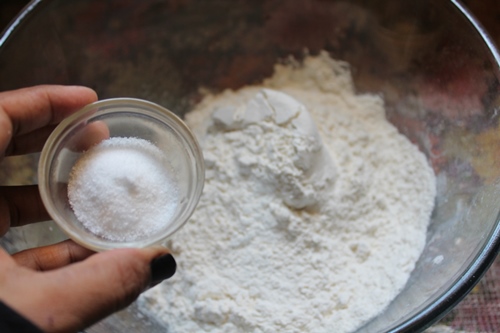 |
| add in salt |
 |
| add in olive oil |
 |
| mix well |
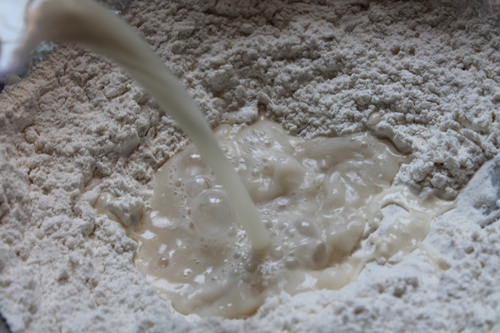 |
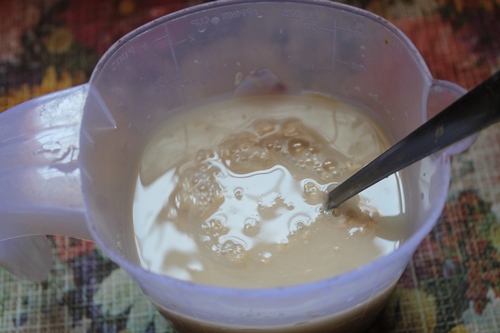
| pour the water |
 |
| use a fork to mix well |
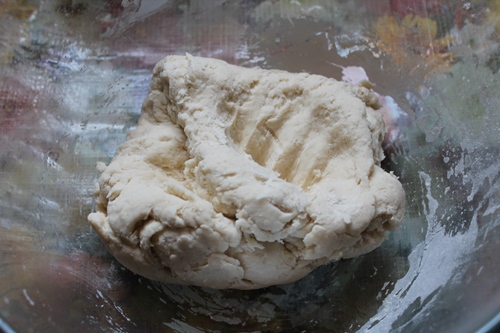 |
| Once it is combined |
 |
| knead well to a smooth dough |
 |
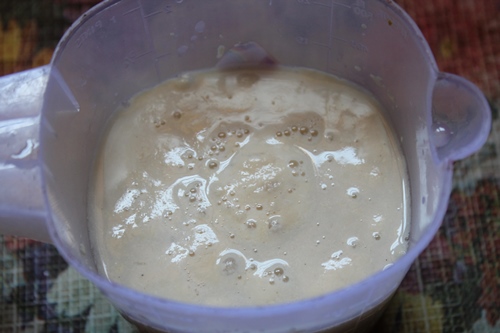
| cover with a plastic wrap and leave it to rest for 1 hour |
 |
| now it is doubled in size |
 |
| dough done |
 |
| give one fine dough |
|
| Take your spread ingredients |
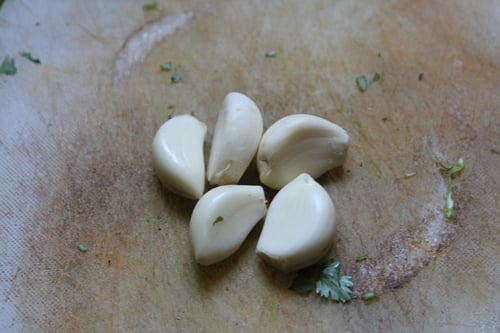 |
| peel some garlic cloves |
 |
| peel it off |
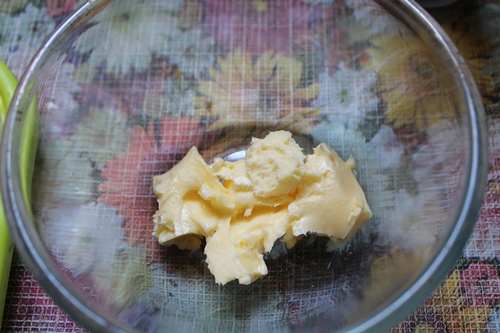 |
| take butter in a bowl |
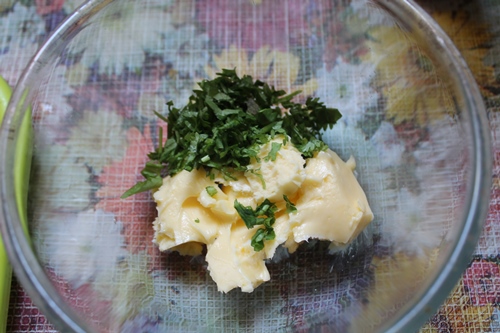 |
| add in chopped coriander leaves |
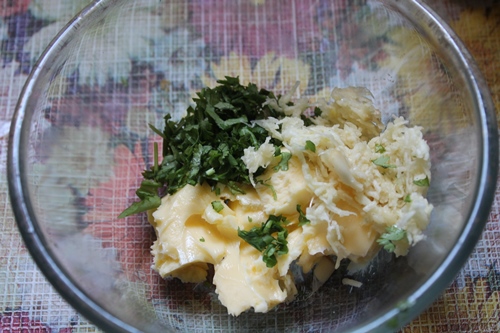 |
| grated garlic |
 |
| season with some salt |
 |
| add in some italian seasoning or oregano |
 |
| mix well |
 |
| take the dough |
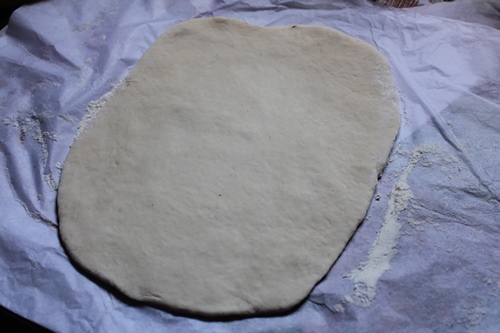 |
| roll it into a rectangle |
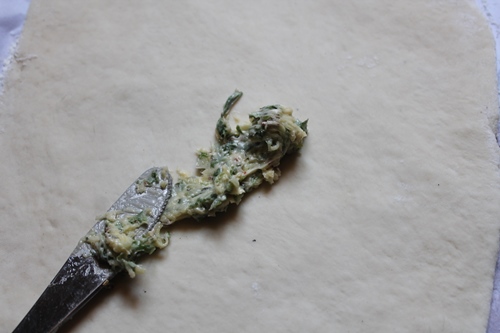 |
| spread the garlic butter |
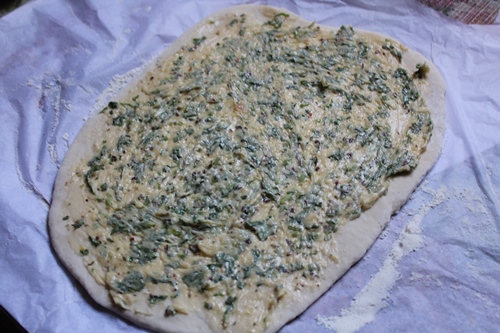 |
| spread evenly |
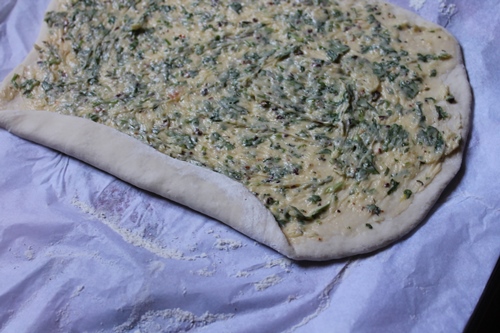 |
| now start rolling |
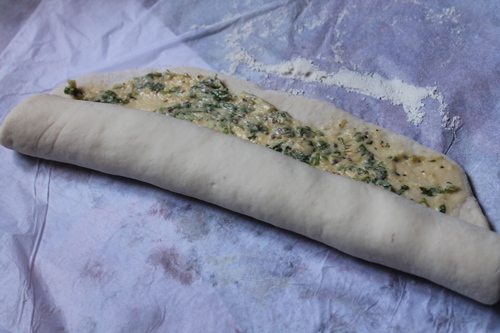 |
| roll it up |
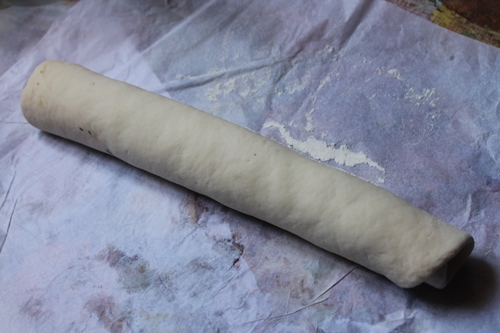 |
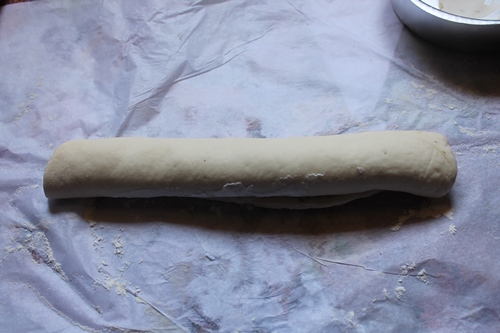
| all rolled |
 |
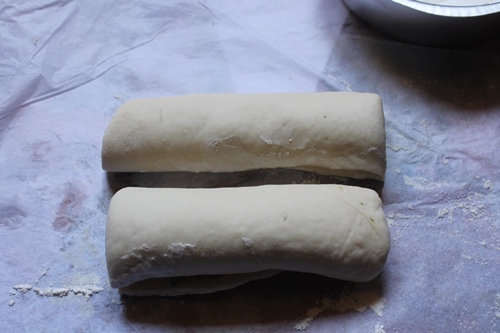 |
| cut in half |
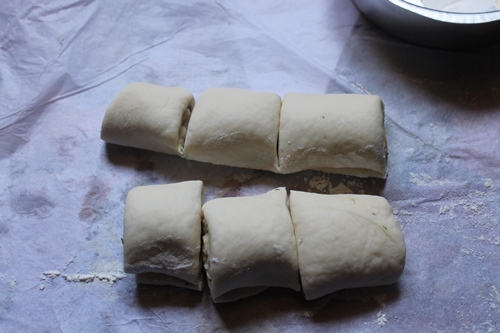 |
| now cut each of them into equal size |
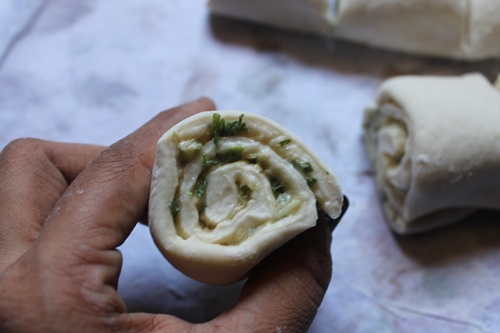 |
| look at the beautiful roll |
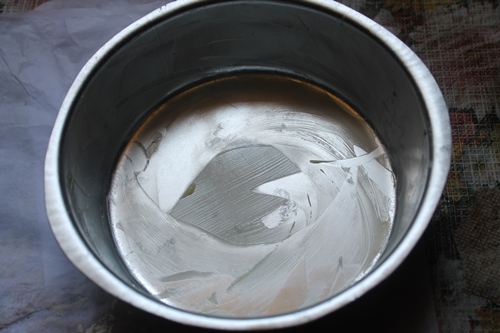 |
| butter a baking dish |
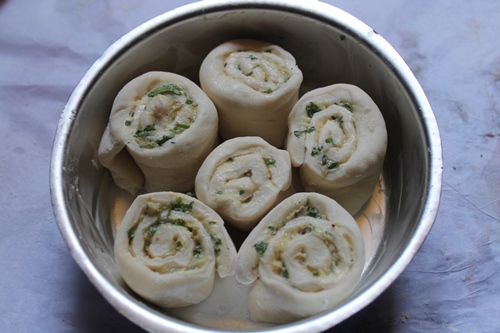 |
| arrange the rolls |
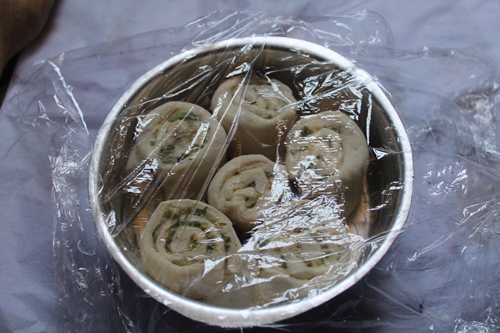 |
| cover with plastic wrap and let it rise |
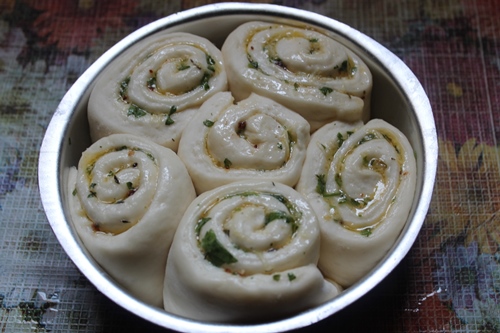 |
| Now it has risen |
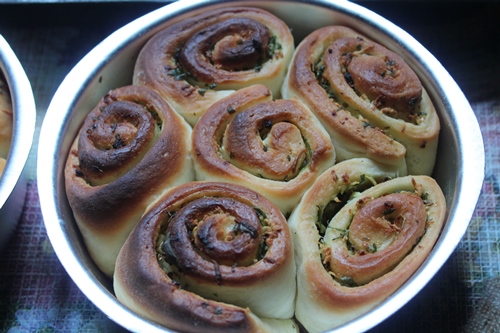 |
| bake it |
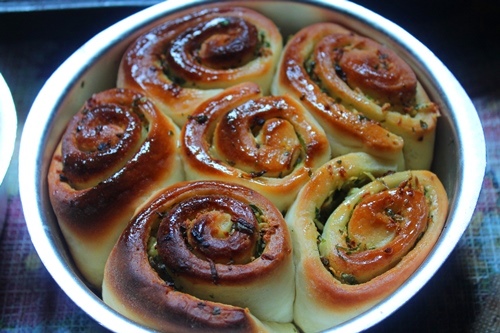 |
| butter on top |
 |
| enjoy |
Expert Tips
- I used unsalted butter, so added salt. if you are using salted butter, be cautious when adding salt in the spread.
- You can any herbs, chilli flakes, black pepper in the butter.
- Grated cheese, parmesan can be added in the garlic butter.
- Instead of using plain flour, you can use whole wheat flour as well.
Serving & Storage
Garlic rolls taste best when made and served fresh. Any leftover can be stored in fridge and reheated in toaster oven or air fryer for few minutes before serving.
More Buns & Rolls Recipes to Try

📖 Get Recipe
Garlic Pull-Apart Rolls Recipe (Garlic Rolls Recipe)
Equipment
Ingredients
For Making Bread Dough
- 3 cups All Purpose Flour
- 1 tablespoon Dry Yeast
- 2 teaspoon Salt
- 2 tablespoon Sugar
- 3 tablespoon Olive Oil
- 1¼ cup Warm Water or as needed
For Garlic Butter
- 100 grams Unsalted Butter Soft
- 10 cloves Garlic peeled and grated
- 1 tablespoon Italian Seasoning
- 1 teaspoon Salt
- ½ cup Coriander Leaves finely chopped
Instructions
- Mix yeast and sugar with warm water and set this aside for 5 mins. let it foam up.
- Take flour, salt, oil in a bowl and mix well. Pour yeast mix into the flour and mix well to a dough. Cover it with plastic wrap or damp cloth and set this aside for 1 hour till it is doubled in size.
- Mix all the ingredients for garlic spread together till it form a smooth paste.
- Take the dough out of the bowl and knead it for 5 min. Roll the dough into a rough rectangle and spread the garlic spread over it. Now roll this into log. Cut into equal portion.
- Arrange this in a buttered baking pan leaving little space between each of them. Now cover it with a damp cloth and let it rise for 45 min.
- In the last 10 mins or rising, preheat oven to 200 degree C. Now place this in the preheated oven and bake for 20 to 30 mins
- Take it out and apply some butter over the top, so that it looks glossy and shiny. Serve hot or warm with a cup of tea.
Notes
- I used unsalted butter, so added salt. if you are using salted butter, be cautious when adding salt in the spread.
- You can any herbs, chilli flakes, black pepper in the butter.
- Grated cheese, parmesan can be added in the garlic butter.
- Instead of using plain flour, you can use whole wheat flour as well.
Serving & Storage
Garlic rolls taste best when made and served fresh. Any leftover can be stored in fridge and reheated in toaster oven or air fryer for few minutes before serving.Nutrition
Tried this Recipe
Mention @yummytummyaarthi or tag #yummytummyaarthi!If you have any questions not covered in this post and if you need help, leave me a comment or mail me @aarthi198689@gmail.com and I'll help as soon as I can.
Follow me on Instagram, Facebook,Pinterest ,Youtube for more Yummy Tummy inspiration.
IF YOU MAKE THIS RECIPE OR ANYTHING FROM YUMMY TUMMY, MAKE SURE TO POST IT AND TAG ME SO I CAN SEE ALL OF YOUR CREATIONS!! #YUMMYTUMMYAARTHI AND @YUMMYTUMMYAARTHI ON INSTAGRAM!

Sadhana Valentina
Feeling like to have some of it....
Nithya
Delicious rolls 🙂 yummy 🙂 The aroma would make us drool for sure. 🙂
Chitra
love it ....
looks very very tempting ..
RAKS KITCHEN
So perfect looking rolls! I love them!
Sharmilee! :)
Am fond of these rolls...looks so soft n yummy
Anonymous
what flour do i use for this
Aarthi
@Anonymous use regular All purpose flour/Maida
Kadra Ibrahim
Nice i love it
deepa.555 naveen
Hai aarthi i tried the garlic buns but the dough did not rise up and with tat i continued the process the bun was very hard wats the reason
Aarthi
@deepa.555 naveenIf your bread didn't rise, then your yeast is dead. You can never get buns with dead yeast
Aarthi
@deepa.555 naveen Always activate your yeast by adding it in warm water with some sugar and leave it to foam up. If it didn't foam up, then ur yeast has expired. You have to throw that away start with a fresh batch of yeast.
deepa.555 naveen
Thank u aarthi ,i ll try with the new yeast
deepa.555 naveen
How many min i should keep in the oven
Aarthi
@deepa.555 naveenbake it for 35 to 40 mins
deepa.555 naveen
Thank u aarthi
deepa.555 naveen
I tried with new yeast aarthi but the dough didnt rise
Aarthi
@deepa.555 naveenthen i think you must have poured too hot water over the yeast. You have to use very warm water.
Anonymous
Can it be made with wheat flour
Anonymous
Hi
Instead of maida can we use wheat....
Any difference in taste while using wheat...
Aarthi
@AnonymousYes u can use wheat flour, it will be a little dense, but still taste good.
Navya Prakash
Hi Aarthi, the rolls looks fantabulous. Going to try it today. Can you plz tell me in about what thickness the dough should be rolled out to rectangular shape?
ranjani k
Hi at what degree should we bake in the oven
Aarthi
@ranjani kBake it at 200 degree C.
Aarthi
@Navya Prakashroll it at 1.5 cm thickness.
Anonymous
I tried it n was awsomme. Livd it.cn v use dis dough as pizza base??,thabju
Aarthi
@Anonymousyes u can use
Unknown
Looks absolutely delicious... Thnk u aarthi for sharing it. Sakshi
durga kalyan
can i make these rolls in pressure cooker. if yes how to know they are done. thanks for reply.
Aarthi
@durga kalyanyes u can make it in pressure cooker
https://www.yummytummyaarthi.com/search/label/Pressure%20Cooker%20Baking
Anonymous
Awesome post 🙂 Thanks a lot Aarthi !..Tried it out for first time and it tastes perfectly yummy 😀
Anonymous
Hi arthi...first of all i want to thank you...your blog helped me to bring out the passion in me for cooking i try almst all of ur recipes...n every tym i made it with huge sucess..i wanted to ask if i take only one cup of maida what would be the measurement for yeast...
Aarthi
@Anonymousfor 1 cup of flour use 1 tsp of yeast
Anonymous
I tried ds today bt everything just got burnt arthi...i follwed all ur steps i dont know wat went wrong..:( hlp me
Aarthi
@Anonymouswhich mode did you bake
Sony Kumari
Nice post…. I enjoyed reading your informative article and considering the points
Bread Paneer Rolls
Sangamitra Sreeshant
Can I try this in ur wheat bun recipe.
Aarthi
@Sangamitra Sreeshantyes u can..
Rifka Seyed
Hai Arthi.. I Tried ur recipe today it came out yummy!! Thank you dear
Rifka Seyed
Hai Arthi.. I Tried ur recipe today it came out yummy!! Thank you dear
Lucky Sign
This blog is looking repository of food and found here every kind of food. it looks beautiful and superb in taste. share more recipe with better information. fresh food delivery services
Anonymous
hi arthi
today tried your garlic rolls and oats cookie.both turned out tasty and it was finished in a wink...thanks a ton..