
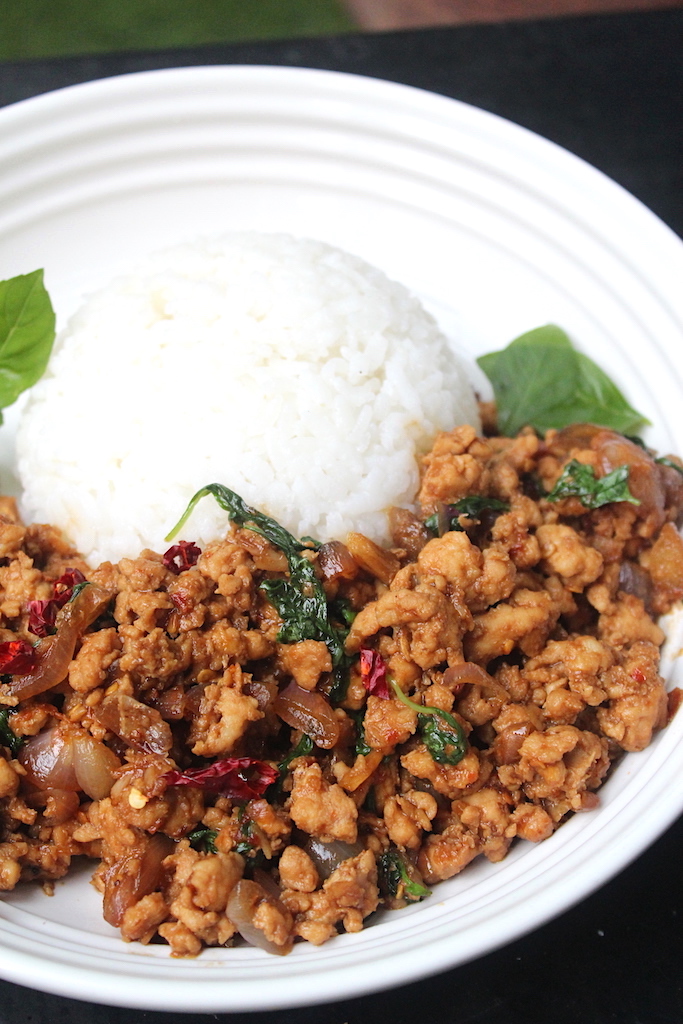
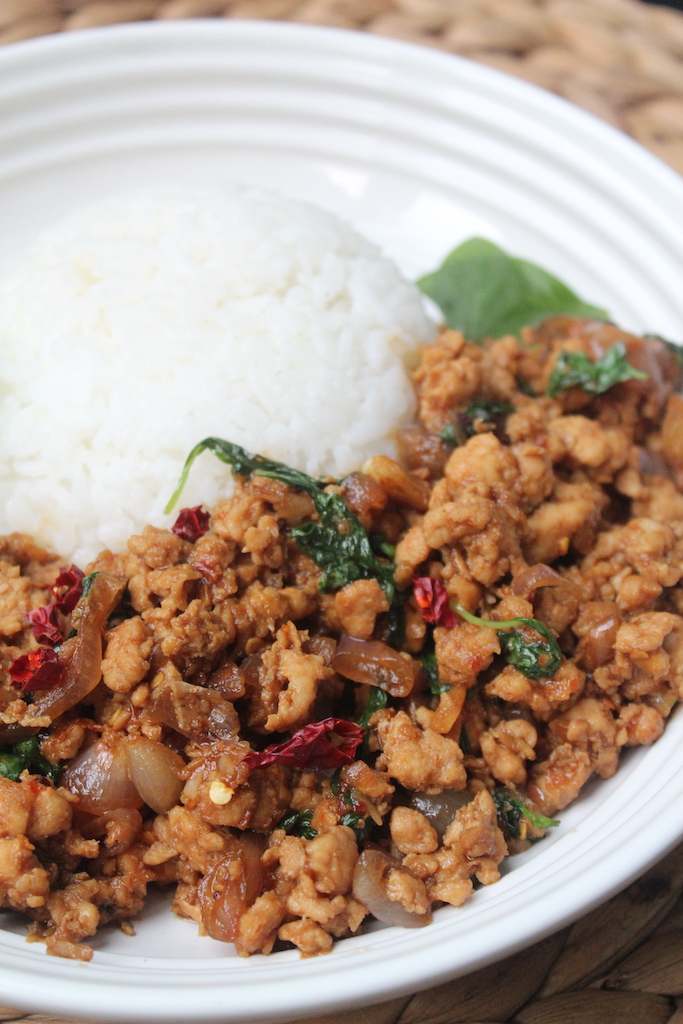
Thai Basil Chicken also known as Pad kra pao, Gai Pad Krapow or chicken basil stir fry. This basil chicken stir fry is a popular Thai recipe which is usually served with steamed rice and fried egg. Learn how to make Thai pad krapow with step by step pictures and video.
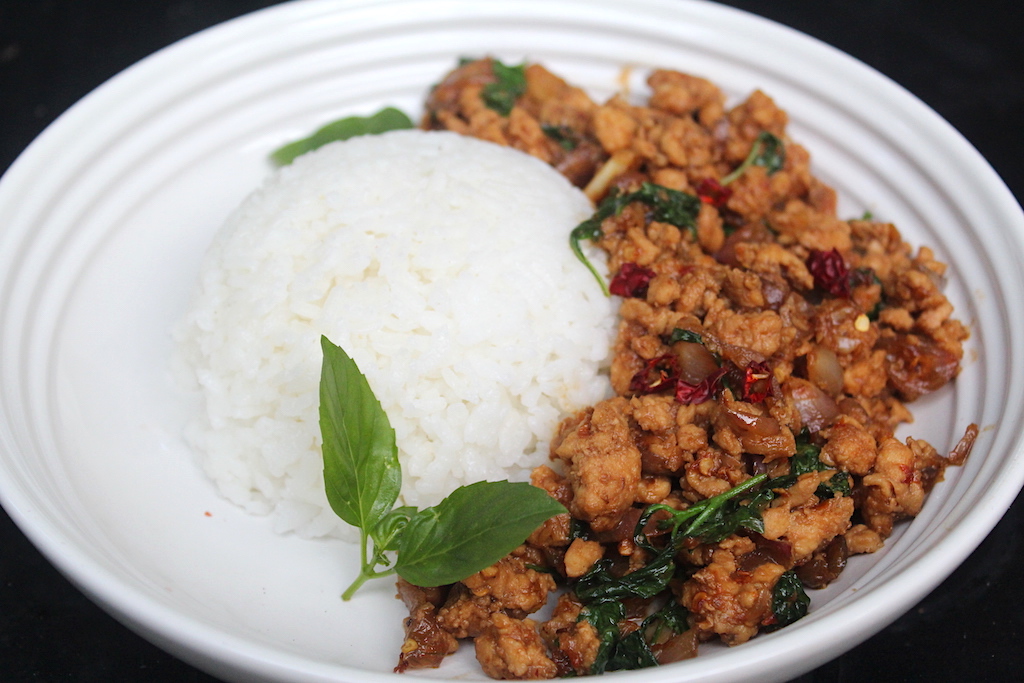
Thai basil chicken
This is a popular street food recipe in Thailand. I have tasted it few times during our trip to Thailand and loved every bit of it. The flavours of this chicken dish is intense from the Thai basil added which pairs well with cooked jasmine rice. For even more satisfying meal, serve it with a fried egg.
Jump to:
I wanted to try this for quite a long time, but I it was in my bucket-list because I couldn't get fresh Thai basil leaves in my place. Now that I grow my own Thai basil, I can make this whenever I want.
I am loving the flavour of Thai basil, it is refreshing, and has a fresh flavour. I have made pesto using it and enjoyed the bright taste of it.
About Thai Basil Chicken
Thai basil chicken is called as Pad krapow gai, basil chicken stir fry which is a delicious chicken preparation using chicken and Thai basil.
It is one of the most popular dish from Thailand which is loved by many all over the world. Phat kaphrao, also spelled pad kaprow, pad kaprao, or pad gaprao, is one of the most popular Thai dishes in Thailand. Here is the vegan tofu basil stir fry recipe.
Pad kra pao translates to "basil stir-fry" in which "pad" means stir fry and "krapow" means "holy basil"and "gai" means "chicken". Hence the name pad krapow gai.
Similar Thai recipes
Pad krapow is made with minced chicken which is stir fried with birds eye chilli and garlic. The main ingredient in this recipe is Thai holy basil which adds peppery taste to the dish.
The chicken preparation is quite simple, it has few ingredients and sauces like oyster sauce, soy sauce. If you don't prefer to use oyster sauce for some reason, you can use hoisin sauce or soy sauce alone.
Traditionally pad kra pao is made with minced pork. But you can use minced chicken or turkey as well. I prefer to chop my chicken into small pieces for this dish, but you can use coarse minced chicken as well.
Since basil is the main flavouring in this dish, add a healthy amount of fresh Thai basil or holy basil.
Thai Basil Chicken Ingredients
- Chicken - Traditionally pad kra pao is made with minced pork. But you can use minced chicken or turkey as well. You can chop chicken into small pieces or use coarse minced chicken. It totally depends on the texture you prefer.
- Thai Basil - for making basil chicken stir fry, I used Thai basil. But traditionally Thai holy basil is used.
- Shallots - you can use sliced shallots or chopped onions in the dish. Shallots can be coarsely ground in the food processor or mortar and pestle along with garlic and chillies.
- Garlic - I like using lots of crushed garlic in my pad Kra Pao for flavour.
- Thai Bird Eye Chillies - be cautious when using Birds Eye chillies since they can be super spicy, you can use fresh or dry chillies.
- Sauces - authentic pad Kra Pao recipe uses oyster sauce, but you can use hoisin sauce instead of oyster sauce. I like to add a bit of soy sauce along with hoisin sauce.
- Sugar - sugar is very important in this dish to provide balanced taste.
Choosing Basil Leaves
Traditional Thai basil chicken is made with holy basil, but you can make it with Thai basil. If you cannot find Thai basil or holy basil, you can make this with Italian basil also called as genovese basil which also known as flat basil, sweet basil, or Italian basil.
The basil has a floral and sweet aroma to it and is pretty mild in flavour compared to Thai basil.
If you can't find fresh basil leaves in your place. I recommend you to try growing them. Basil plant is very easy to grow and it is low maintenance. There is nothing compared to making this dish with fresh basil leaves.
Step by Step Pictures
Chilli Garlic Paste
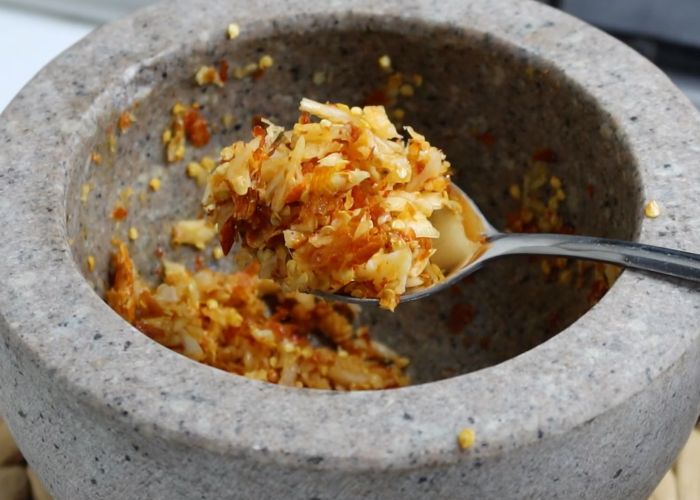
1)First let's make the chilli garlic paste. Take peeled garlic, bird eye chillies in a mortar and pestle and crush them coarsely. You can use a blender or food processor.
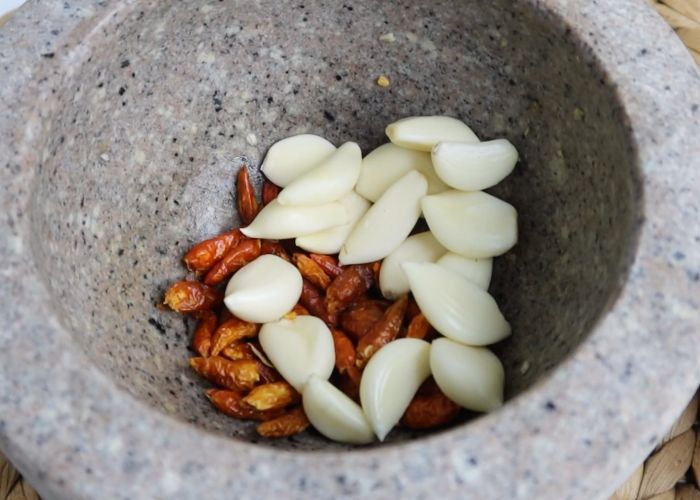
2)Now the garlic and chillies are crushed. Set this aside till use.
Pro Tip: Bird eye chillies can be spicy, so add as much as you prefer.
Stir Fry Garlic & Chillies
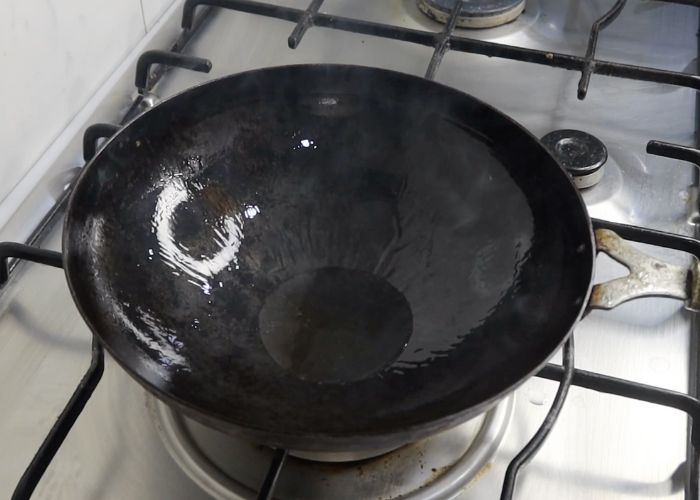
3)Heat oil in a wok. Let it heat up on high heat.
4)Add in crushed garlic and chillies into the oil.
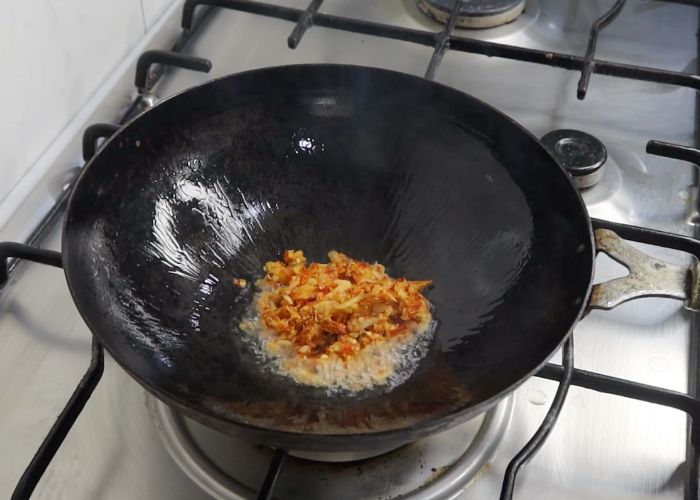
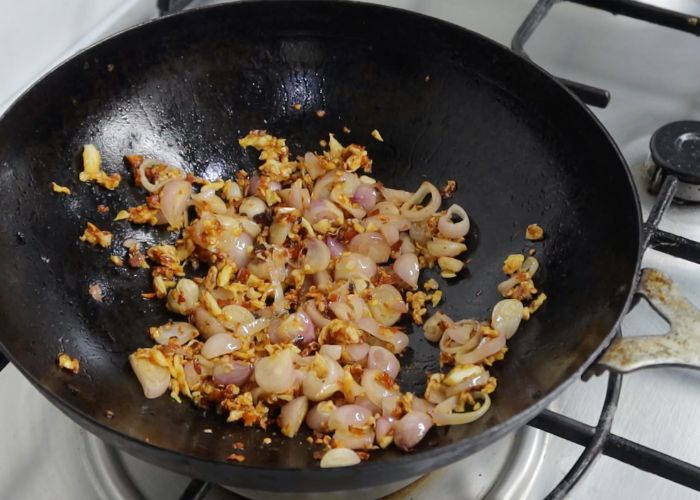
5)Stir fry for 1 minute on high heat until the garlic gets fragrant.
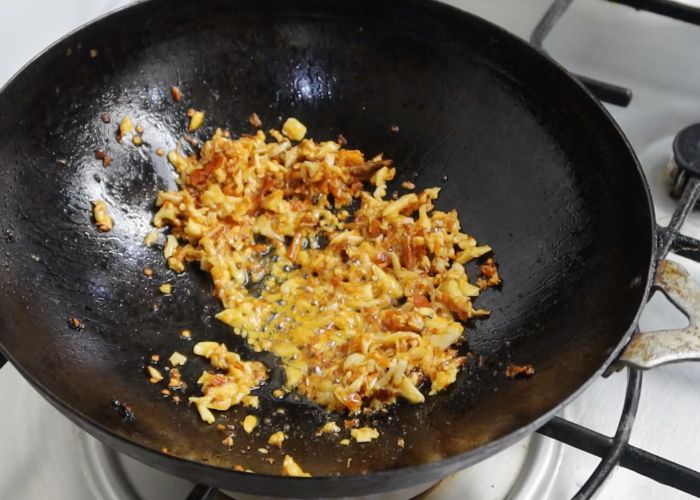
6)Now add in peeled and sliced shallots. instead of shallots you can use sliced onions.
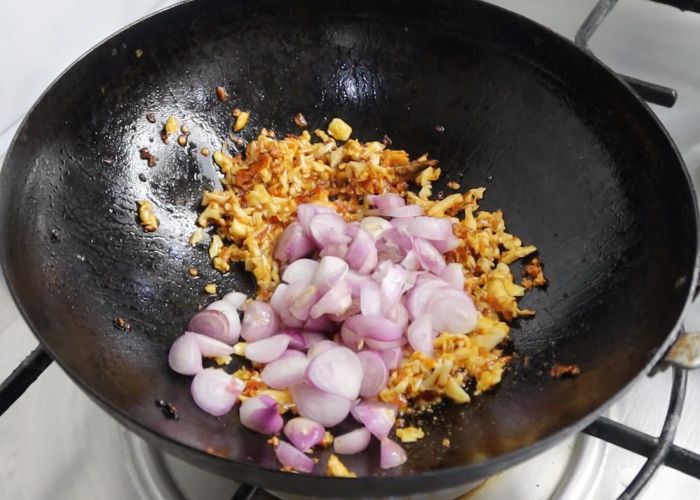
7)Saute the shallots for 1 minute until slightly cooked.
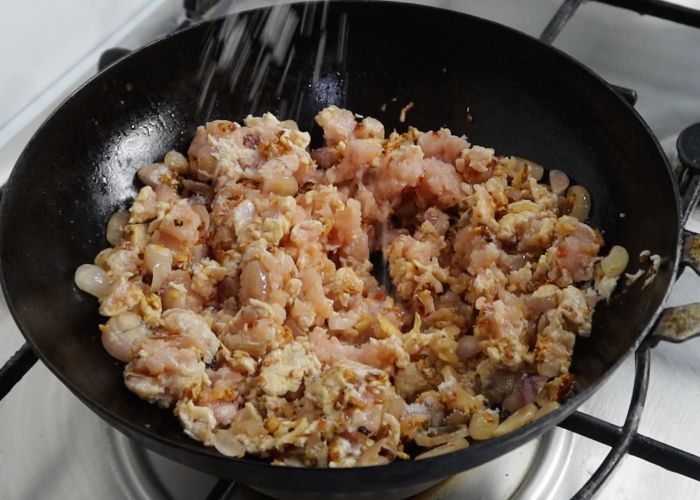
Cooking Chicken
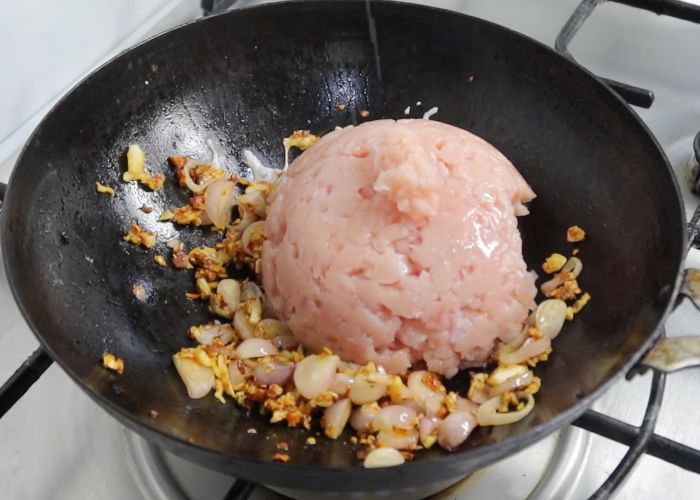
8)Now add in coarsely minced chicken into the chillies and garlic.
9)Stir fry the chicken for a minute.
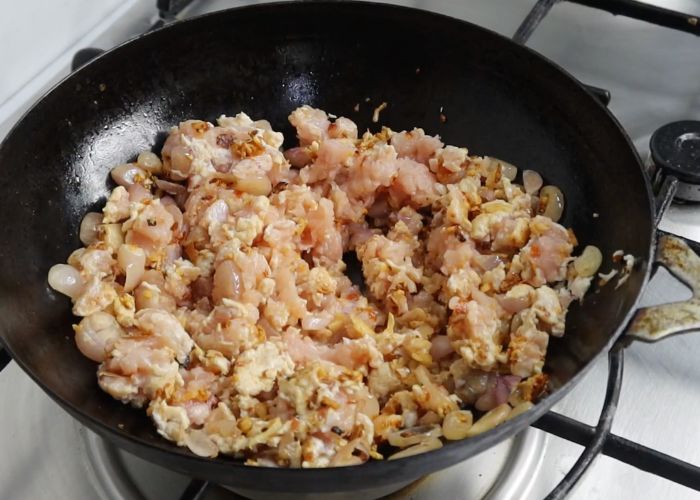
10)Season chicken with salt and stir fry for 2 to 3 minutes until it turns white in colour.
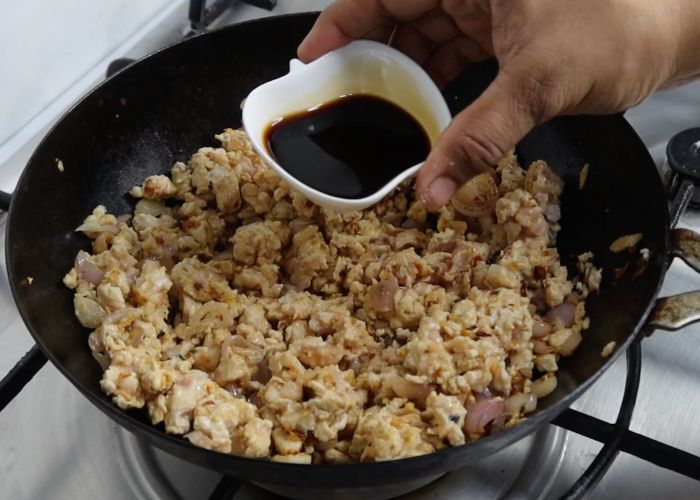
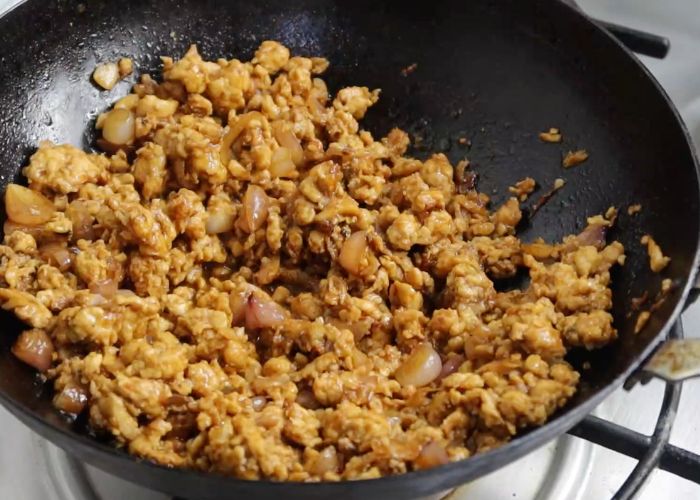
Adding in Sauces
11)Add in soy sauce. I am using dark soy sauce which adds salty taste and colour.
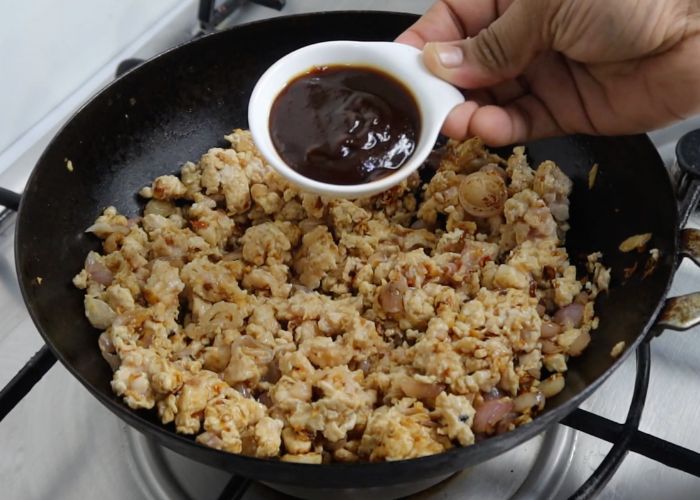
12)Now add in either oyster sauce or hoisin sauce.
13)Add some sugar to balance the taste.
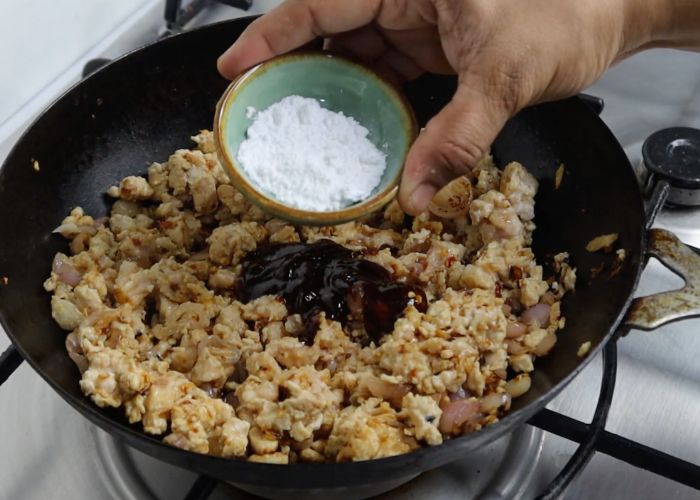
14)Toss all the sauces into the chicken.
Adding Thai Basil
15)Now once the chicken is cooked, add in a handful of washed Thai basil into the chicken.
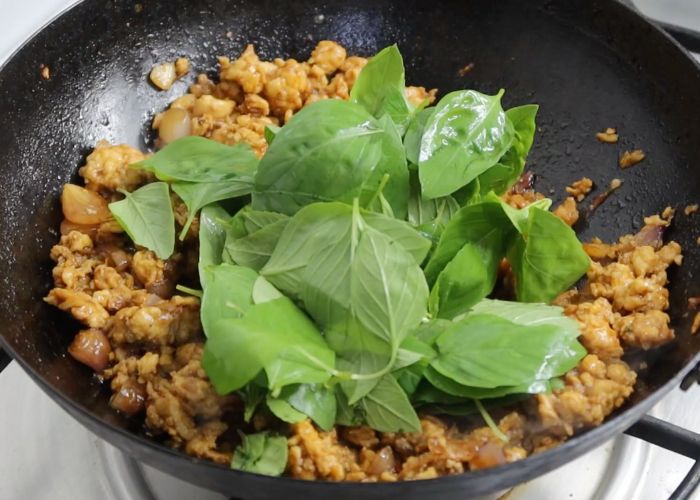
16)Toss the chicken with the basil for 30 seconds until the basil is wilted.
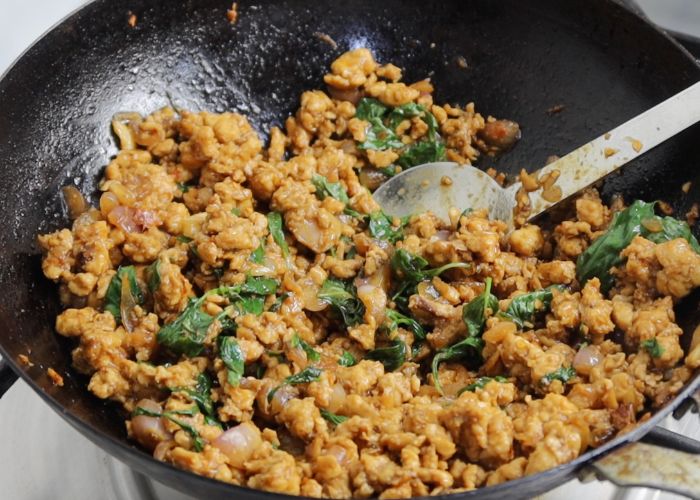
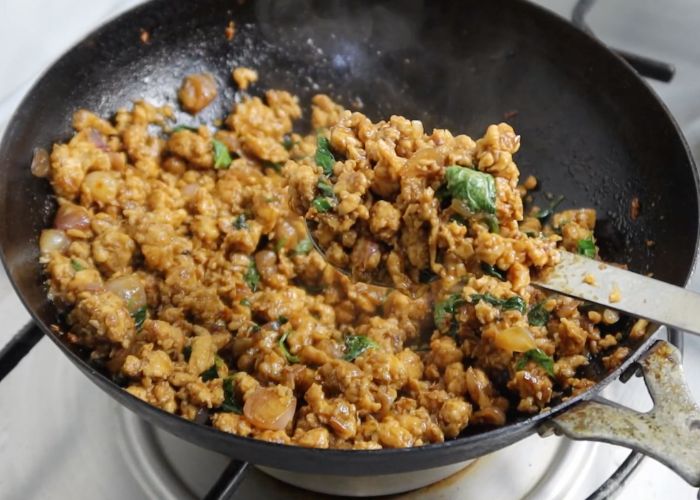
17)Enjoy hot with steamed jasmine rice.
Expert tips
- Instead of using chicken, you can use ground turkey, pork.
- Coarsely Minced chicken is best for making pad kra pao. So chop them coarse in a food processor, a few pulses is enough.
- If you want to use chopped chicken, I prefer chopping it into smaller pieces.
- Instead of hoisin sauce you can opt for the more traditional oyster sauce.
- You can use dry or fresh chillies.
- Instead of shallots you can use sliced onions.
Serving and Storage
Pad Kra Pao can be made in bulk and stored in fridge upto 4 to 5 days. You can reheat in microwave for few seconds before serving. Enjoy pad kra pao with steamed jasmine rice or noodles.
FAQ
Italian basil has slight pepper flavour which is similar to thai basil. So you can use Italian basil if that is what available.
Hoisin sauce is perfect substitute for oyster sauce which provides the caramel sweet taste to the dish.
Chicken, turkey, pork are best protein option to make this Thai basil chicken.
Vegetarians or vegan can use crumbled tofu, or soy chunks granules instead of chicken. Vegetarian oyster sauce is available which can be used.
📖 Get Recipe
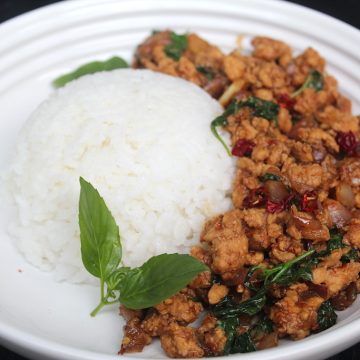
Thai Basil Chicken Recipe (Pad Kra Pao Recipe)
Equipment
Ingredients
- 500 grams Minced Chicken
- 2 tablespoon Oil
- 10 no Shallots peeled & sliced
- 3 tablespoon Hoisin Sauce or Oyster Sauce
- 2 tablespoon Dark Soy Sauce or to taste
- 2 teaspoon Sugar
- 2 handful Thai Basil
- Salt to taste
For Crushing
- 6 no Bird Eye Chillies
- 8 cloves Garlic
Instructions
- Take garlic, chillies in a blender and grind them coarsely. You can use a mortar and pestle to crush them coarse
- Heat a wok on high heat. Add oil and let them smoke. Add in the crushed garlic and chilli and saute till fragrant. Add in sliced shallots and saute for a minute. Add in chicken and salt and stir fry for 4 to 5 minutes until chicken is cooked. Add in hoisin sauce, soy sauce, sugar and mix well.
- Once chicken is cooked, Add in basil leaves and toss well till wilted. Serve hot with steamed jasmine rice.
Video

Notes
- Instead of using chicken, you can use ground turkey, pork.
- Coarsely Minced chicken is best for making pad kra pao. So chop them coarse in a food processor, a few pulses is enough.
- If you want to use chopped chicken, I prefer chopping it into smaller pieces.
- Instead of hoisin sauce you can opt for the more traditional oyster sauce.
- You can use dry or fresh chillies.
- Instead of shallots you can use sliced onions.
Serving and Storage
Pad Kra Pao can be made in bulk and stored in fridge upto 4 to 5 days. You can reheat in microwave for few seconds before serving. Enjoy pad kra pao with steamed jasmine rice or noodles.Nutrition
Tried this Recipe
Mention @yummytummyaarthi or tag #yummytummyaarthi!If you have any questions not covered in this post and if you need help, leave me a comment or mail me @aarthi198689@gmail.com and I'll help as soon as I can.
Follow me on Instagram, Facebook,Pinterest ,Youtube for more Yummy Tummy inspiration.
IF YOU MAKE THIS RECIPE OR ANYTHING FROM YUMMY TUMMY, MAKE SURE TO POST IT AND TAG ME SO I CAN SEE ALL OF YOUR CREATIONS!! #YUMMYTUMMYAARTHI AND @YUMMYTUMMYAARTHI ON INSTAGRAM!


Leave a Reply