
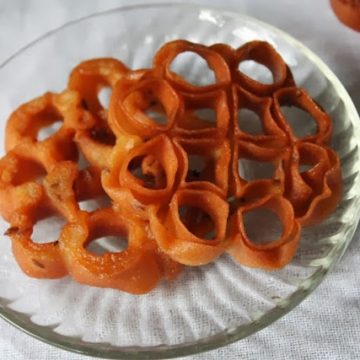
Achu Murukku also known as Rose cookies, Achappam is a popular Kerala style snack recipe . Traditionally it has eggs added in the batter, but this recipe for achappam is eggless and is made with just 4 ingredients. Rice flour, plain flour, coconut milk and sugar is made into batter. A special Achappam mould is dipped in the batter and fried in hot oil to make this super tasty, crispy and flavourful snack.
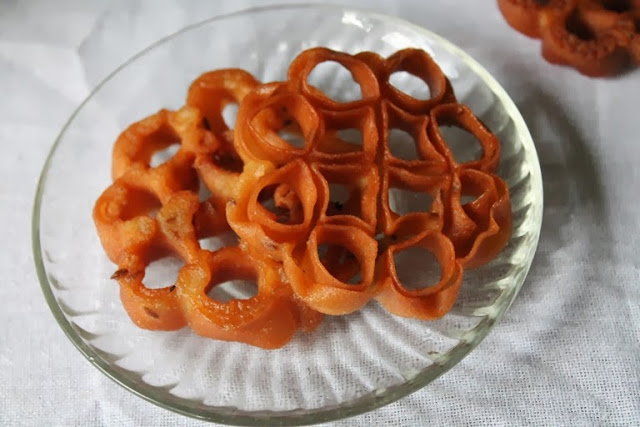
Rose Cookies | Achappam
Achu murukku is one of my all time favorite childhood snack. Amma buys it from store often and I don't remember her making it at home. This traditional snack is crispy and slightly sweet which I enjoy with some hot coffee. Few years back I wanted to make this for diwali and it turned out delicious and crunchy.
About Rose Cookies (Achappam)
Achappam is a popular snack from Kerala. It is also known as Achu murukku or Rose cookies. This snack is made using a special mould which is designed like a rose shape or special mould that looks like rose shape.
Rose cookies or Achappam mould is made with rice flour, plain flour, sugar, coconut milk. Traditionally it has eggs added in the batter which makes the frying process easier and crispy.
The batter is made and taken in a deep bowl. The achappam mould is heated by dipping in hot oil. Now dip the achappam mould in the batter just half way through. The batter will stick to the achappam mould. Now place the mould in hot oil and fry till golden to get crispy Rose cookies. For more Kerala Inspired Snacks, Banana Chips, Ulli Vada & Pazham Pori.
Rose Cookies (Achappam) Ingredients
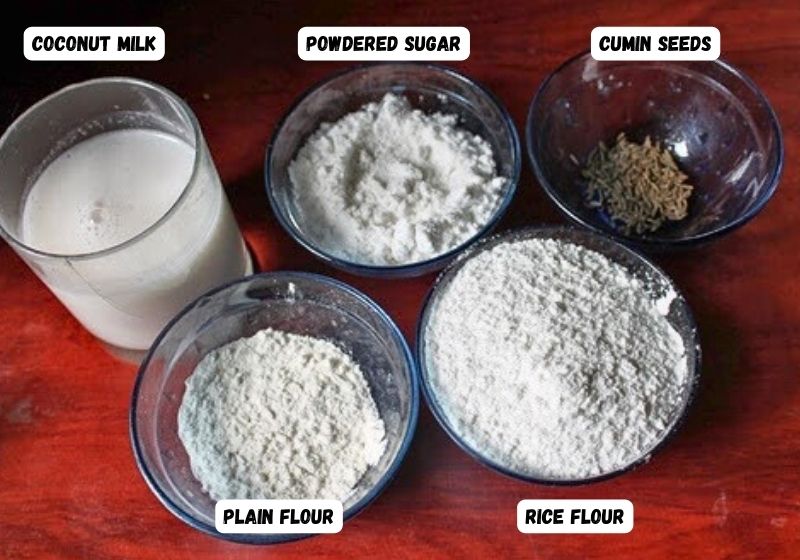
Rice Flour - I use store bought rice flour for making the batter. Traditionally rice is soaked and ground into a paste. But this is the easy method.
Plain Flour - all purpose flour or maida is added to the rice flour to give the texture. Since we don't use egg in this recipe, maida is required.
Sugar - sugar helps with the golden colour. Make sure you powder sugar in a blender and add to batter. This way it mix easily into the batter.
Coconut Milk - for flavour and taste. Use store bought packaged one or freshly squeezed coconut milk.
Optional - cumin seeds, grated coconut or sesame seeds is added in rose cookies.
How to Season New Achappam Mould
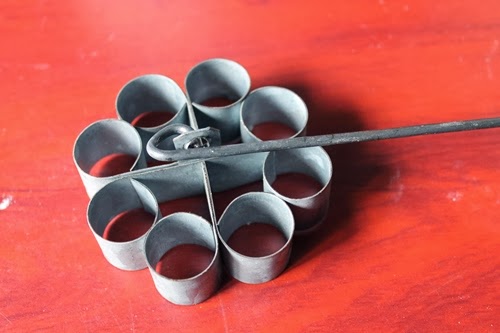
Achappam is made using a special mould. It is available in stores and online shops. Usually it is made with aluminium, iron or steel. For using achappam moulds, you have to season it first. Seasoning helps with easy release of the murukku from mould.
This is how you season your achappam mould
- First heat some oil in a kadai. Dip the mould in the hot oil and switch off the heat, leave it in the oil overnight.
- Next day Immerse the mould in a bowl of dosa batter for a whole day. Remove, wash it well, wipe it dry, apply oil on all sides, leave it for a whole day again and use.
- This way the mould gets properly seasoned.
How to Make Rose Cookies (Stepwise Pictures)
Making Achappam Batter
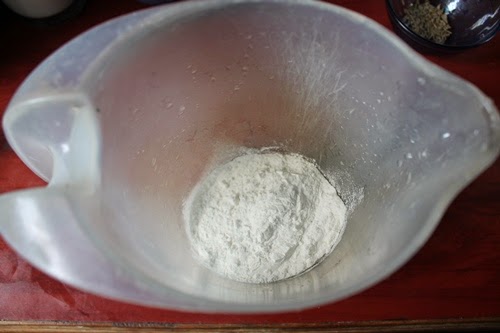
1)Take rice flour in a bowl. You can use store bought readymade rice flour or homemade rice flour.
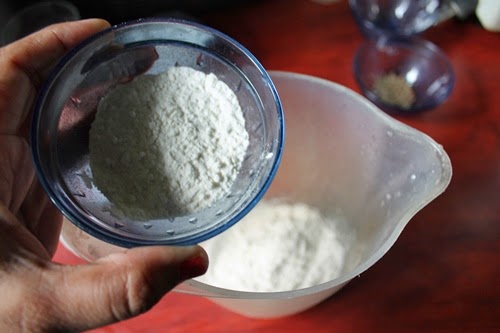
2)Add in plain flour.
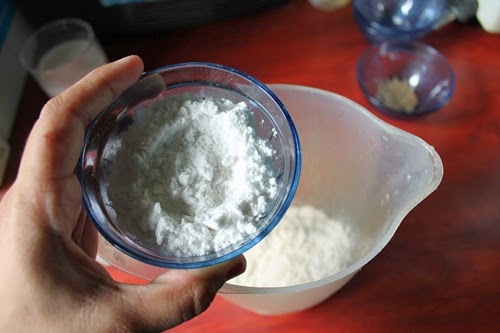
3)Add in sugar. Make sure you powder regular sugar in a blender till fine and use that which dissolves evenly into the batter.
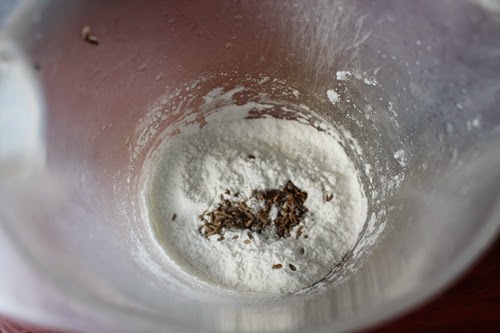
4)Add in cumin seeds. Instead of cumin seeds you can add sesame seeds or even skip adding this entirely.
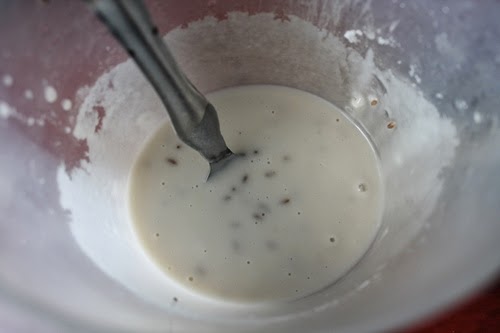
5)Add in coconut milk and mix well. Add little at a time and mix to a smooth batter.
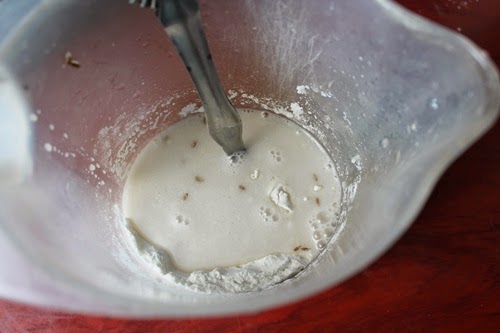
6)This is how achappam batter should look like. It shouldn't be too thick or too thin.
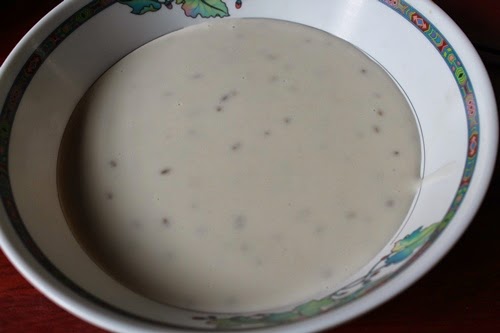
7)Transfer the batter to a bowl and set aside.
Seasoning Achappam Mould
8)Take your achappam mould.
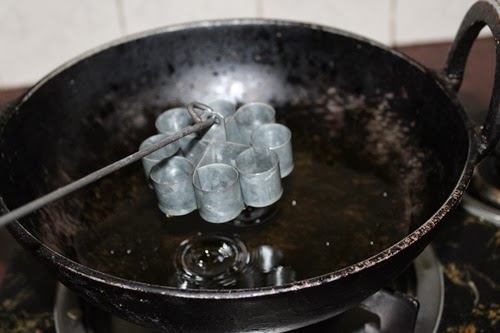
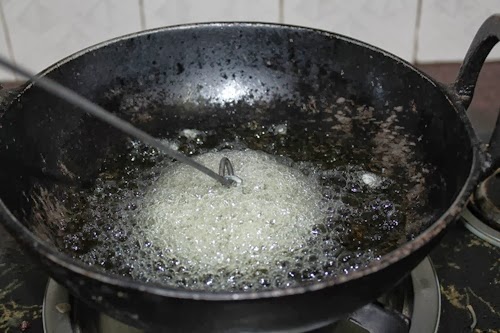
9)Heat oil for frying.
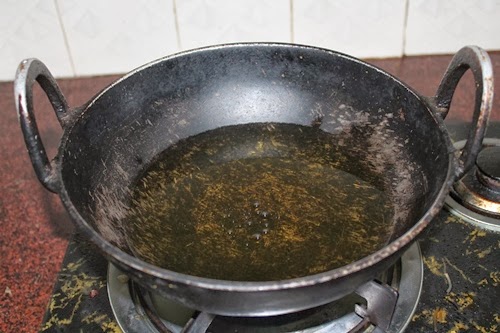
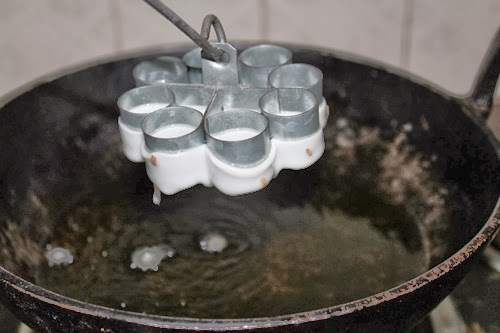
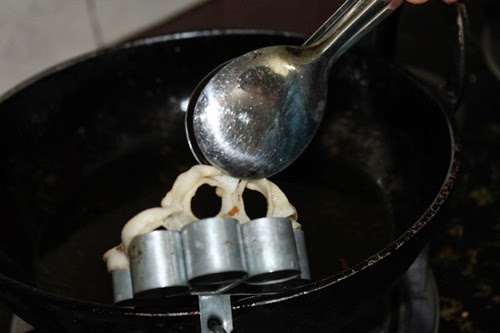
10)Now to prepare the achappam mould, dip the mould in the hot oil and let it get heated.
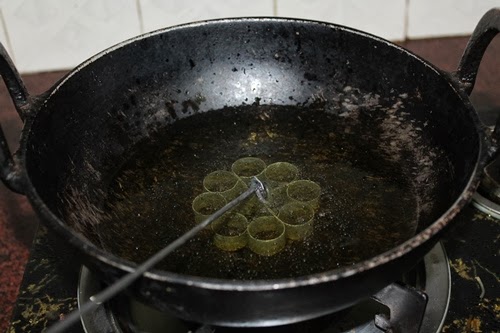
11)Now remove the mould from oil. Shake off any excess oil.
Frying Achappam
12)Dip the hot mould in the batter just half way through.
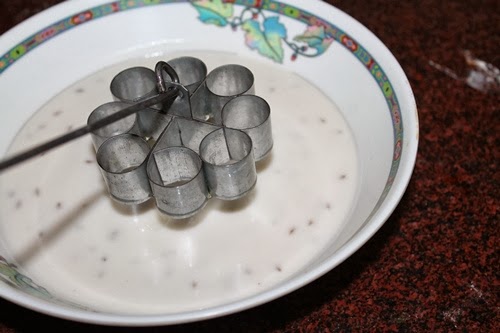
13)Like this.
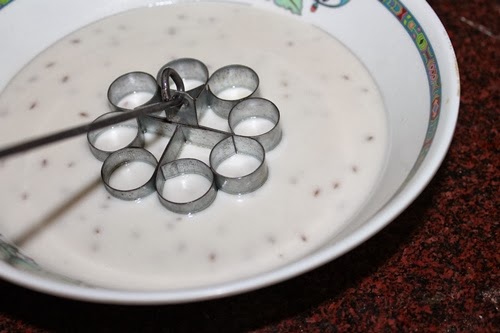
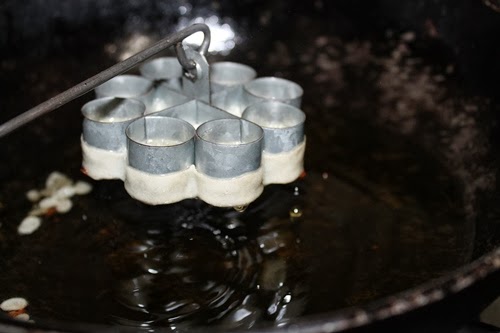
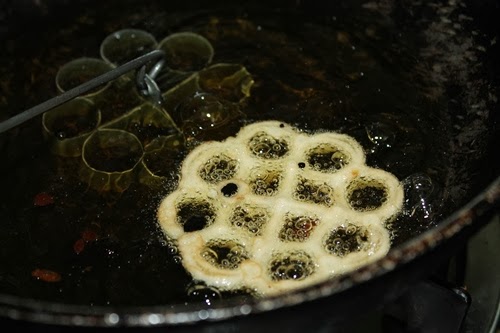
14)The batter will stick to the mould beautifully. Now dip it back into the oil.
15)Dip the mould in hot oil and let it cook for few seconds in the oil.
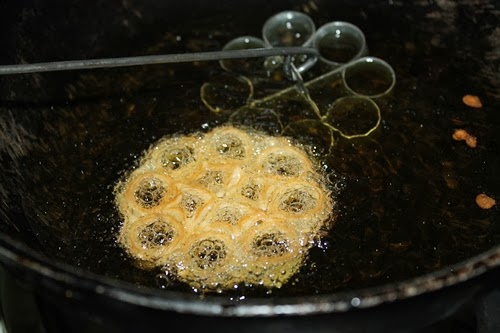
16)Once it is fried half way through. Remove the mould from oil.
17)Use tongs, fork or spoon to remove the achappam from mould.
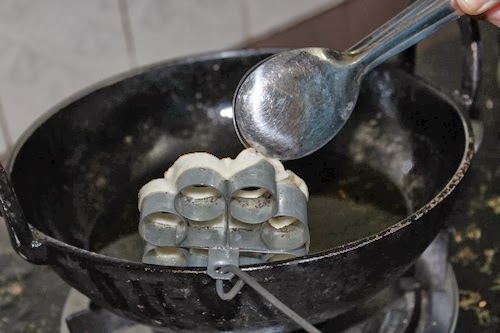
18)It will release easily from the mould.
19)Perfectly seasoned mould will release the achappam on its own in the oil. But if it not releasing from oil, you can shake it gently or use a fork to remove the achappam from mould.
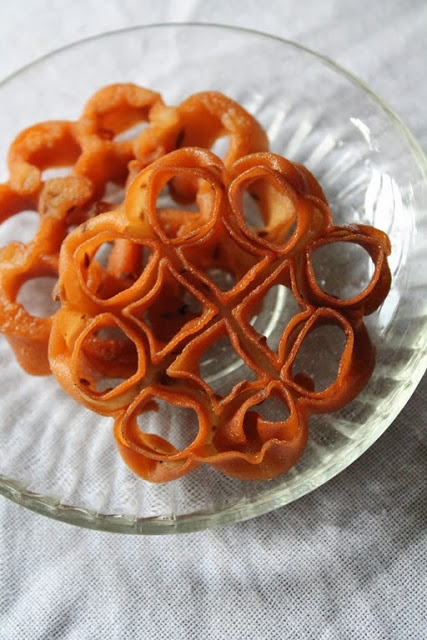
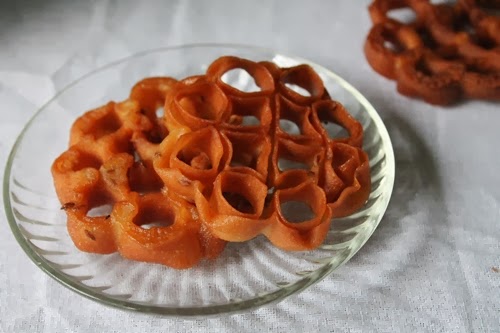
20)Fry the achappam till golden brown.
21)Strain the achappam from oil and serve.
Expert Tips
Batter Consistency
Batter consistency is important. The batter should not be too thick or too thin. If it is too thick, then the achappam will be chewy, if it is too thin, the achappam won't release from the mould.
The consistency of the batter should be little thinner than dosa batter, thicker than rava dosa batter.
Oil Temperature & Technique
Don't dip the achu all the way through in the batter, you have to dip it half way or a little more than half way. If you dip it completely then the murukku won't come off from the achu.
Heating the mould in hot oil is important, so the batter sticks properly to the achu.
Try to remove the achu using a fork or knife or a tongs when it is almost cooked. If you try to remove when the murukku is not cooked, then it may tear up.
Frying Rose Cookies
Fry the murukku till it reaches light golden colour, it will keep on cook and get colour as it cools.
The murukku will look soft when you remove it from oil, it will get harder and crispier as it cools.
More Murukku Recipes
📖 Recipe Card
Rose Cookies | Achu Murukku | Achappam Recipe
Equipment
- Achappam Mould
- Kadai
Ingredients
- 1 cup Rice Flour
- ¼ cup All Purpose Flour | Plain Flour
- ½ cup Sugar powdered
- ½ teaspoon Cumin Seeds | Sesame Seeds optional
- 1 cup Coconut Milk + more if needed
- Oil for deep frying
Instructions
- Take rice flour, maida, sugar, cumin seeds in a bowl. Add coconut milk and make a smooth batter.
- Now heat oil for deep frying. When it is hot, Place the achu muruku maker in hot oil for 5 mins or so till it is heated.
- Now dip the maker in the batter. Don't dip it too much, just dip half way through.
- The batter will stick to the achu, now place the maker in hot oil and fry, when it is fried half way through, take it out and use a fork or knife to release the sides, it will come easily. Now fry that till it reaches light golden.
- Drain in a paper towel. Let it cool completely. It will be soft when you remove from oil, but once it cool the murukku will harden up. Let it cool completely. Store in an air tight container.
Notes
- Batter consistency is important. The batter should not be too thick or too thin. If it is too thick, then the murukku will be chewy, if it is too thin, the the muruku wont comes from the achu maker.
- The consistency of the batter should be little thinner than dosa batter, thicker than rava dosa batter.
- Adding cumin seeds is optional.
- Heating the achu in hot oil is important, so the batter sticks properly to the achu.
- Don't dip the achu all the way through in the batter, you have to dip it half way or a little more than half way. If you dip it completely then the murukku wont come off from the achu.
- Try to remove the achu using a fork or knife or a tongs when it is almost cooked. If you try to remove when the murukku is not cooked, then it may tear up.
- Fry the murukku till it reaches light golden colour, it will keep on cook and get colour as it cools.
- The murukku will look soft when you remove it from oil, it will get harder and crispier as it cools.
How to Season New Achappam Mould
- First heat some oil in a kadai. Dip the mould in the hot oil and switch off the heat, leave it in the oil overnight.
- Next day Immerse the mould in a bowl of dosa batter for a whole day. Remove, wash it well, wipe it dry, apply oil on all sides, leave it for a whole day again and use.
- This way the mould gets properly seasoned.
Nutrition
If you have any questions not covered in this post and if you need help, leave me a comment or mail me @aarthi198689@gmail.com and I’ll help as soon as I can.
Follow me on Instagram, Facebook,Pinterest ,Youtube and Twitter for more Yummy Tummy inspiration.
IF YOU MAKE THIS RECIPE OR ANYTHING FROM YUMMY TUMMY, MAKE SURE TO POST IT AND TAG ME SO I CAN SEE ALL OF YOUR CREATIONS!! #YUMMYTUMMYAARTHI AND @YUMMYTUMMYAARTHI ON INSTAGRAM!


Nahid
Noone can go wrong..tx to d way u hv explained..gr8 job..tx fr sharin.
Hamaree Rasoi
Crispy and crunchy looking cookies.
Deepa
Shobha
Nice.. I just bought this mould.. waiting to try it out .
Anonymous
Thanks for posting the step-by-step pictures..it really helps for the first timers!
Anonymous
Wow...v nice...but where can we get such moulds..I stay in Kolkata..
Anonymous
I am going to make this for Deepavali. Thks for detailed tips.
Aarthi
@Anonymousyou can get it in any shops which sell steel utensils..
banuprasanna
Ur receipes r really awesome.. no words to praise u.. step by step teaching s ur speciality. Keep rocking
Glavan Fernandez
Instead of coconut milk..... Can i use nilgiri's milk???
Aarthi
@Glavan Fernandezcoconut milk is must
Anonymous
Thanks for the recipe. It is a traditional recipe of Bangladesh. we used milk or water. It taste better If u use saunf instead of cumin.
Yasmin, Bangladesh.
Anonymous
I am from nagercoil... We used to add egg in this batter so that it will be soft and crispy
sindhu
It looks beautiful,in my house my mother used to make it with rice flour,eggs and sugar.They used to be very crispy as well as tasty,reminds me of my mother. In kerala we call it Achappam.Thank u for sharing this new method
Shafee Nazrin
Raw rice flour or roasted?
Aarthi
@Shafee Nazrinroasted rice flour.
Anonymous
Hi aarthi can u tell me the substitute of coconut milk because in north we don't get it. Thanks
Aarthi
@Anonymouscoconut milk is what gives the flavour to this, try using normal milk
Ten Dek
Hi Aarthi, I live in California & not sure where to buy this mold... online or Indian grocery. What is the mold called when ordering online? Thank you. Looks crunchy & delicious
Aarthi
@Ten Deku can look in online indian shops. or look in indian markets
Subha
Hi aarthi, i always follow ur recipes and all come out really well. But here in this case my batter has become bit thin so how can i make it thick and continue with the recipe. Please reply it as soon as possible coz i am on the half way of it